

Elasticsearch: Set up vector search
Overview
Introduction to Elasticsearch
As you ramp up on Elastic, you'll use the Elasticsearch Relevance Engine™ (ESRE), designed to power AI search applications. With ESRE, you can take advantage of a suite of developer tools including Elastic's textual search, vector database, and our proprietary transformer model for semantic search.
Elastic offers a variety of search techniques, starting with BM25, the industry standard for textual search. It provides precise matching for specific searches, matching exact keywords, and it improves with tuning.
As you get started on vector search, keep in mind there are two forms of vector search: "dense" (aka, kNN vector search) and "sparse".
In addition, Elastic also supports kNN vectors to implement similarity search on unstructured data beyond text, such as videos, images, and audio.
In this guide, we'll demonstrate how to get started with leveraging Elasticsearch as a vector database, which enables vector search use cases.
Let's get started
Create an Elastic Cloud project
Get started with a 14-day trial. Once you go to cloud.elastic.co and create an account, follow the steps below to learn how to launch your first Elasticsearch Serverless project.
In this example, we will onboard a live website, the Elasticsearch Labs.
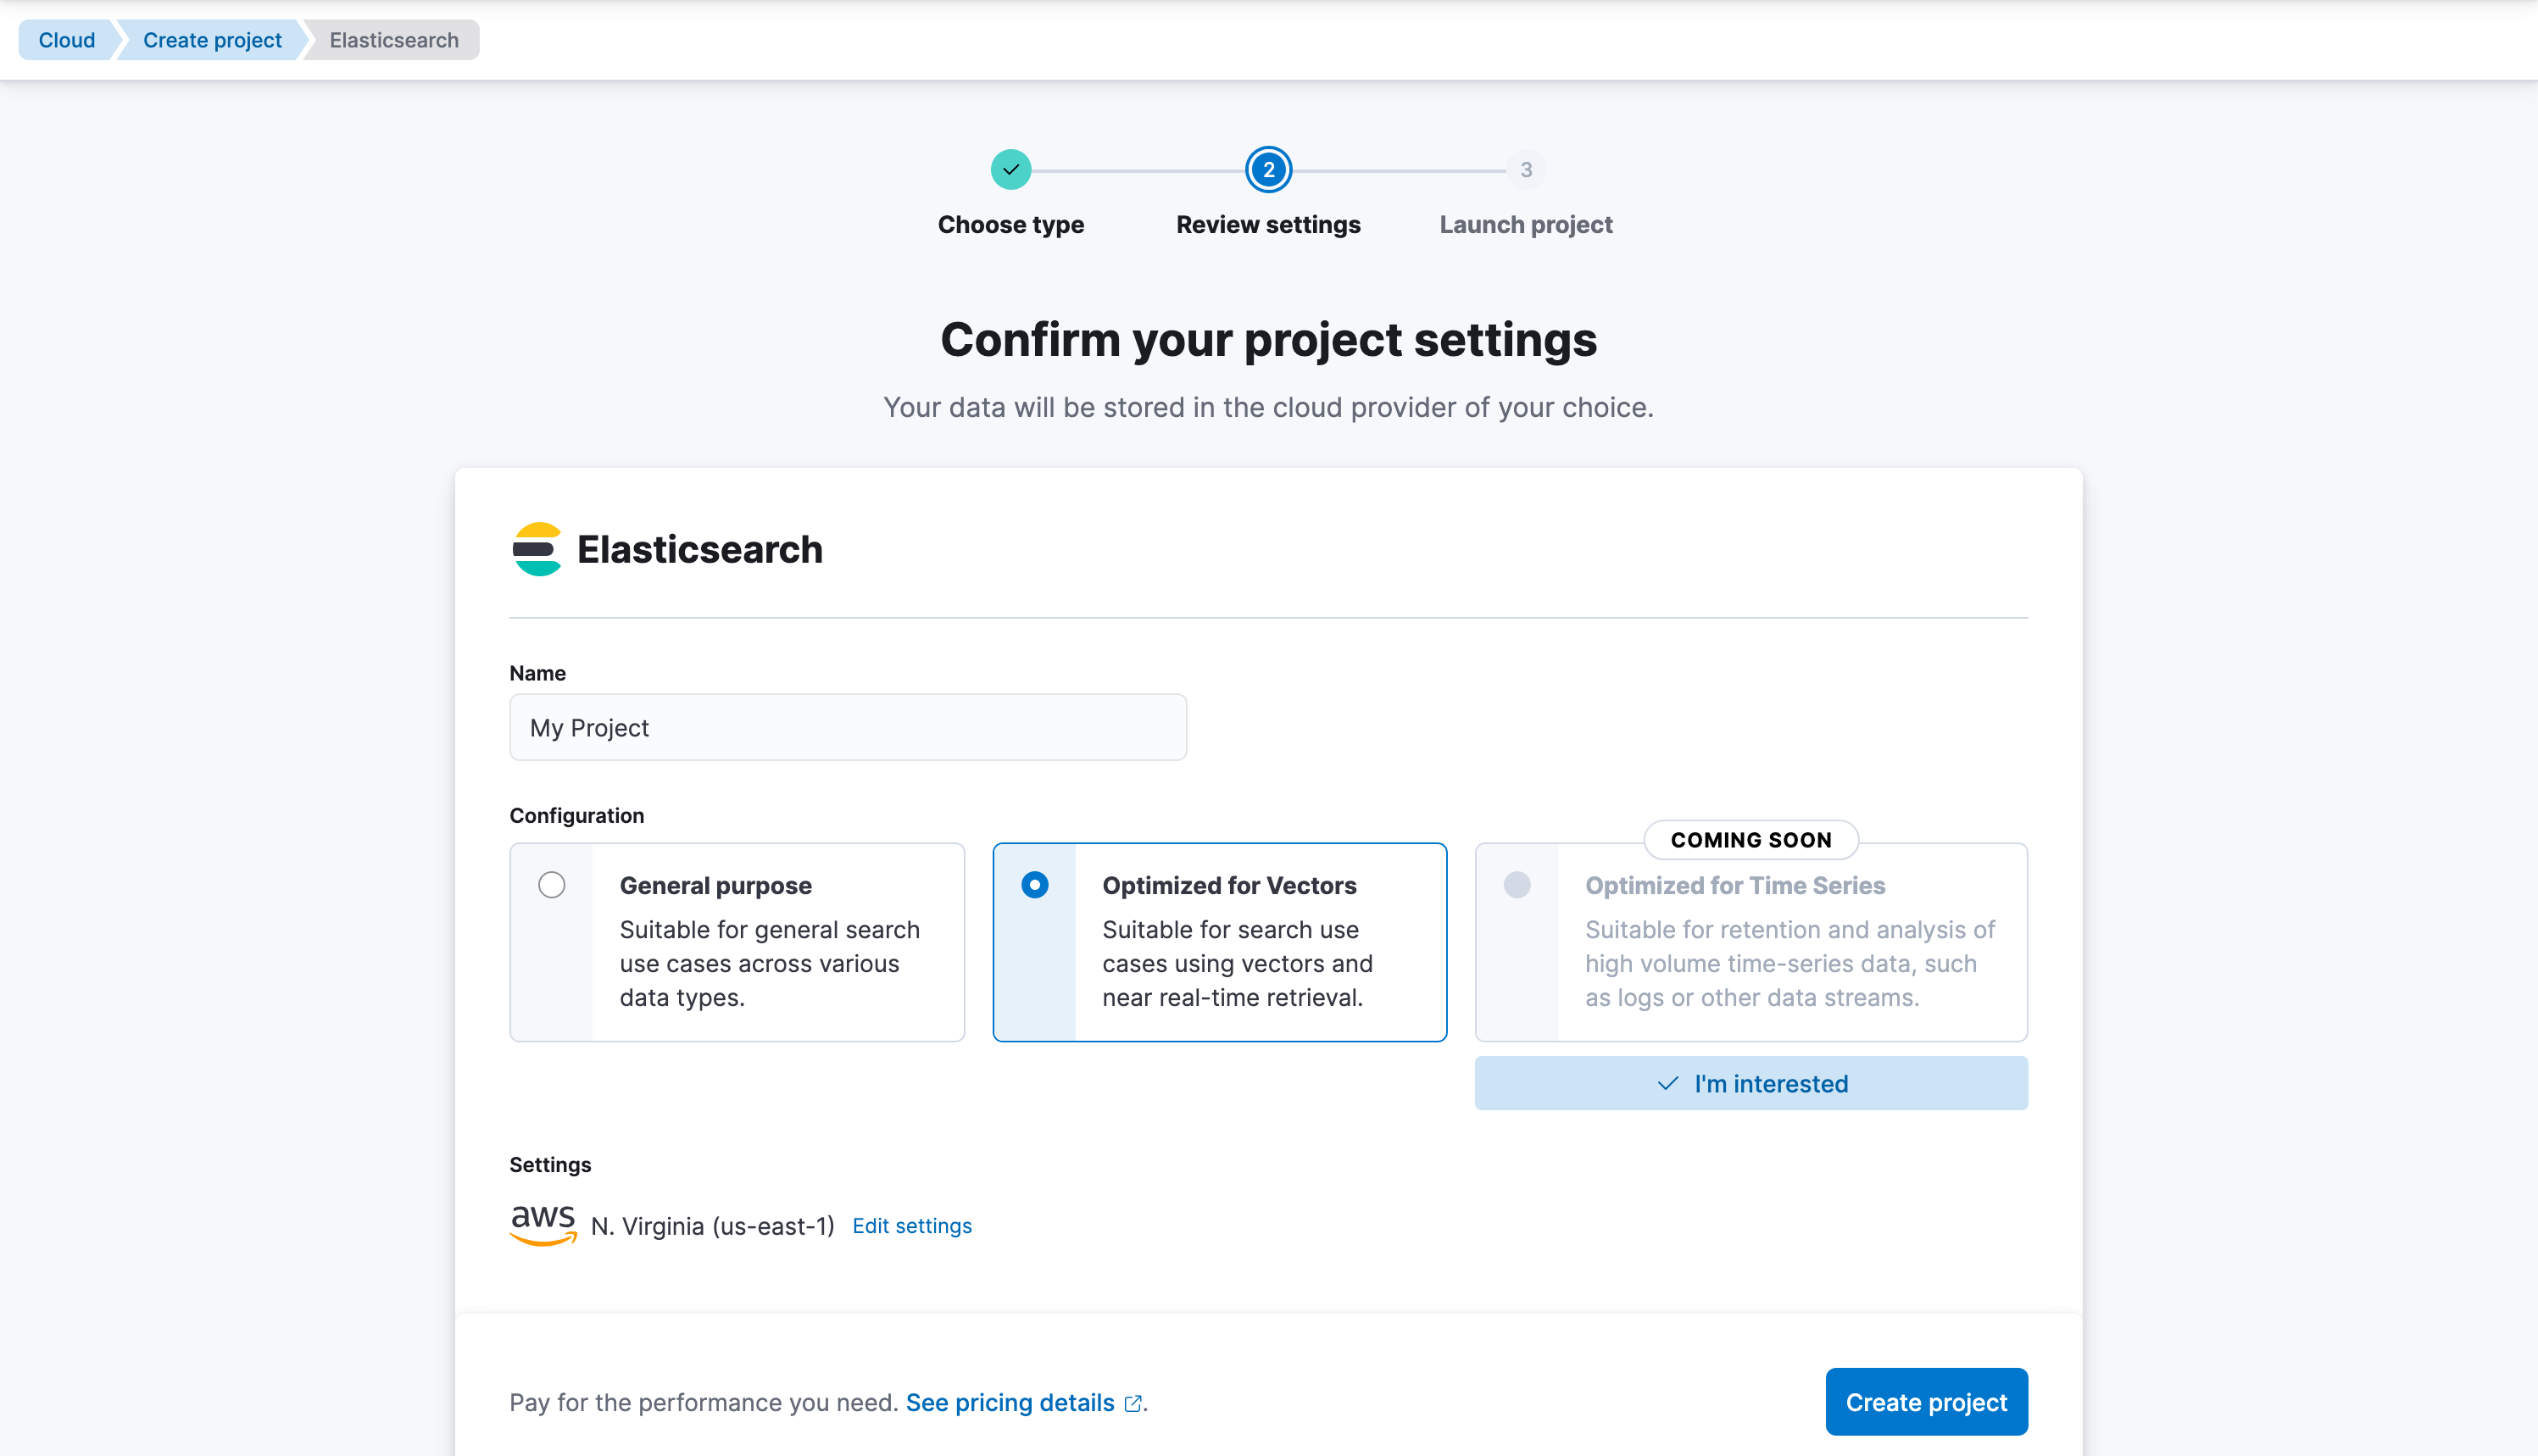
Head over Create Project. Let’s create a Serverless project that is Optimized for Vectors, give it a name and create it.
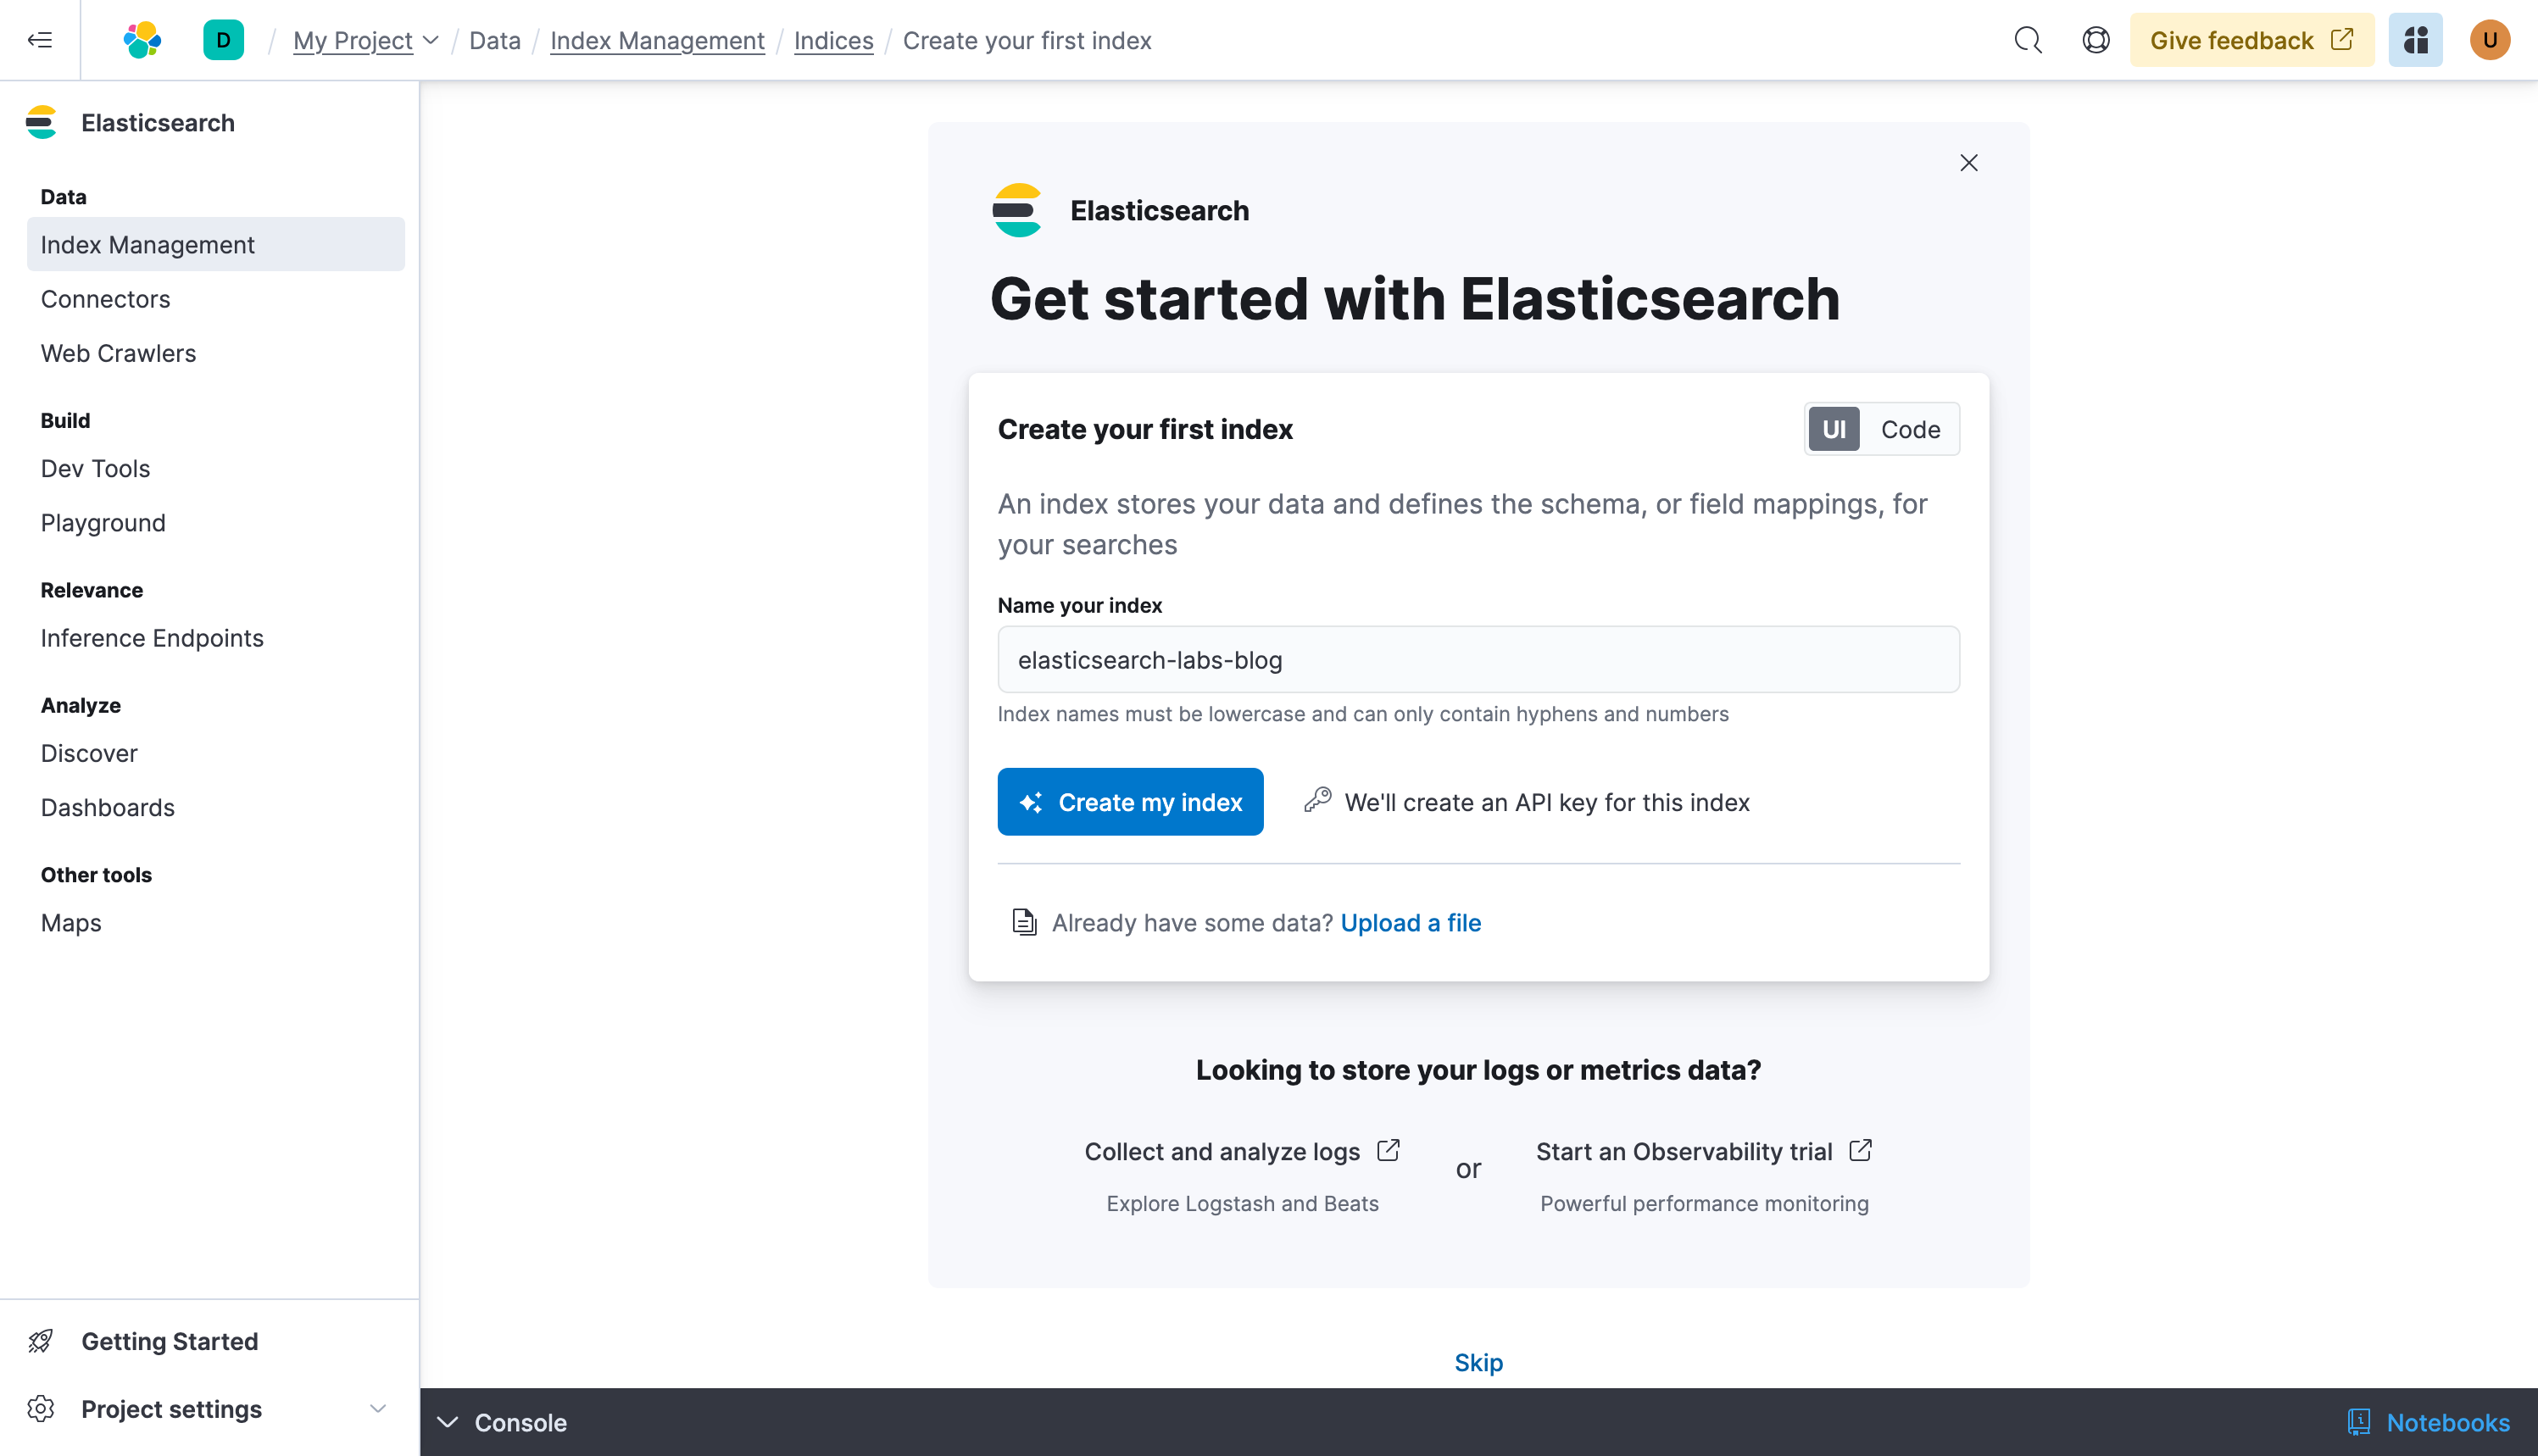
Let’s create our first Elasticsearch index, we can name it vector-search. Hit Create my index.
Get started with vector search
Now that you’ve created your serverless project and your first index, it’s time to get data into Elasticsearch. We’ve made it easy for you to try it out, at Data > Index Management Data, click Run in Console.
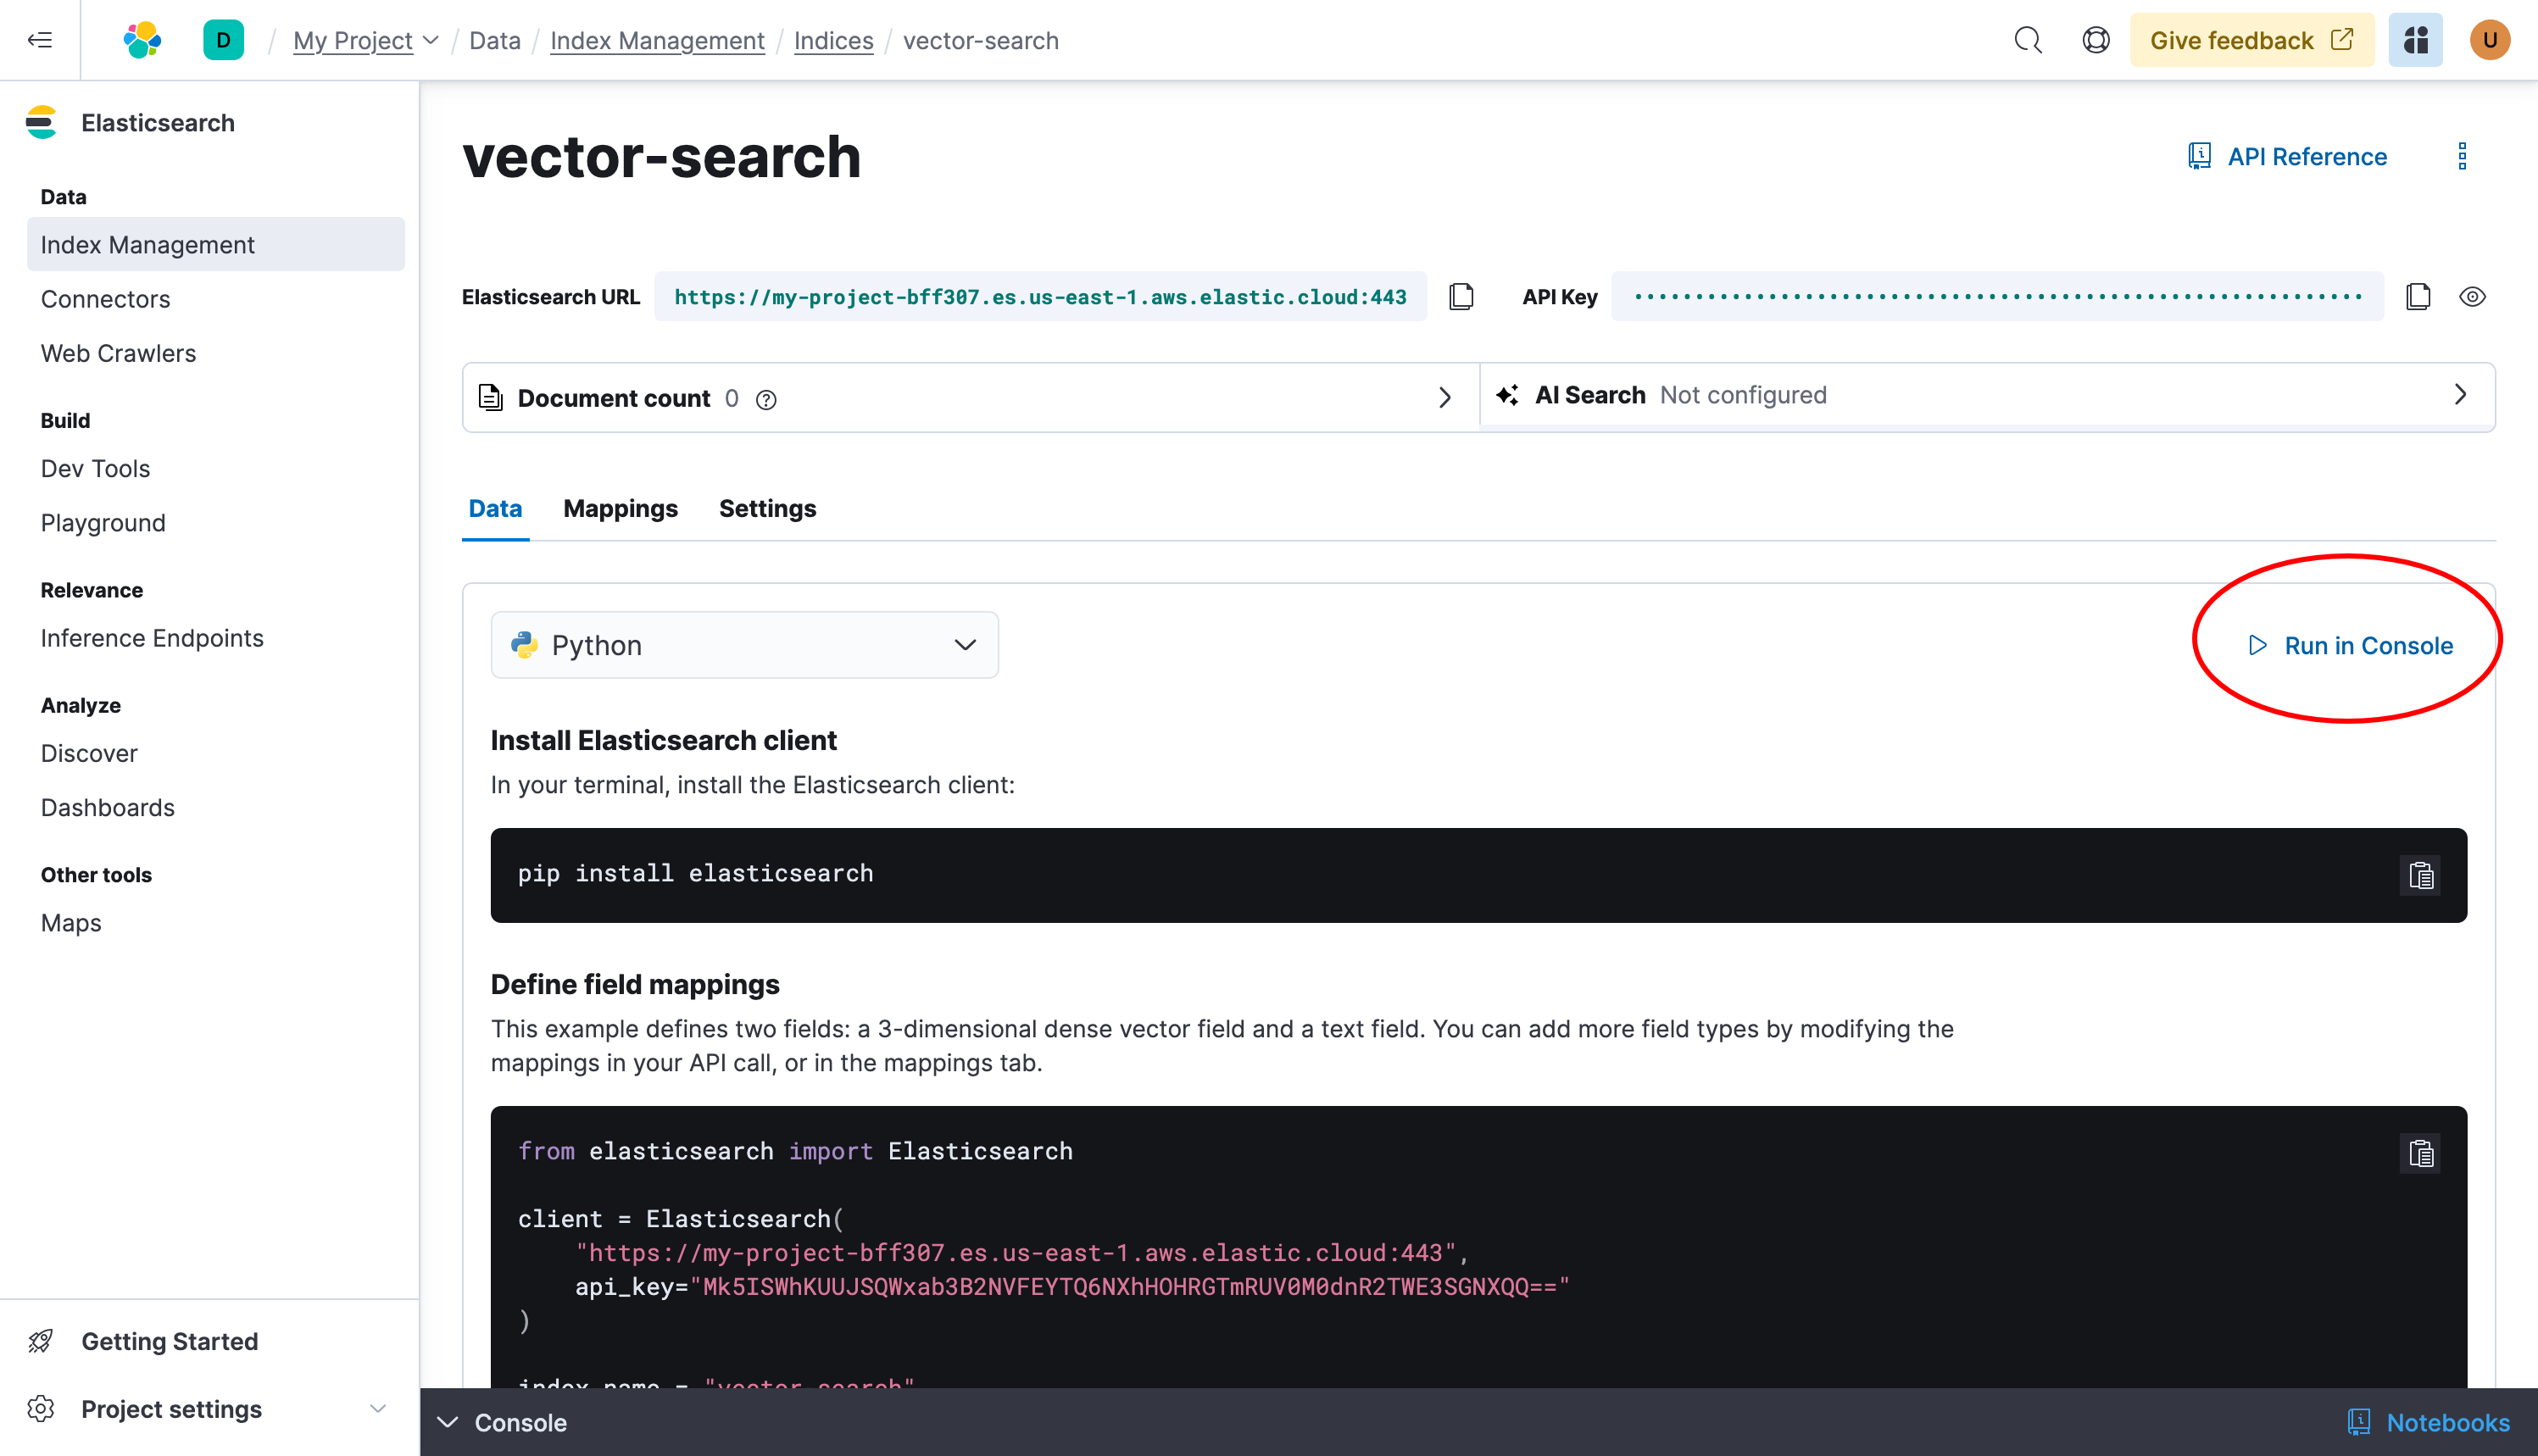
A flyout will appear with the console. You’ll see the code on the left. When you click the Send request button ▶, you’ll see the executed code on the right.
The first command will create the mappings for the index, with a vector field called vector and a text field called text.
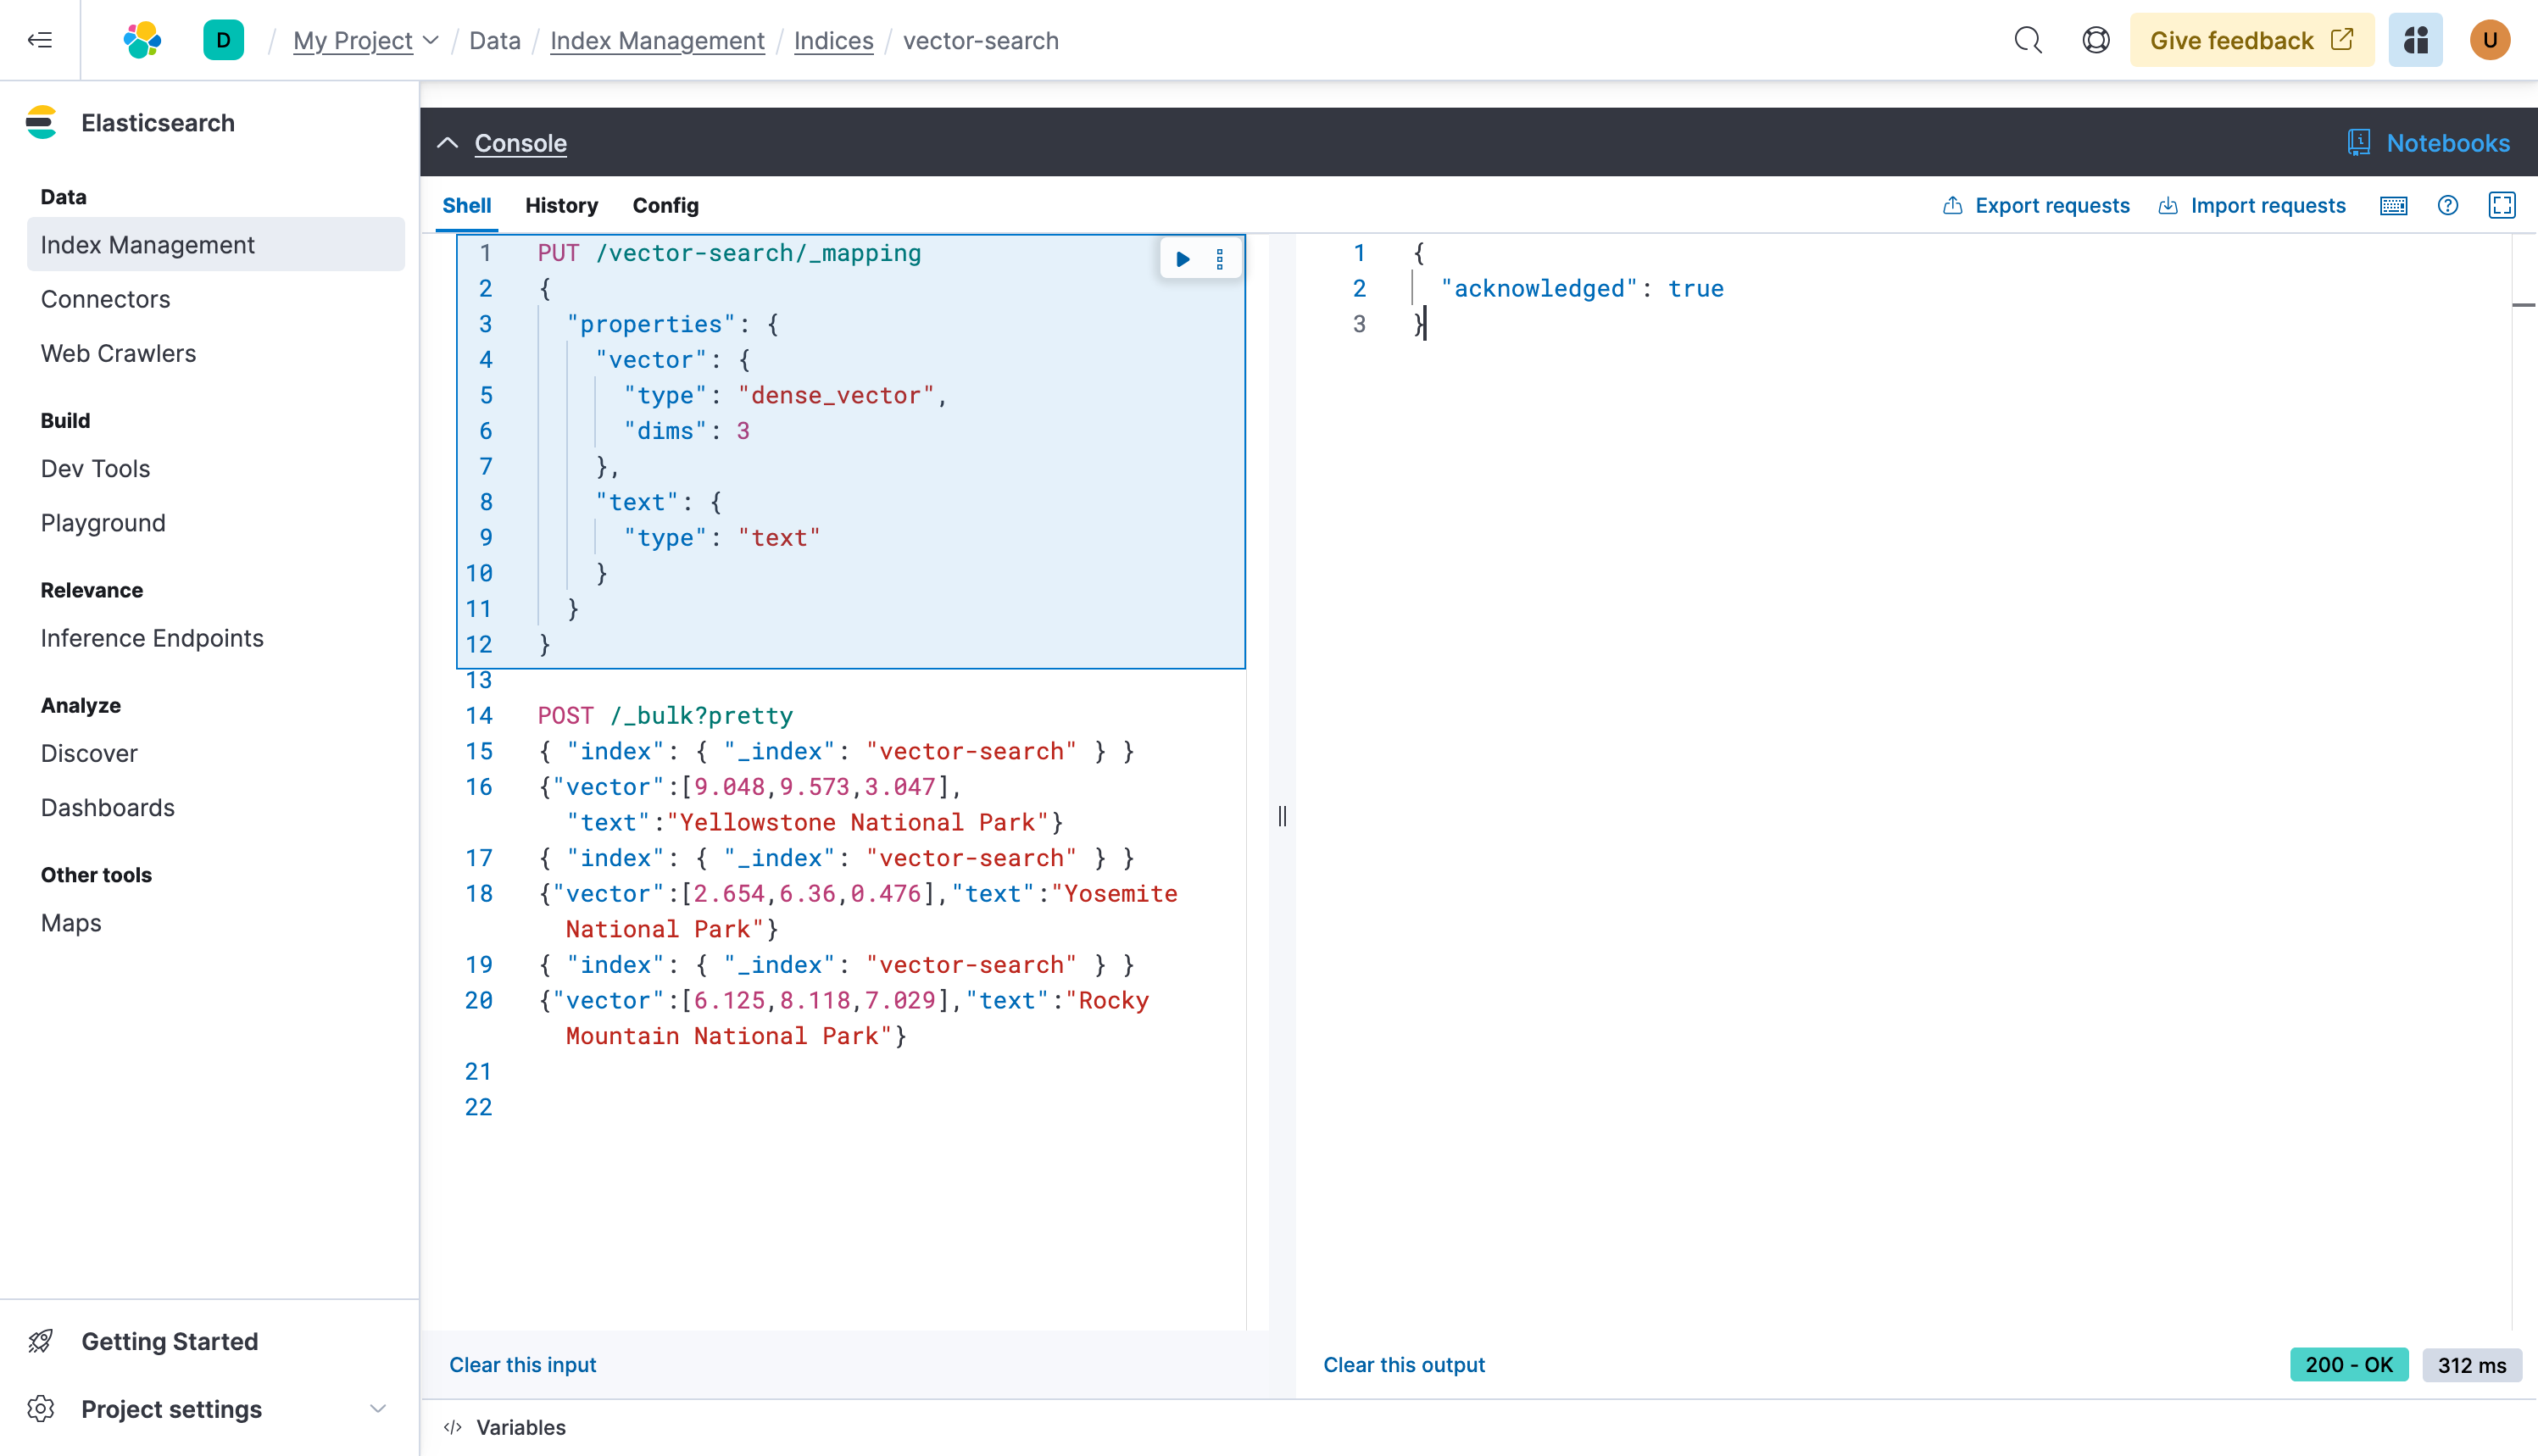
Now run the second command to index 3 documents using a _bulk request. This is the preferred choice when indexing large quantities of documents in Elasticsearch.
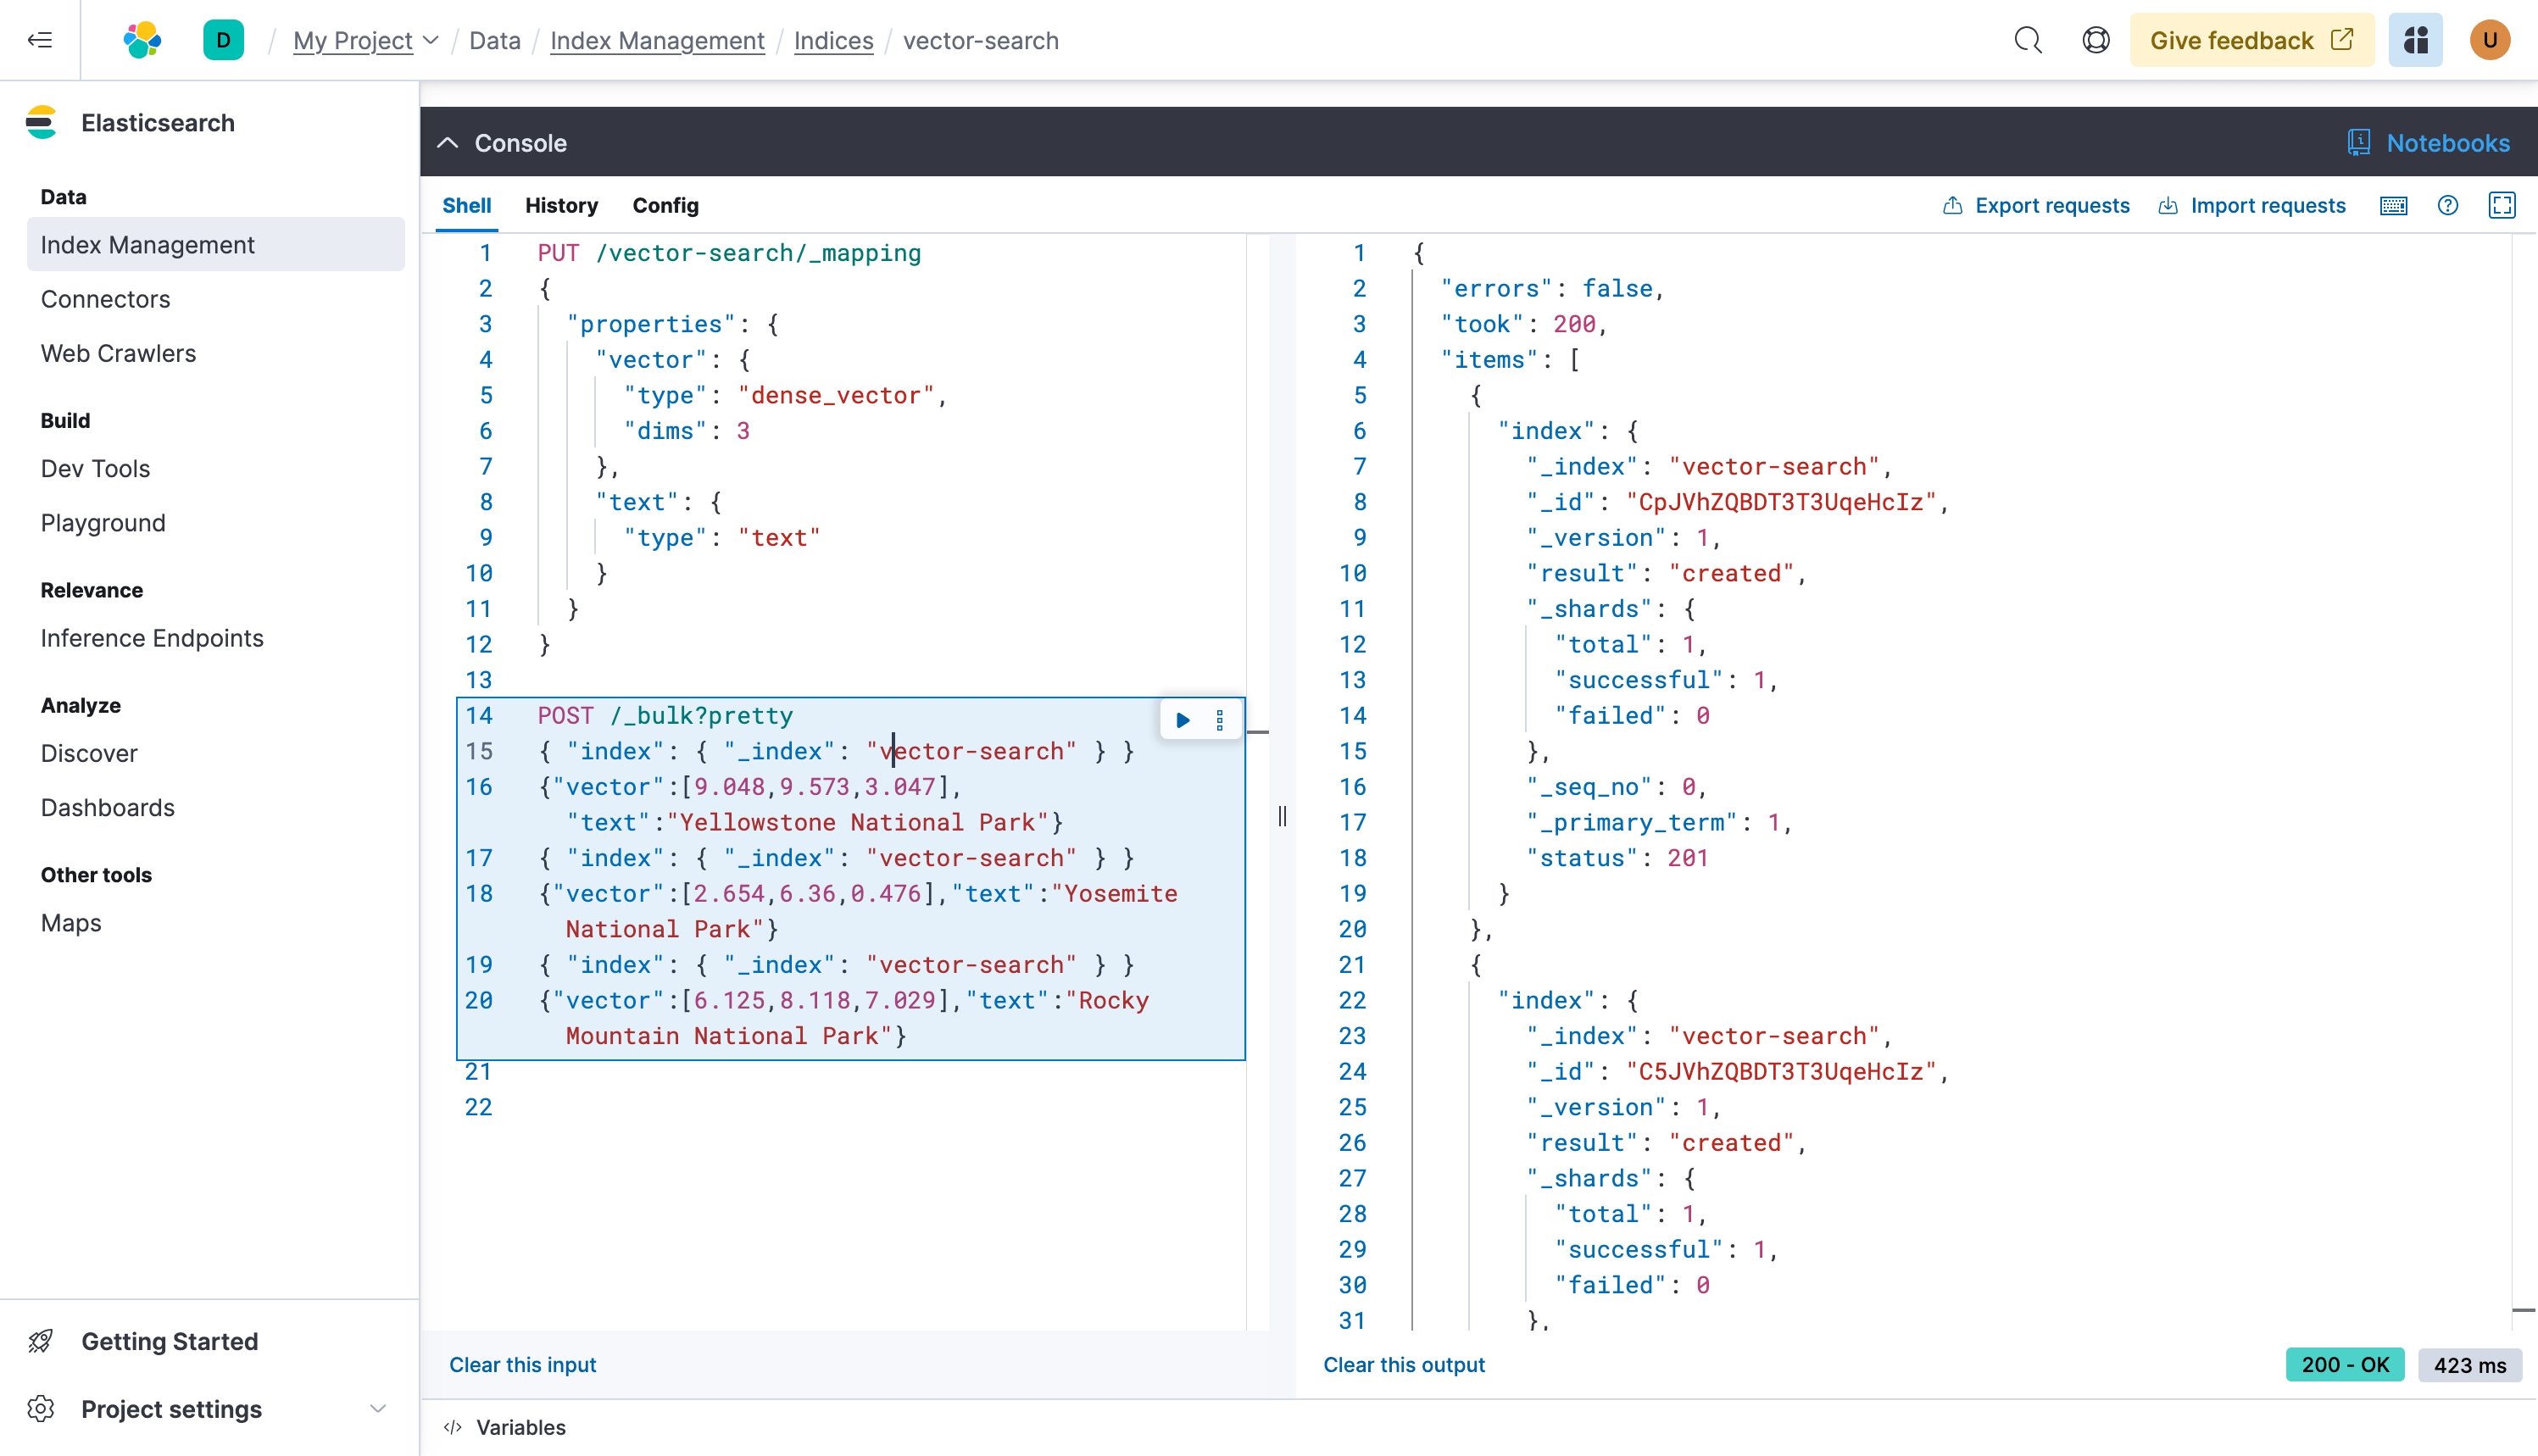
Working with Elasticsearch
Build your vector search query
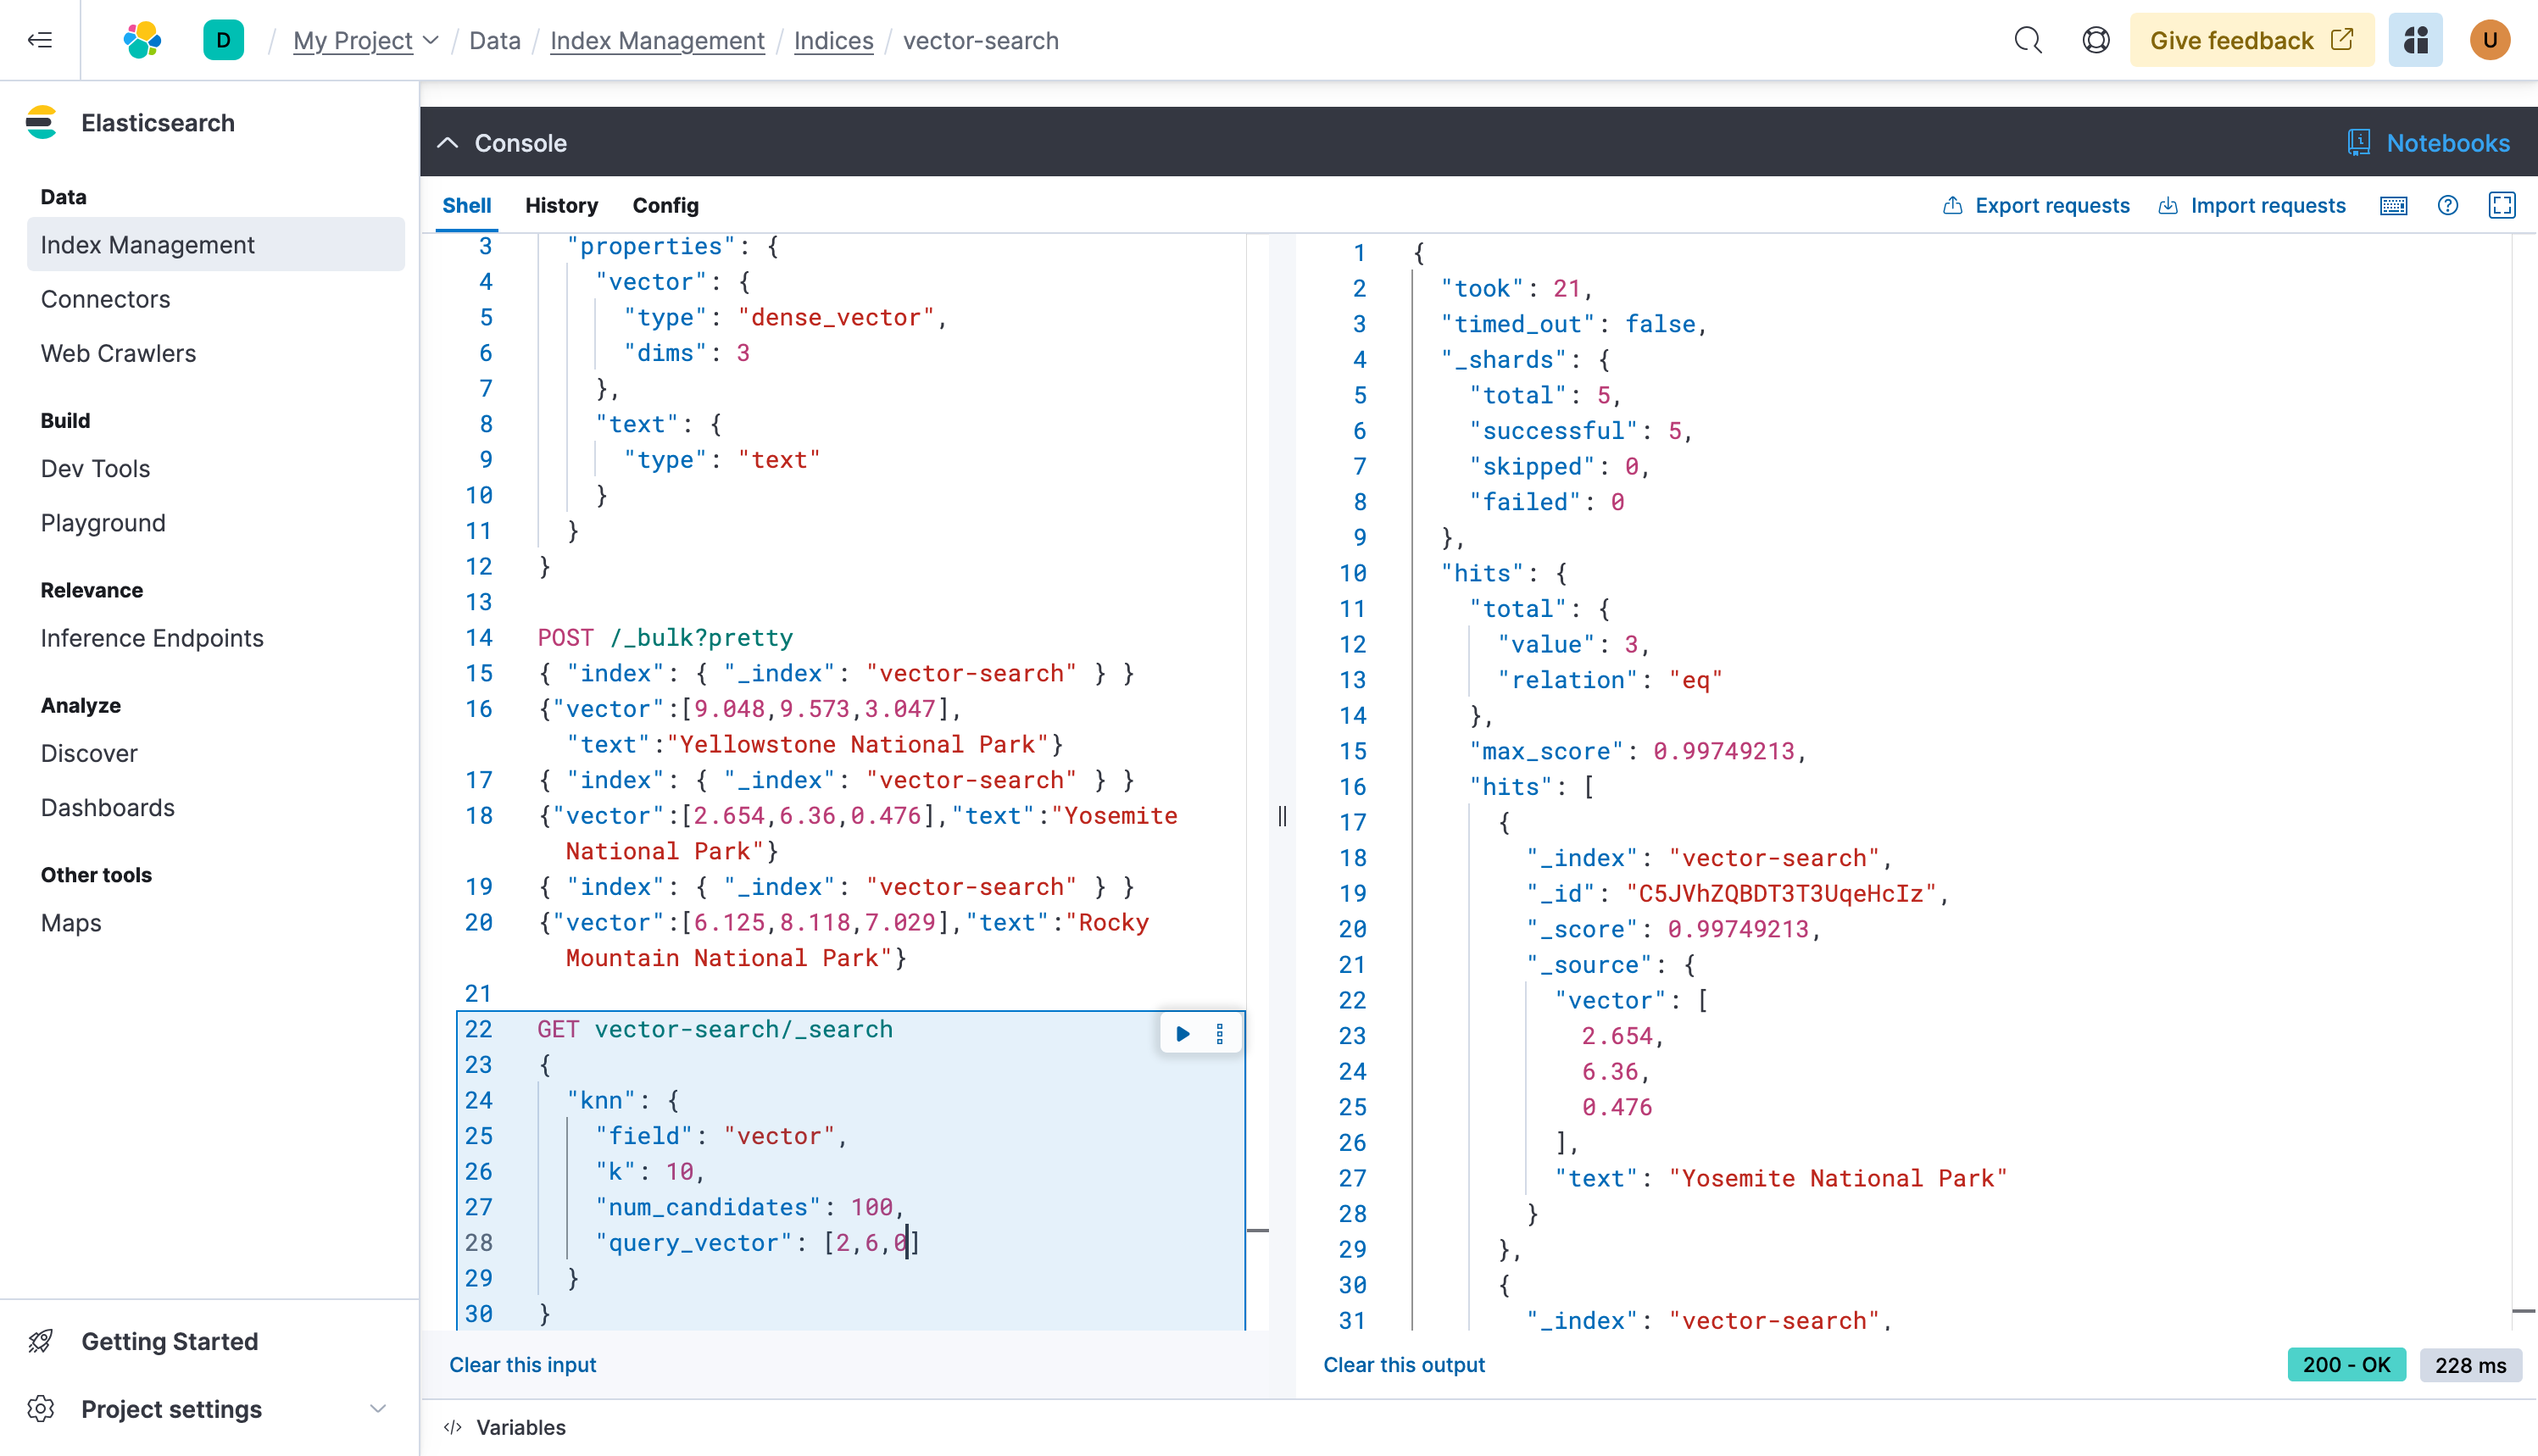
Great, now we can issue a knn query to get the closest documents that match a given vector, we can try with a vector such as [2,6,0]. Copy and paste the following request:
GET vector-search/_search
{
 "knn": {
   "field": "vector",
   "k" 10,
   "num_candidates": 100,
   "query_vector": [2,6,0]
 }
}
Done, “Yosemite National Park” with vector [2.654, 6.36, 0.476] is indeed the closest match.
Next steps
Thanks for taking the time to set up vector search for your data with Elastic Cloud. As you begin your journey with Elastic, understand some operational, security, and data components you should manage as a user when you deploy across your environment.
Ready to get started? Spin up a free 14-day trial on Elastic Cloud or try out these 15 minute hands-on learning on Search AI 101.
Additional resources
- Get started with Elasticsearch
- Build an AI-powered search experience
- Search across business systems and software
- Build an application on top of Elasticsearch
- Connect to the Elasticsearch API