Snapshotting to Minio on-premise storage
editSnapshotting to Minio on-premise storage
editMinio is a popular, open-source distributed object storage server compatible with the Amazon AWS S3 API. You can use it with Elastic Cloud Enterprise installations when you want to store your Elasticsearch snapshots locally.
Create a test environment
editWe recommend following the Minio Quickstart Guide Docker Container instructions to create a simple Minio standalone installation for your initial evaluation and development.
Be sure to use the docker -v option to map persistent storage to the container.
Production environment prerequisites
editInstalling Minio for production requires a high-availability configuration where Minio is running in Distributed mode.
As mentioned in the Minio documentation, you will need to have 4-16 Minio drive mounts. There is no hard limit on the number of Minio nodes. It might be convenient to place the Minio node containers on your ECE hosts to ensure you have a suitable level of availability, but those can not be located on the same hosts as ECE proxies since they both listen on the same port.
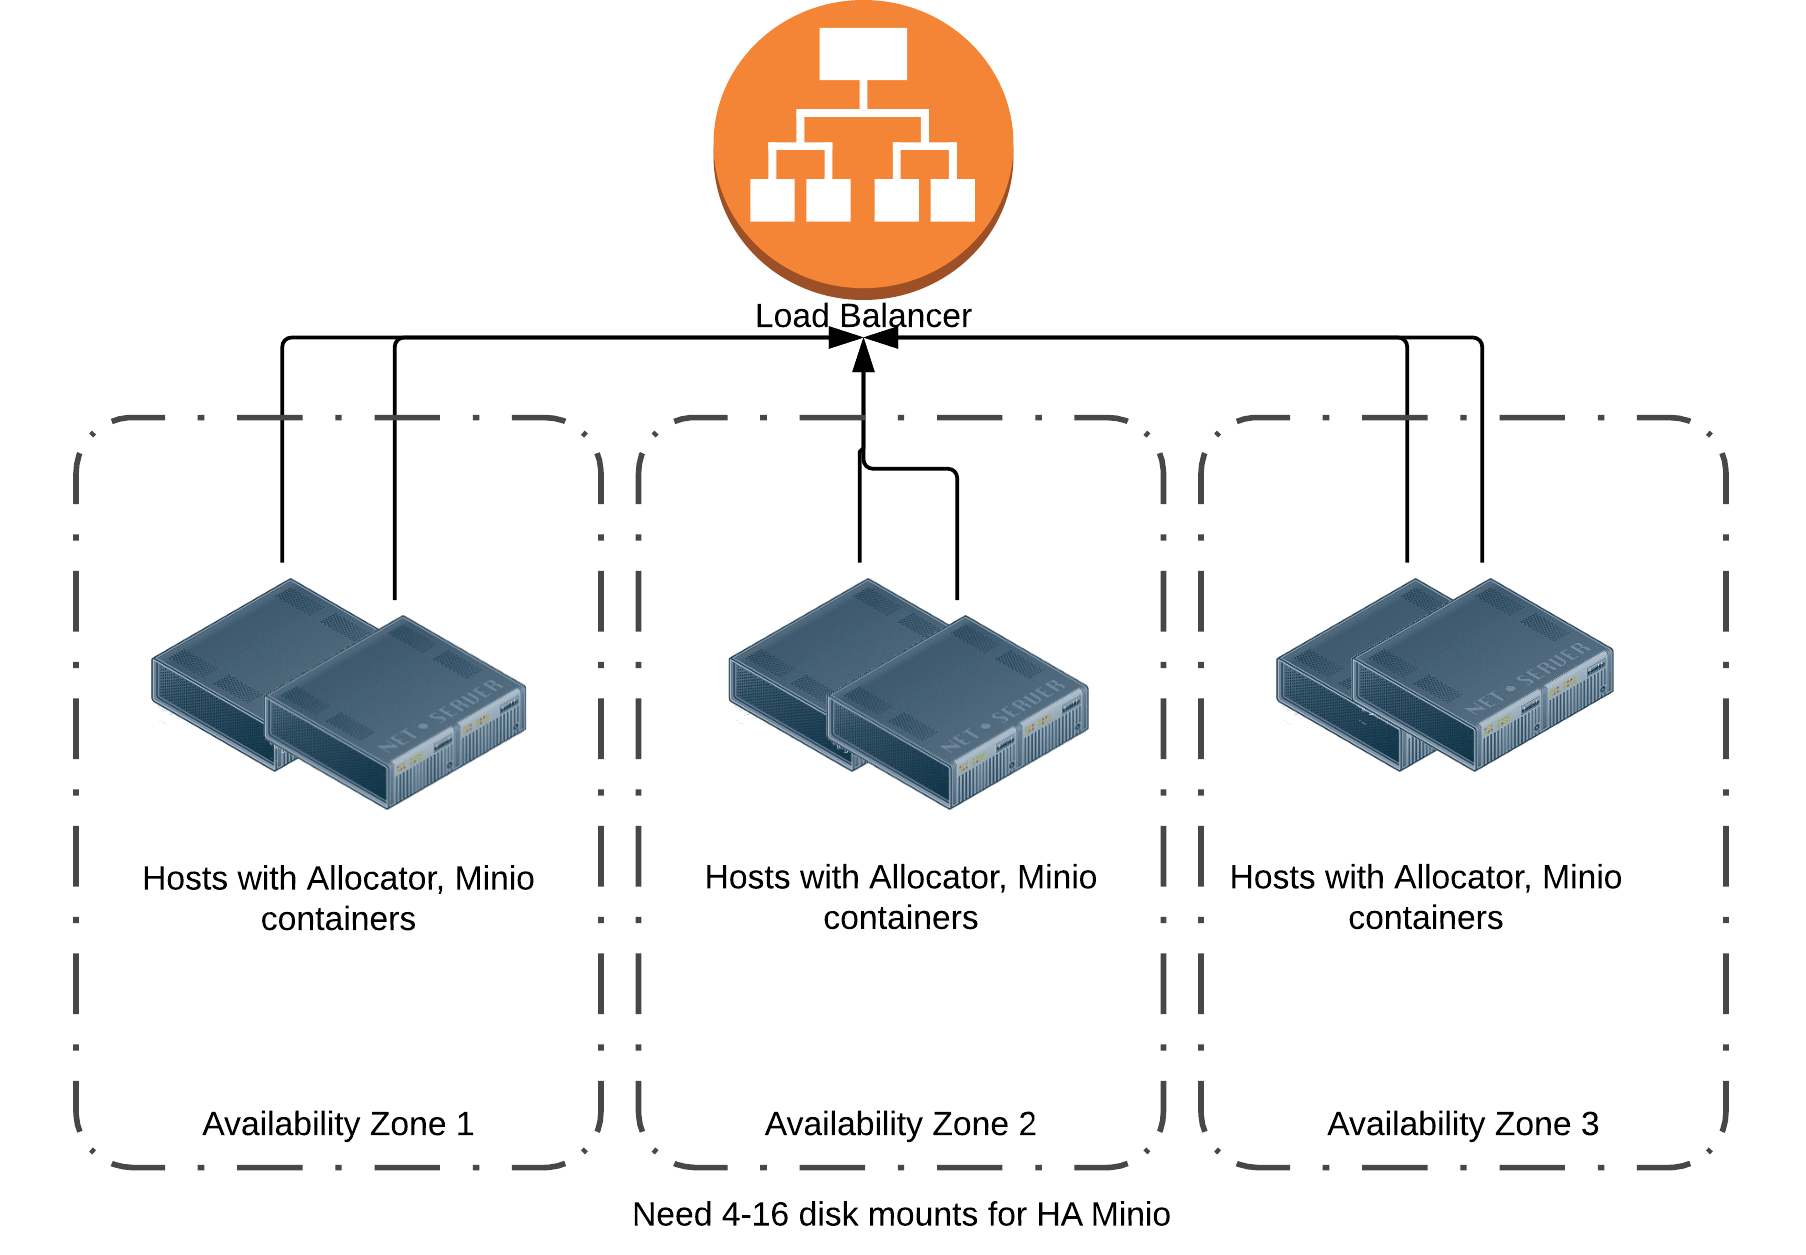
The following illustration is a sample architecture for a large ECE installation. Note that there is at least one MinIO container in each availability zone.
There are a number of different ways of orchestrating the Minio deployment (Docker Compose, Kubernetes, and so on). We suggest you use the method most familiar to you.
We recommend:
- Using a single Minio endpoint with the Elastic Cloud Enterprise installation, to simplify repository management.
- Securing access to the Minio endpoint with TLS.

Create an offline installation
editIf you are installing MinIO offline, the process is very similar to the offline installation of Elastic Cloud Enterprise. There are two options:
- Use a private Docker repository and install the Minio images in the private repository.
-
Download the Minio images from an internet-connected machine, then use docker save to bundle the images into tar files. Copy the TAR files to the target hosts and use
docker loadto install.
Gather the following after your installation:
- Minio AccessKey
- Minio SecretKey
- Endpoint URL
Minio might report various Endpoint URLs, be sure to choose the one that will be routable from your Elasticsearch Docker containers.
Create the S3 bucket
editHow you create the AWS S3 bucket depends on what version of Elasticsearch you are using:
- For version 5.x, installing the S3 repository plugin creates an S3 bucket for you.
-
For versions 6.0–7.17:
- Using the Minio browser or an S3 client application, create an S3 bucket to store your snapshots. TIP: Don’t forget to make the bucket name DNS-friendly, e.g. no underscores or uppercase letters. For more details, read the bucket restrictions.
- Log into the Cloud UI and add the S3 repository plugin to your cluster.
- For versions 8.0 and later, Elasticsearch has built-in support for AWS S3 repositories; no repository plugin is needed. Use the Minio browser or an S3 client application to create an S3 bucket to store your snapshots. TIP: Don’t forget to make the bucket name DNS-friendly, for example no underscores or uppercase letters. For more details, read the bucket restrictions.
Elastic Cloud Enterprise configuration
editYou can configure existing deployments, or create new ones, with the following changes to use Minio storage.
Add the repository to Elastic Cloud Enterprise
editYou must add the new repository to Elastic Cloud Enterprise before it can be used with your Elasticsearch clusters.
- Log into the Cloud UI.
- From the Platform menu, select Repositories.
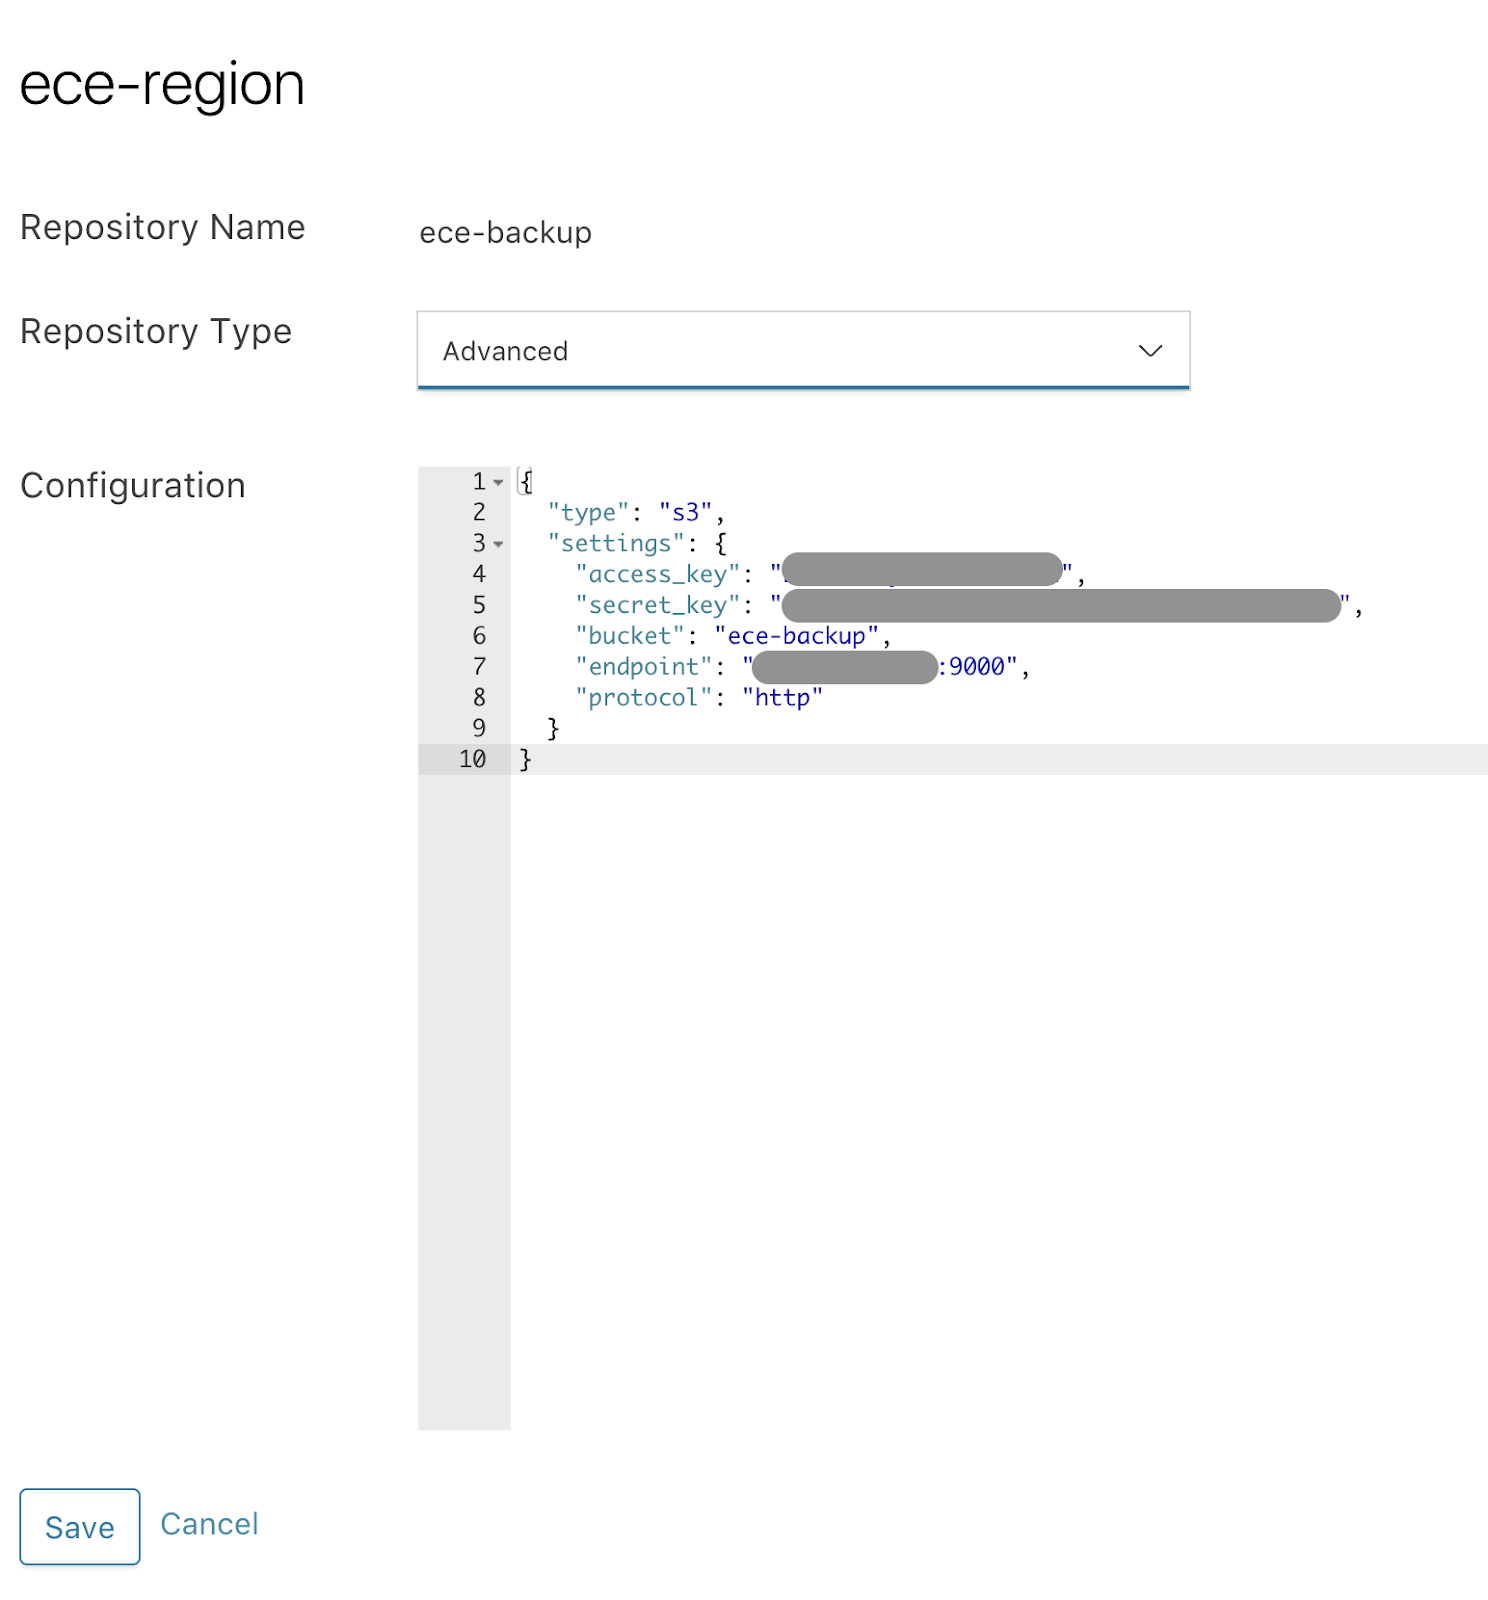
- Select Add Repository.
- From the Repository Type drop-down list, select Advanced.
-
In the Configuration text area, provide the repository JSON. You must specify the bucket, access_key, secret_key, endpoint, and protocol.
  {
     "type": "s3",
      "settings": {
         "bucket": "ece-backup",
         "access_key": "<your Minio AccessKey>",
         "secret_key": "<your Minio SecretKey>",
         "endpoint": "<your Minio endpoint URL>:9000",
         "path_style_access": "true",
         "protocol": "http"
      }
  }
- Select Save to submit your configuration.
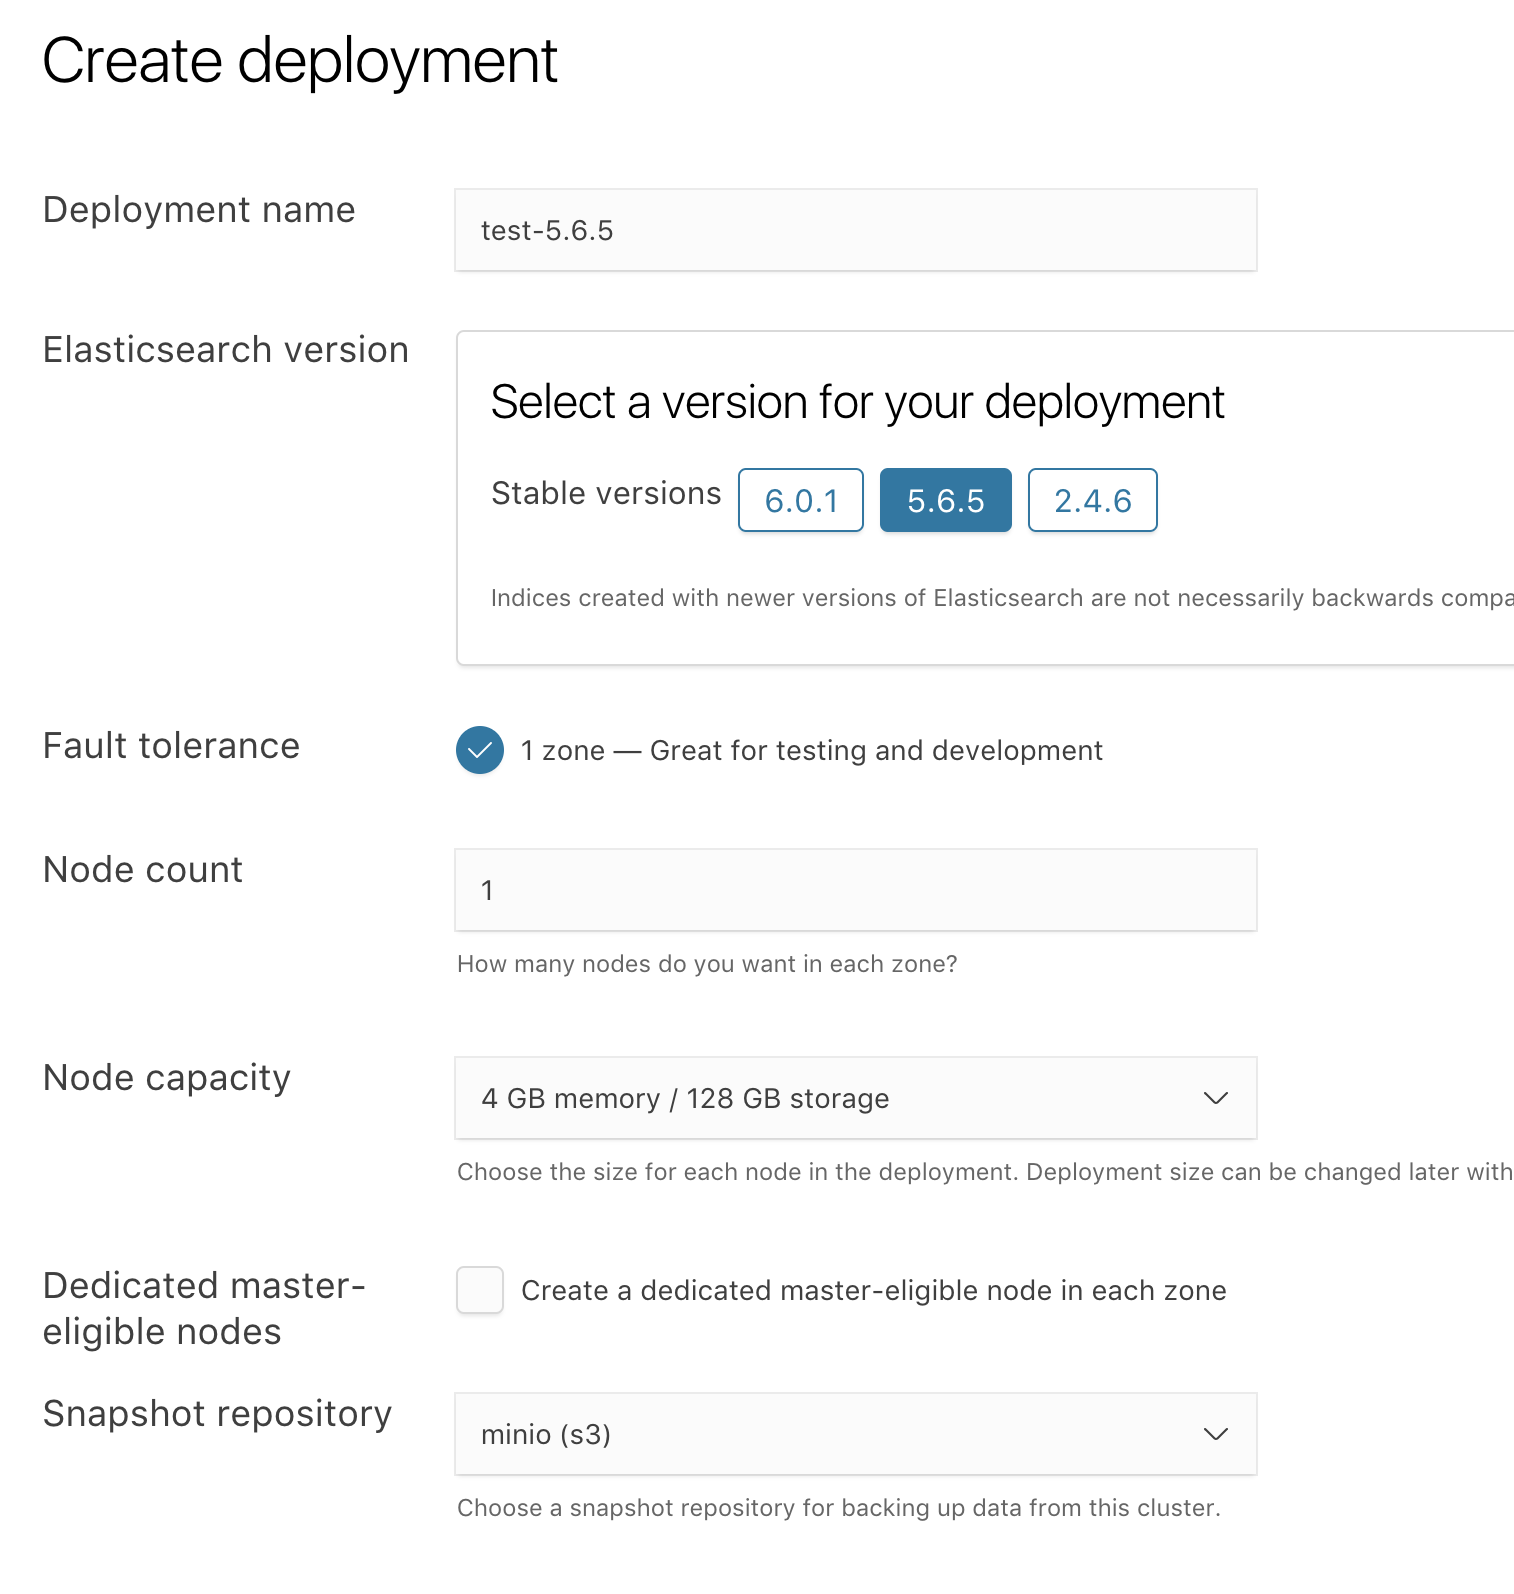
The Minio repository is now available from the drop-down list of repositories when creating deployments.

Additional settings for 6.x clusters
editFor Elasticsearch versions 6.0 and later, after selecting the repository, you also need to set your User Settings YAML to specify the endpoint and protocol. For example:
s3.client.default.endpoint: "<your Minio endpoint>:9000"
s3.client.default.protocol: http
Check the Elasticsearch S3 plugin details for more information.
Upgrade from 5.x to 6.x Elasticsearch clusters
editThe configuration options for the Elasticsearch S3 repository plugin have changed from 5.x to 6.x versions and you must copy the endpoint and protocol values from your repository configuration to your User Settings YAML before you upgrade.
Verify snapshots
editThe cluster should make a snapshot when the repository is set up. You can check that by going to the Elasticsearch and then the Snapshots page.
As an extra verification step, you can restore a cluster using the snapshots that have been taken.
- Log into the Cloud UI.
-
Get the plan from your test cluster.
-
From the Deployments page, select your deployment.
Narrow the list by name, ID, or choose from several other filters. To further define the list, use a combination of filters.
- From your deployment menu, go to the Edit page then go to the bottom of the page and select advanced Elasticsearch configuration.
- Copy the JSON format under the Deployment configuration heading.
-
- Create a new Elasticsearch cluster as your target.
-
On the new cluster, open the advanced cluster configuration editor. In the transient section, add the
restore_snapshotsettings to the plan.... "transient": { "restore_snapshot": { "repository_name": "<Minio repository name>", "snapshot_name": "latest_success" } } - Select Save to restore from the snapshot. When the plan update is complete, you can check the restored indexes in your target cluster.
More details are available to restore a snapshot.