

Elastic Security: Detect and respond to threats with SIEM
Overview
Introduction to Elastic Security
Learn how Elastic Security helps you protect your organization by unifying SIEM, endpoint, and cloud security.
Get your hands on Elastic Security
Experience Elastic Security for yourself with this interactive demo.
Let's get started
Create an Elastic Cloud account
Get started with a 14-day trial. Create an account on cloud.elastic.co and create a deployment.
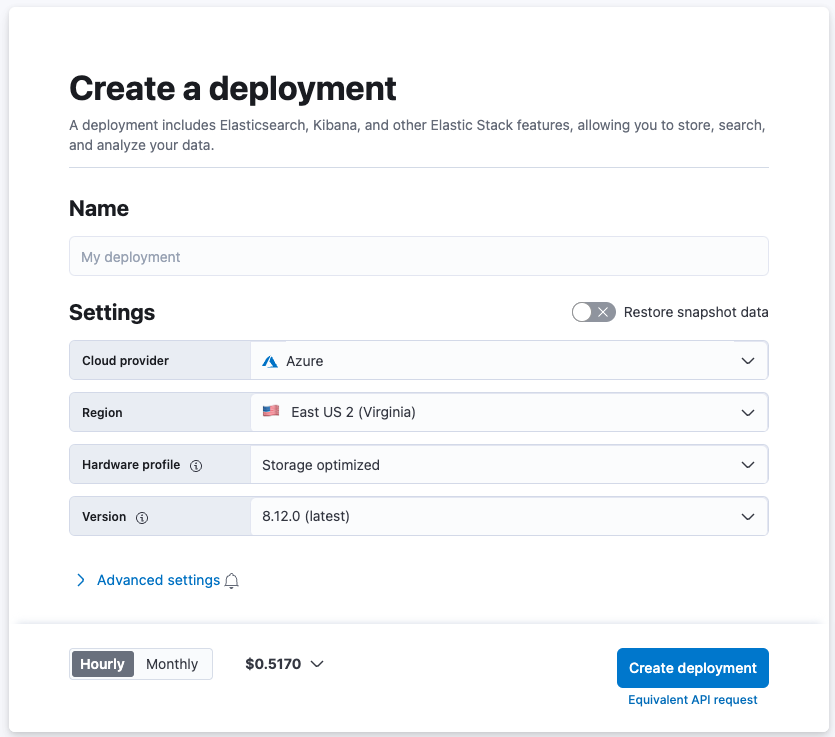
Choose a Cloud provider and then a Region. Make sure to select a Hardware profile of Storage optimized or Storage optimized (dense)
Open Advanced settings to optimize your cluster for security use cases.
| Tier | Size per zone | Availability zone |
|---|---|---|
| Hot data and Content Tier | 180GB storage | 2 zones |
| Frozen data tier | 6.25TB storage | 1 zone |
| Machine learning instances | Minimum per zone: 2GB RAM Maximum per zone: 64GB RAM | 1 zone |
| Kibana | 2GB RAM | 1 zone |
| Integrations Server instances | 1GB RAM | 1 GB RAM |
After selecting these settings, click Create deployment
Once your deployment is ready, under the Security tab, select Detect threats in my data with SIEM and then Start.

You'll be brought to the integration overview for Elastic Defend, which (together with the System integration) equips Elastic Agent to collect rich host data. Get started with this guided tour or follow the instructions below:
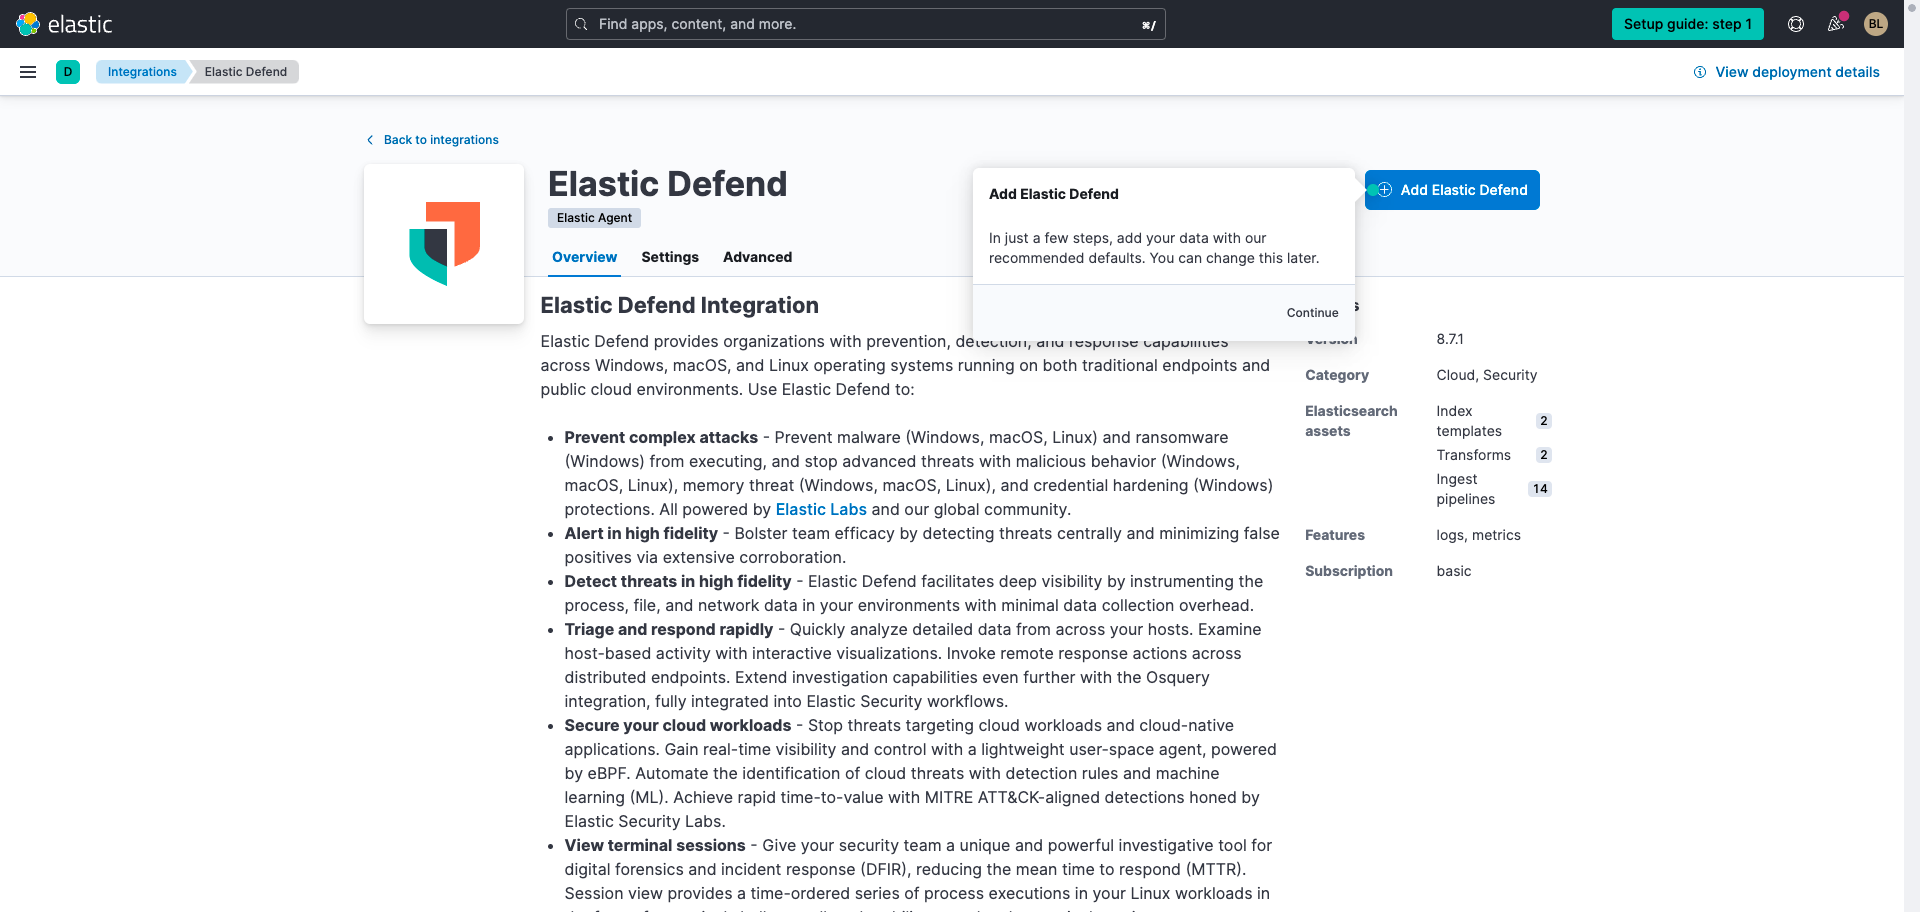
Select Add Elastic Defend. You'll be prompted to install Elastic Agent on a host.
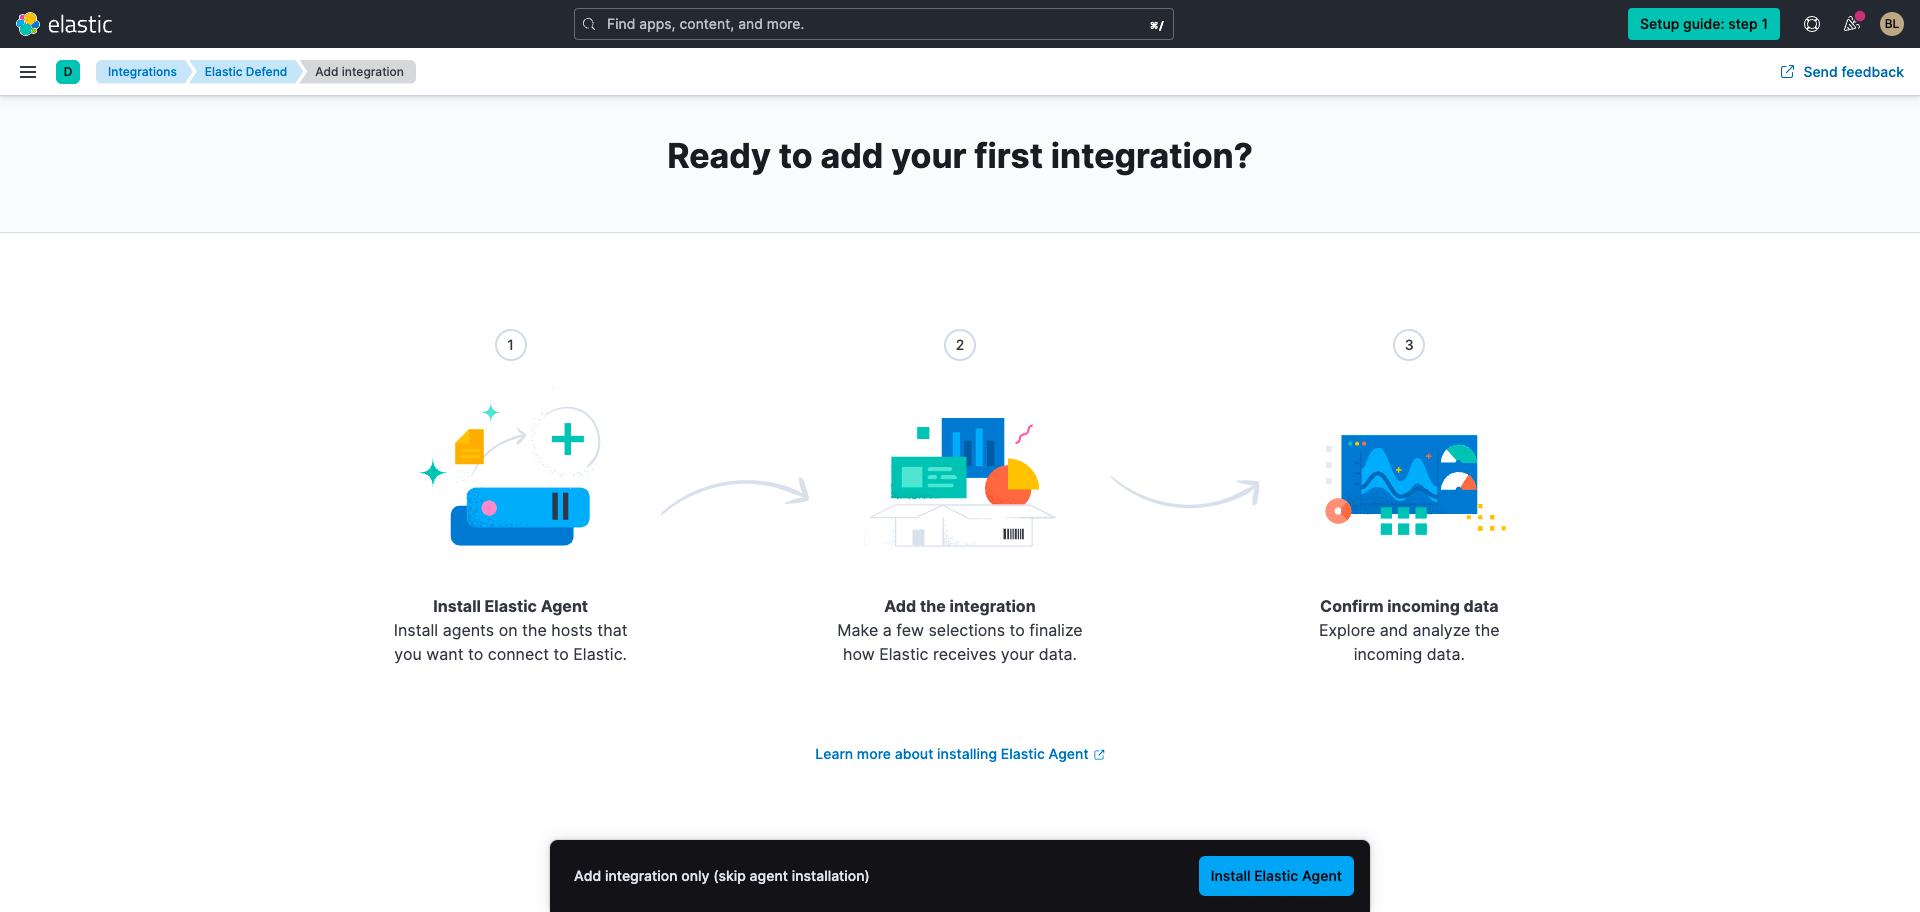
Click Install Elastic Agent, select the appropriate operating system, and run the commands to install and start Elastic Agent on your host.
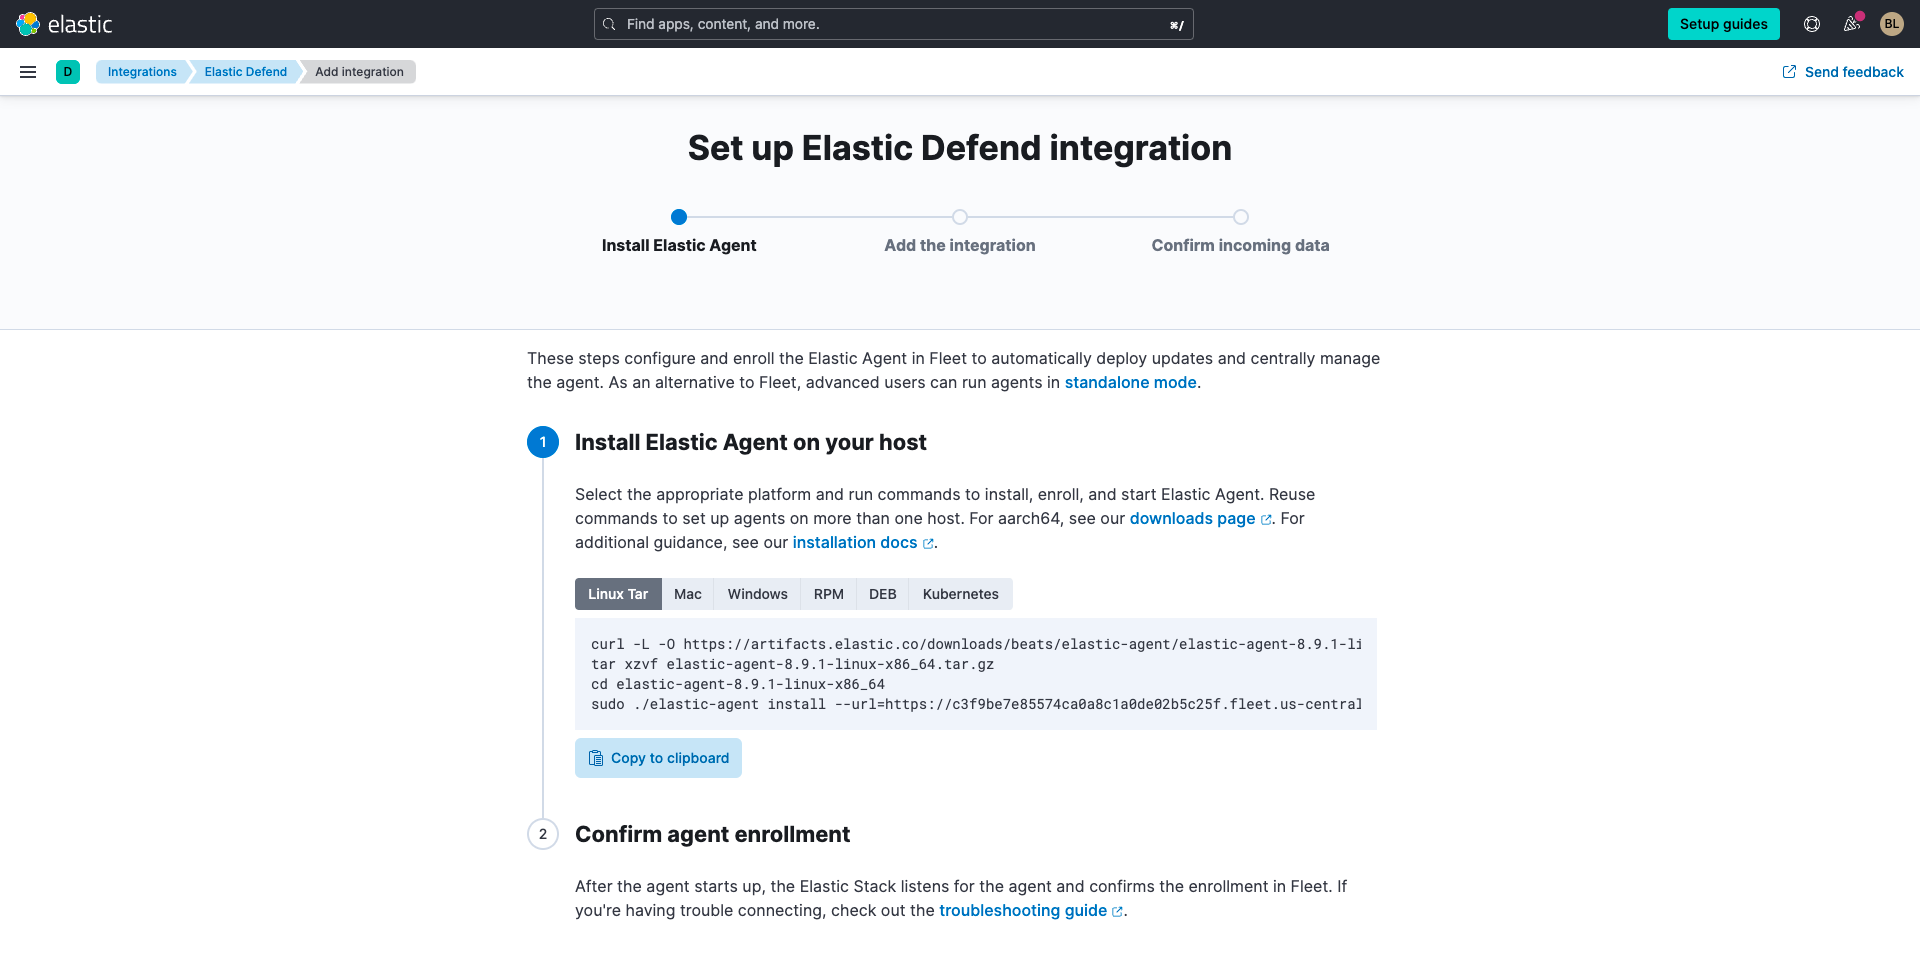
Once you've installed Elastic Agent, the page will confirm that it has been enrolled successfully.
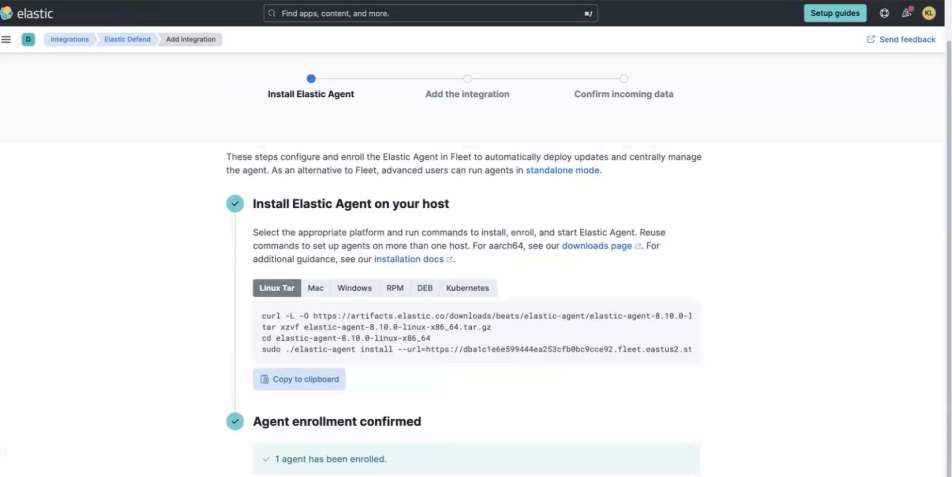
On the following page, select the Confirm incoming data button.
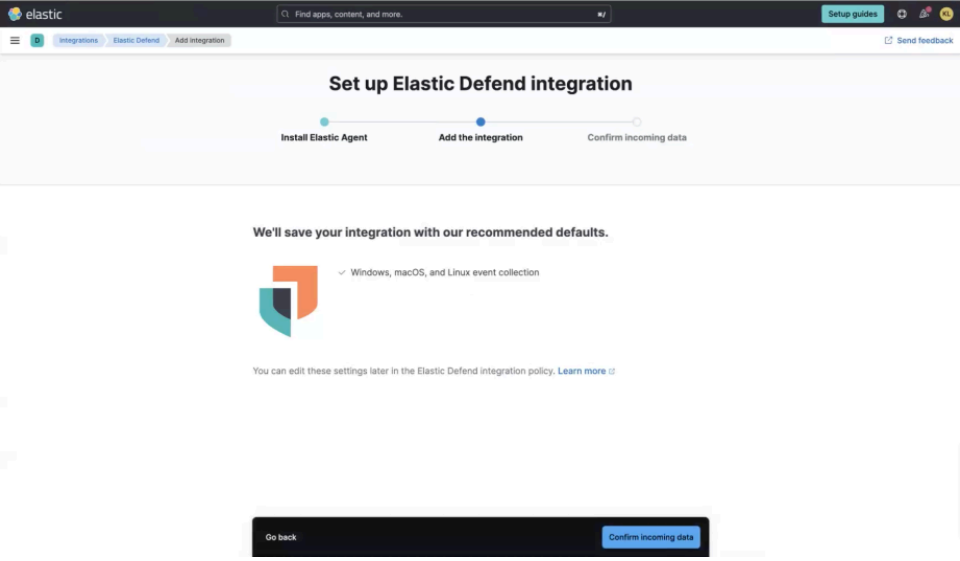
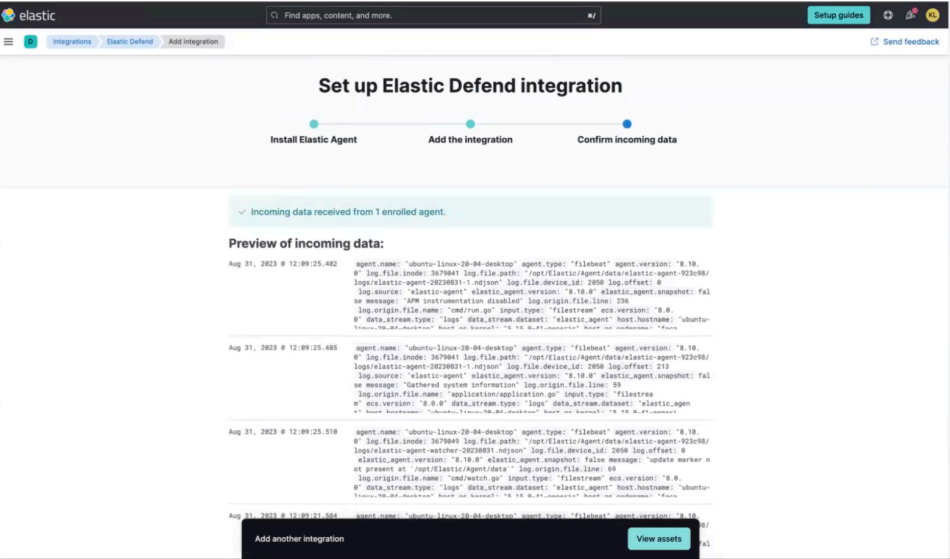
You'll see a preview of incoming data. Select View Assets.
You'll see a list of the assets that are included with the Elastic Defend integration.
From here, navigate to Management and select Integrations, where you can discover and install integrations with other data sources to centralize within your SIEM.
Working with Elastic Security
Analyze your data
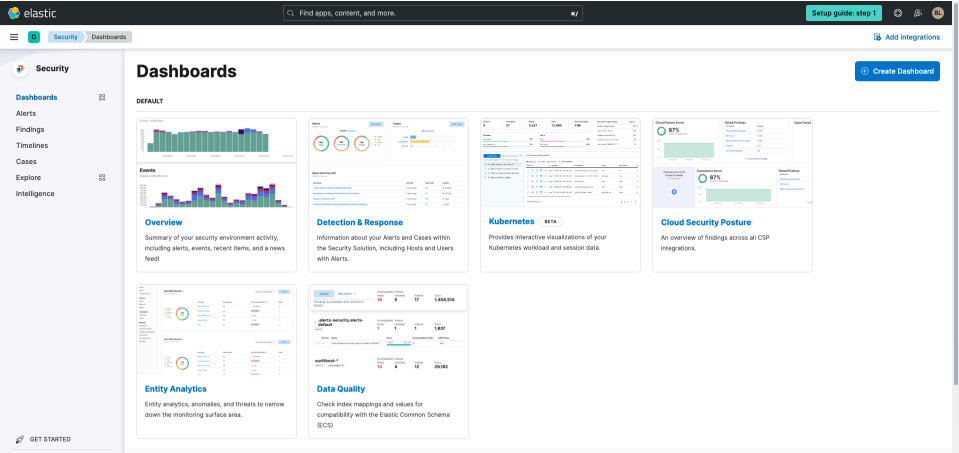
Let’s start exploring what’s happening in your environment. After installing Elastic Defend you’ll be brought to the page below. Expand the upper-left menu and navigate to Dashboards under Security.
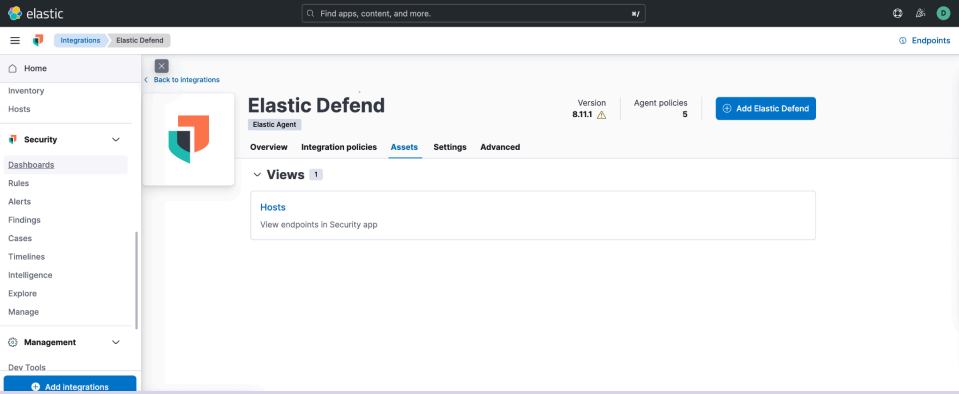
Next, open the Security overview page to take a broad view of your environment. You can also visualize system data in Host view, explore network data in Network view, and more.
Automate protection
Next, activate out-of-the-box detection rules:
Go further by uncovering unknown threats with ML-based anomaly detection. Plus, protect your hosts by implementing ransomware and malware prevention via the Elastic Defend integration for Agent.Investigate and respond
Perform investigations — from triaging alerts to closing cases — with the following resources:
For guidance with investigating and responding to threats, configure Elastic AI Assistant.
Next steps
Congrats on beginning your Elastic Security journey. In the days ahead, be sure to review key operational, security, and data considerations to make sure you get the most out of your deployment.