Webhook - Case Management connector and action
editWebhook - Case Management connector and action
editThe Webhook - Case Management connector uses axios to send POST, PUT, and GET requests to a case management RESTful API web service.
Create connectors in Kibana
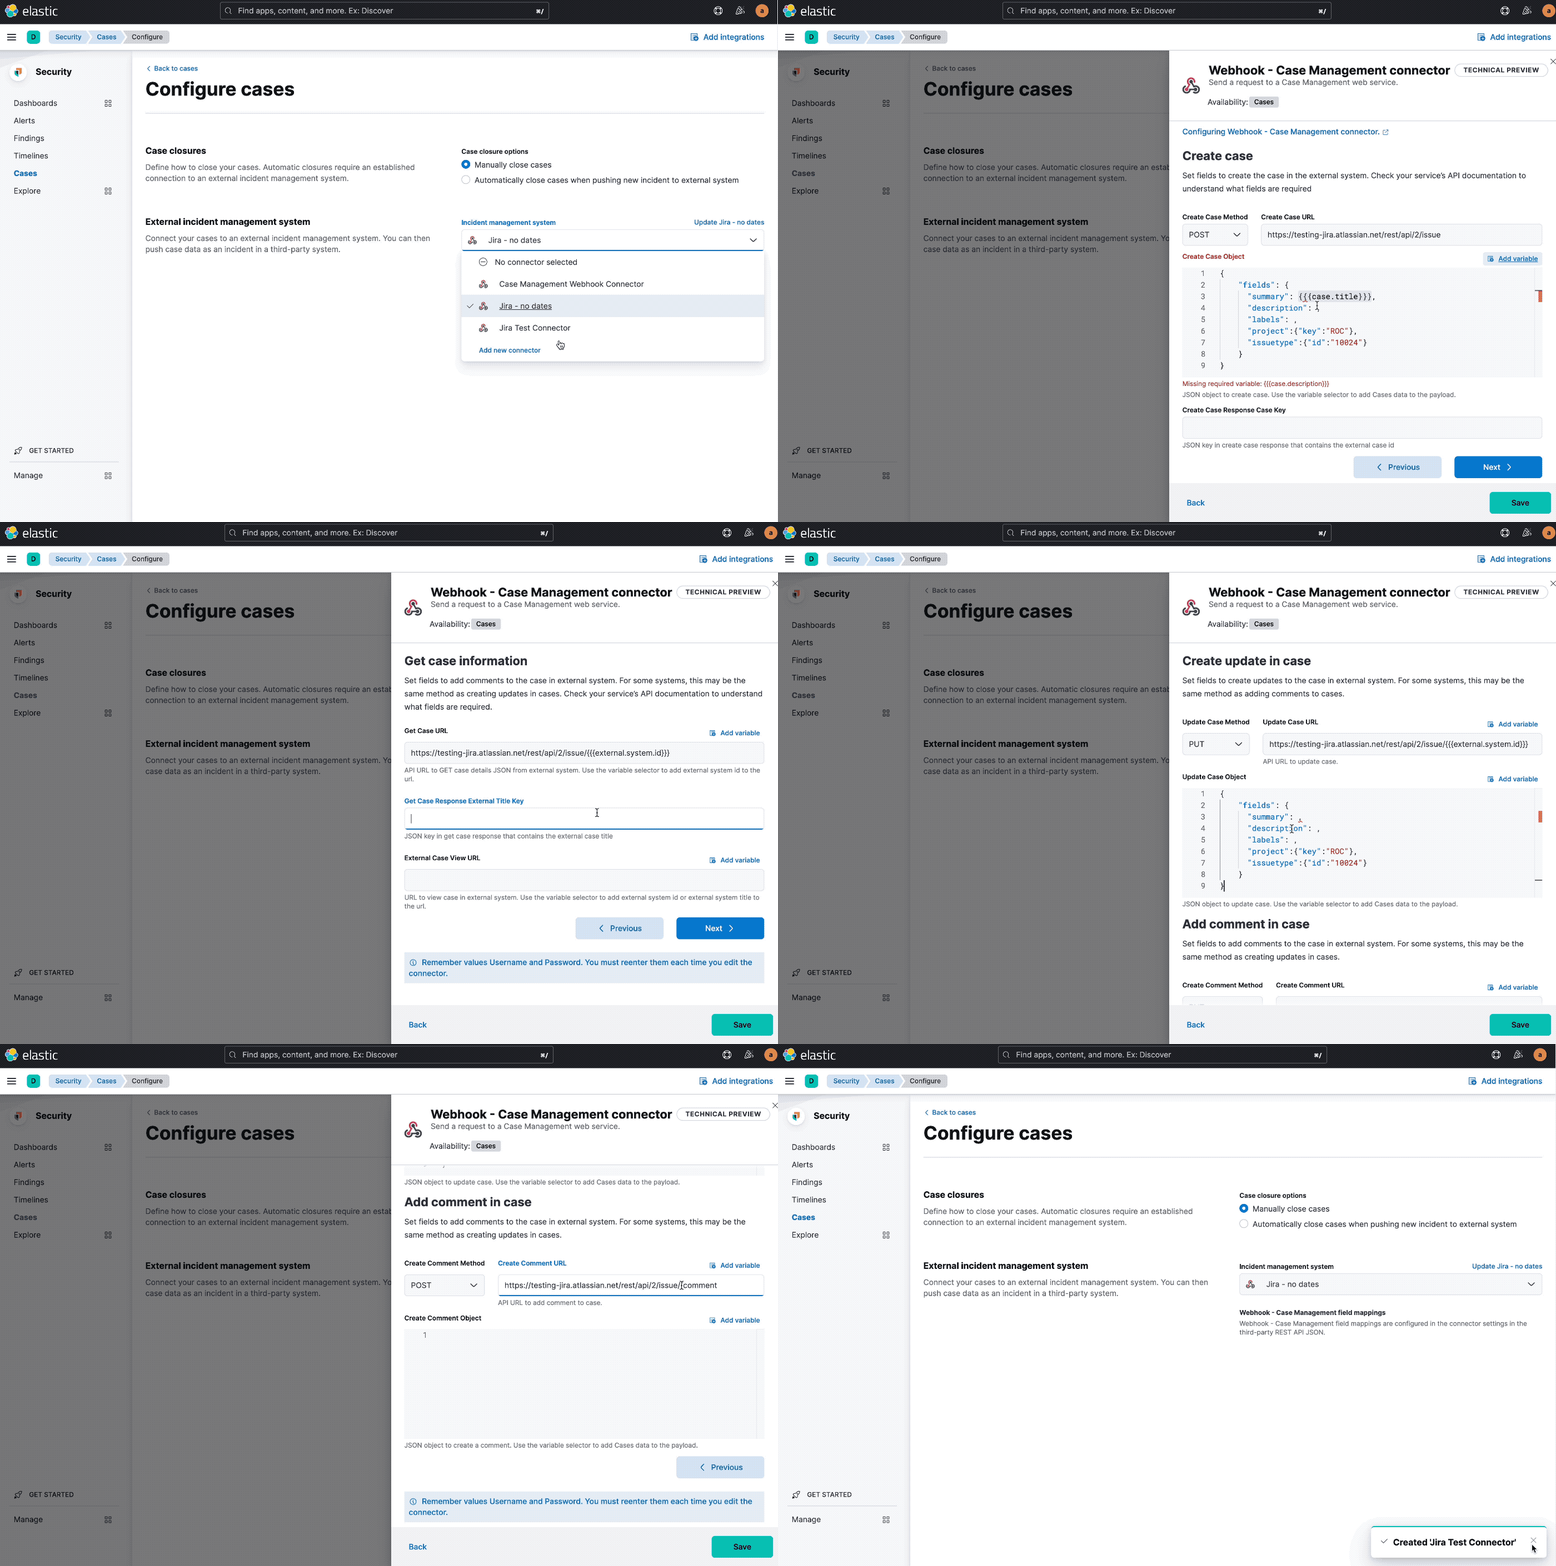
editYou can create connectors in Stack Management > Connectors or as needed when you’re creating a rule. For example:

Connector configuration
editWebhook - Case Management connectors have the following configuration properties:
- Name
- The name of the connector. The name is used to identify a connector in the management UI connector listing and in the connector list when configuring an action.
- Require authentication
- If true, a username and password for login type authentication must be provided.
- Username
- Username for HTTP basic authentication.
- Password
- Password for HTTP basic authentication.
- Headers
- A set of key-value pairs sent as headers with the request URLs for the create case, update case, get case, and create comment methods.
- Create case method
-
REST API HTTP request method to create a case in the third-party system, either
post(default),put, orpatch. - Create case URL
-
REST API URL to create a case in the third-party system. If you are using the
xpack.actions.allowedHostssetting, make sure the hostname is added to the allowed hosts. - Create case object
-
A JSON payload sent to the create case URL to create a case. Use the variable selector to add case data to the payload. Required variables are
case.titleandcase.description. For example:{ "fields": { "summary": {{{case.title}}}, "description": {{{case.description}}}, "labels": {{{case.tags}}} } }Due to Mustache template variables (the text enclosed in triple braces, for example,
{{{case.title}}}), the JSON is not validated in this step. The JSON is validated after the Mustache variables have been placed when REST method runs. Manually ensure that the JSON is valid, disregarding the Mustache variables, so the later validation will pass. - Create case response - case ID key
- JSON key in the create case response that contains the external case ID.
- Get case URL
-
REST API URL to GET case by ID from the third-party system. Use the variable selector to add the external system ID to the URL. If you are using the
xpack.actions.allowedHostssetting, make sure the hostname is added to the allowed hosts. For example:<JIRA_URL>/rest/api/2/issue/{{{external.system.id}}}/commentDue to Mustache template variables (the text enclosed in triple braces, for example,
{{{case.title}}}), the JSON is not validated in this step. The JSON is validated after the Mustache variables have been placed when REST method runs. Manually ensure that the JSON is valid, disregarding the Mustache variables, so the later validation will pass. - Get case response - title key
- JSON key in get case response that contains the external case title
- External case view URL
-
URL to view case in the external system. Use the variable selector to add the external system ID or external system title to the URL. For example:
<JIRA_URL>/browse/{{{external.system.title}}} - Update case method
-
REST API HTTP request method to update the case in the third-party system, either
post,put(default), orpatch. - Update case URL
-
REST API URL to update the case by ID in the third-party system. Use the variable selector to add the external system ID to the URL. If you are using the
xpack.actions.allowedHostssetting, make sure the hostname is added to the allowed hosts. For example:<JIRA_URL>/rest/api/2/issue/{{{external.system.ID}}} - Update case object
-
A JSON payload sent to the update case URL to update the case. Use the variable selector to add Kibana Cases data to the payload. Required variables are
case.titleandcase.description. For example:{ "fields": { "summary": {{{case.title}}}, "description": {{{case.description}}}, "labels": {{{case.tags}}} } }Due to Mustache template variables (which is the text enclosed in triple braces, for example,
{{{case.title}}}), the JSON is not validated in this step. The JSON is validated after the Mustache variables have been placed when REST method runs. Manually ensure that the JSON is valid to avoid future validation errors; disregard Mustache variables during your review. - Create comment method
-
(Optional) REST API HTTP request method to create a case comment in the third-party system, either
post,put(default), orpatch. - Create comment URL
-
(Optional) REST API URL to create a case comment by ID in the third-party system. Use the variable selector to add the external system ID to the URL. If you are using the
xpack.actions.allowedHostssetting, make sure the hostname is added to the allowed hosts. For example:https://testing-jira.atlassian.net/rest/api/2/issue/{{{external.system.id}}}/comment - Create comment object
-
(Optional) A JSON payload sent to the create comment URL to create a case comment. Use the variable selector to add Kibana Cases data to the payload. The required variable is
case.comment. For example:{ "body": {{{case.comment}}} }Due to Mustache template variables (the text enclosed in triple braces, for example,
{{{case.title}}}), the JSON is not validated in this step. The JSON is validated once the mustache variables have been placed and when REST method runs. We recommend manually ensuring that the JSON is valid, disregarding the Mustache variables, so the later validation will pass.
Test connectors
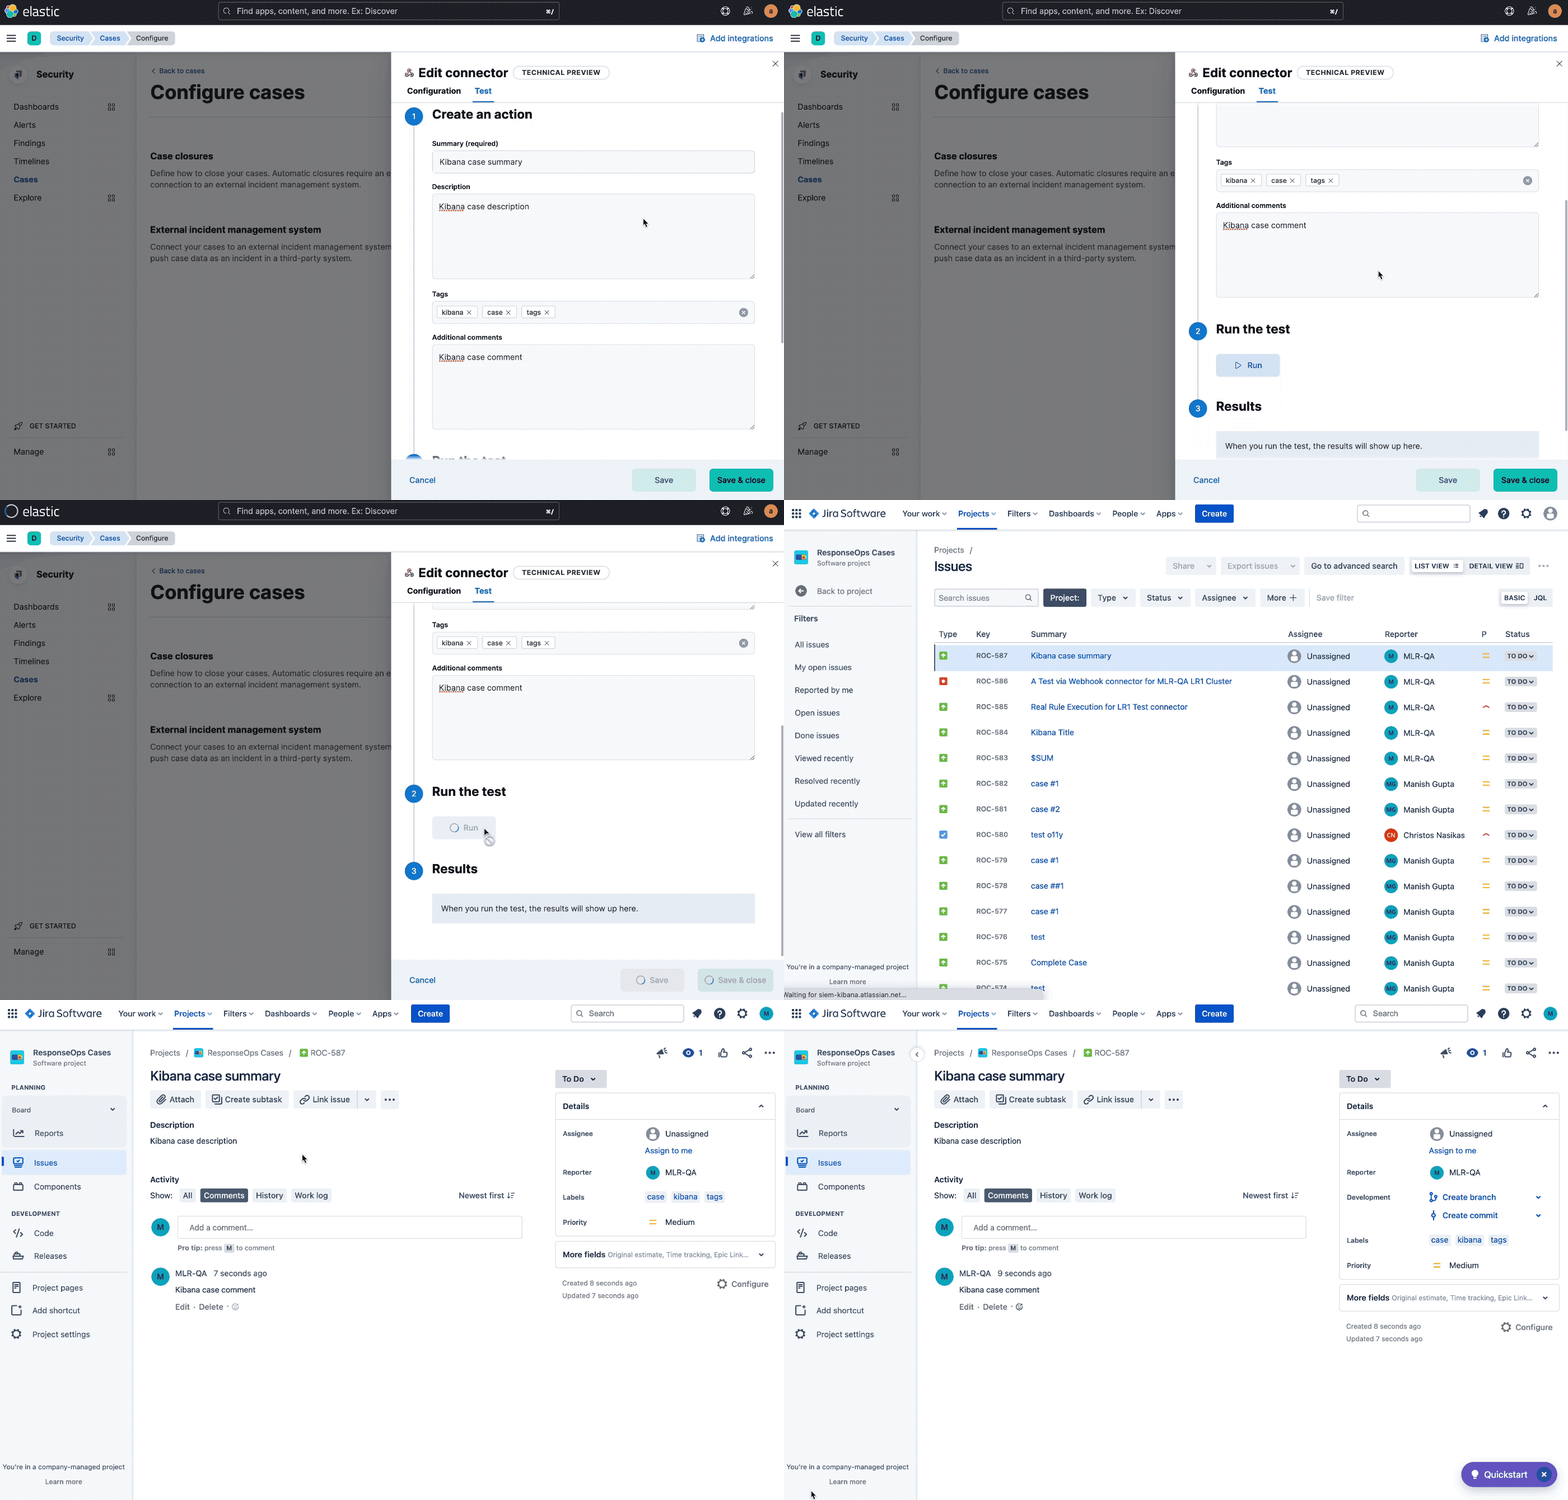
editYou can test connectors with the run connector API or as you’re creating or editing the connector in Kibana. For example:

Webhook - Case Management actions have the following configuration properties:
- Title
- A title for the issue, which is used for searching the contents of the knowledge base.
- Description
- The details about the incident.
- Labels
- The labels for the incident.
- Additional comments
- Additional information for the client, such as how to troubleshoot the issue.
Connector networking configuration
editUse the action configuration settings to customize connector networking configurations, such as proxies, certificates, or TLS settings. You can set configurations that apply to all your connectors or use xpack.actions.customHostSettings to set per-host configurations.