IMPORTANT: No additional bug fixes or documentation updates
will be released for this version. For the latest information, see the
current release documentation.
Configure service-level objective (SLO) access
edit
IMPORTANT: This documentation is no longer updated. Refer to Elastic's version policy and the latest documentation.
Configure service-level objective (SLO) access
editTo create and manage SLOs, you need an appropriate license.
You can create the following roles for your SLOs:
To create a role:
- From the left navigation in Kibana, under Management select Stack Management.
- Under Security, select Roles.
- Click Create role in the upper-right corner of the page.
Create an SLO All role
editSet the following privileges for the SLO All role:
-
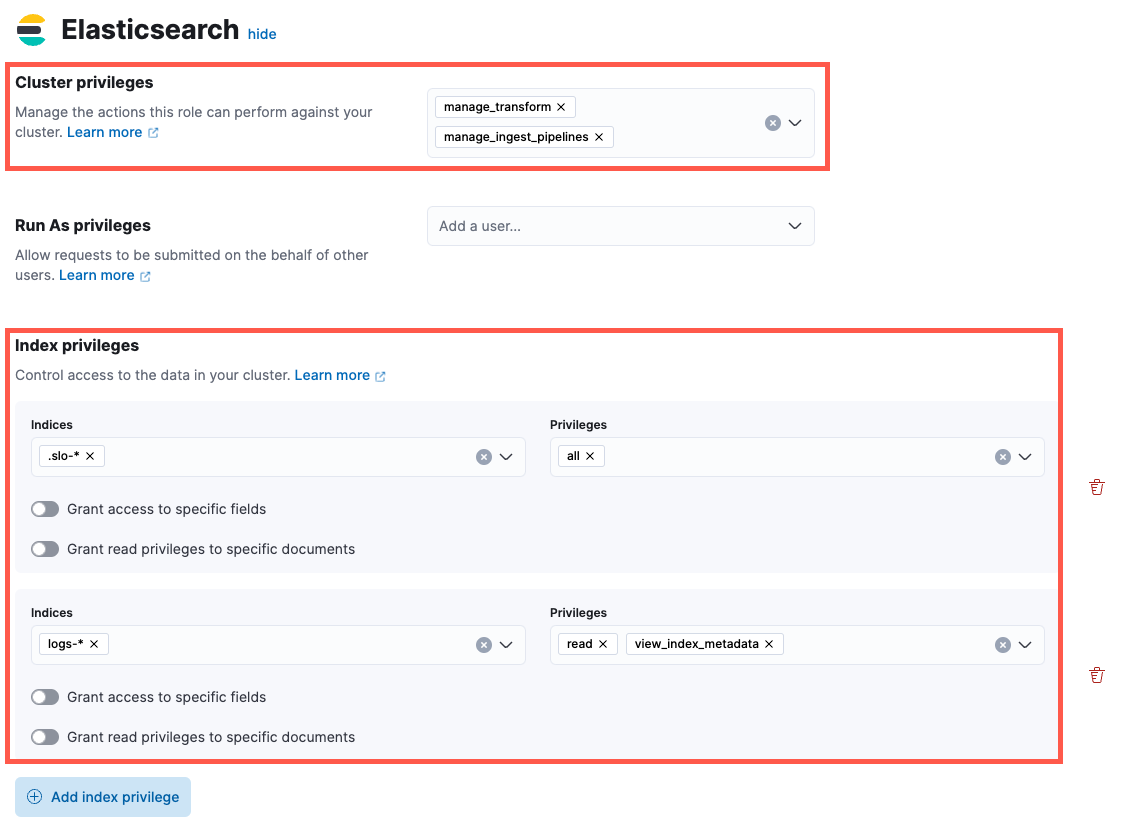
Under Cluster privileges in the Elasticsearch section, add
manage_transformandmanage_ingest_pipelines. -
Under Index privileges, add
.slo-*to the Indices field andallto the Privileges field. - Click Add index privilege.
-
Add indices you plan to create SLOs for to the Indices field, and add read and view_index_metadata to the Privileges field. The following example shows
logs-*, but you can specify any indices.
- In the Kibana section, click Add Kibana privilege.
- From the Spaces dropdown, either select any specific spaces you want the role to apply to, or select All Spaces.
-
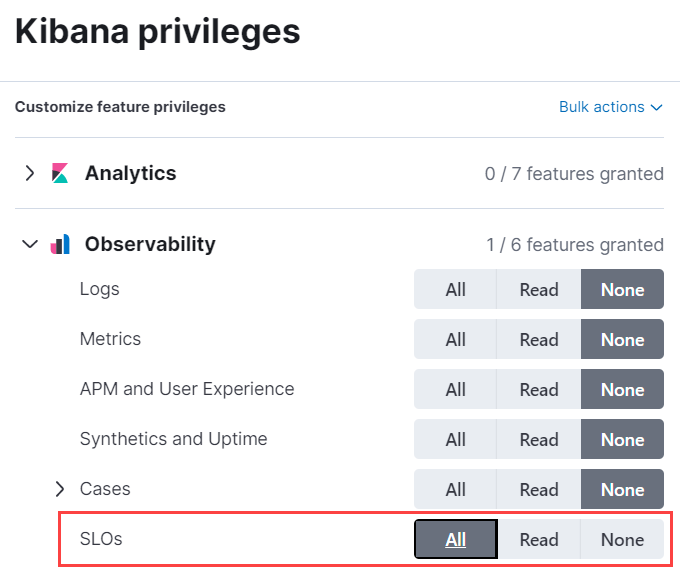
Set Observability → SLOs to
All.
Create an SLO Read role
editSet the following privileges for the SLO Read role:
-
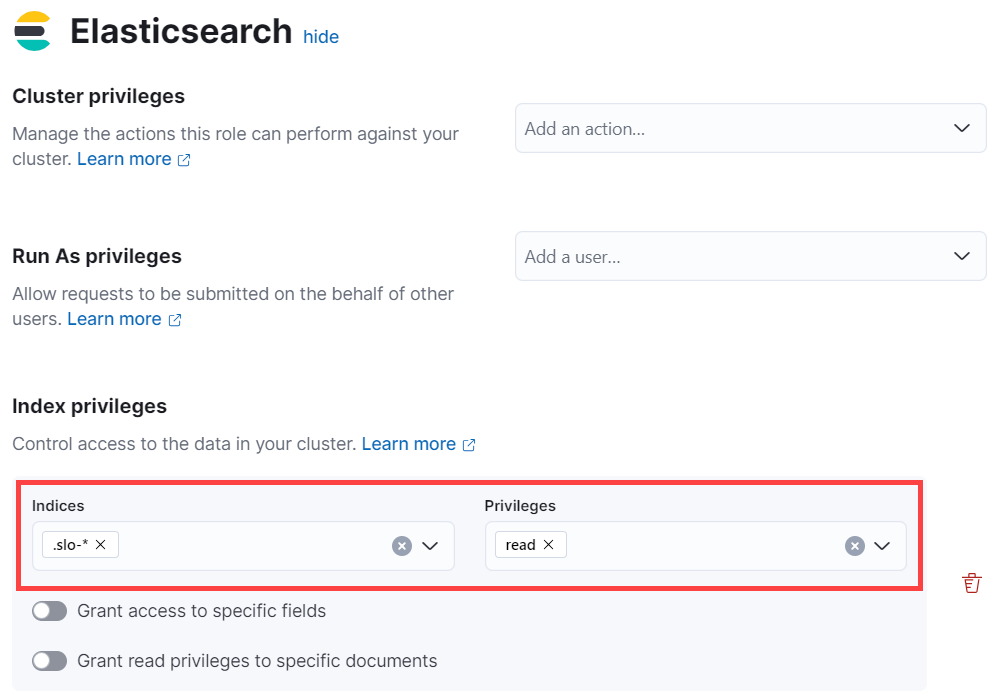
Under Index privileges in the Elasticsearch section, add
.slo-*to the Indices field andreadto the Privileges field.
- In the Kibana section, click Add Kibana privilege.
- From the Spaces dropdown, either select any specific spaces you want the role to apply to, or select All Spaces.
-
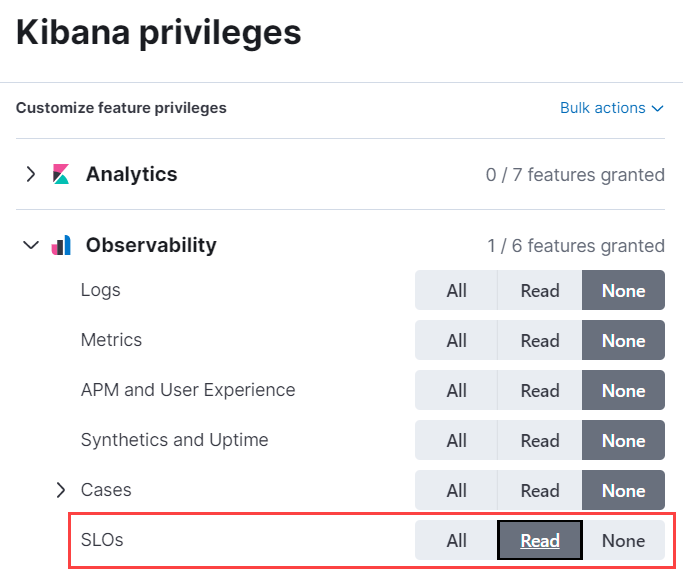
Set Observability → SLOs to
Read.