Detections prerequisites and requirements
editDetections prerequisites and requirements
editTo use the Detections feature, you need to configure a few things.
There are a number of step that are only required for self-managed Elastic Stack deployments. If you are using an Elastic Cloud deployment, you only need to configure Enable Detections and Access and use Detections.
Additionally, there are some advanced settings used to configure Kibana value list upload limits.
You need the appropriate license to send notifications when detection alerts are generated.
Configure self-managed Elastic Stack deployments
editThese steps are only required for self-managed deployments:
- HTTPS must be configured for communication between Elasticsearch and Kibana.
-
In the
elasticsearch.ymlconfiguration file, set thexpack.security.enabledsetting totrue. For more information, see Configuring Elasticsearch and Security settings in Elasticsearch. -
In the
kibana.ymlconfiguration file, add thexpack.encryptedSavedObjects.encryptionKeysetting with any alphanumeric value of at least 32 characters. For example:xpack.encryptedSavedObjects.encryptionKey: 'fhjskloppd678ehkdfdlliverpoolfcr'
After changing the xpack.encryptedSavedObjects.encryptionKey value
and restarting Kibana, you must restart all detection rules.
Enable Detections
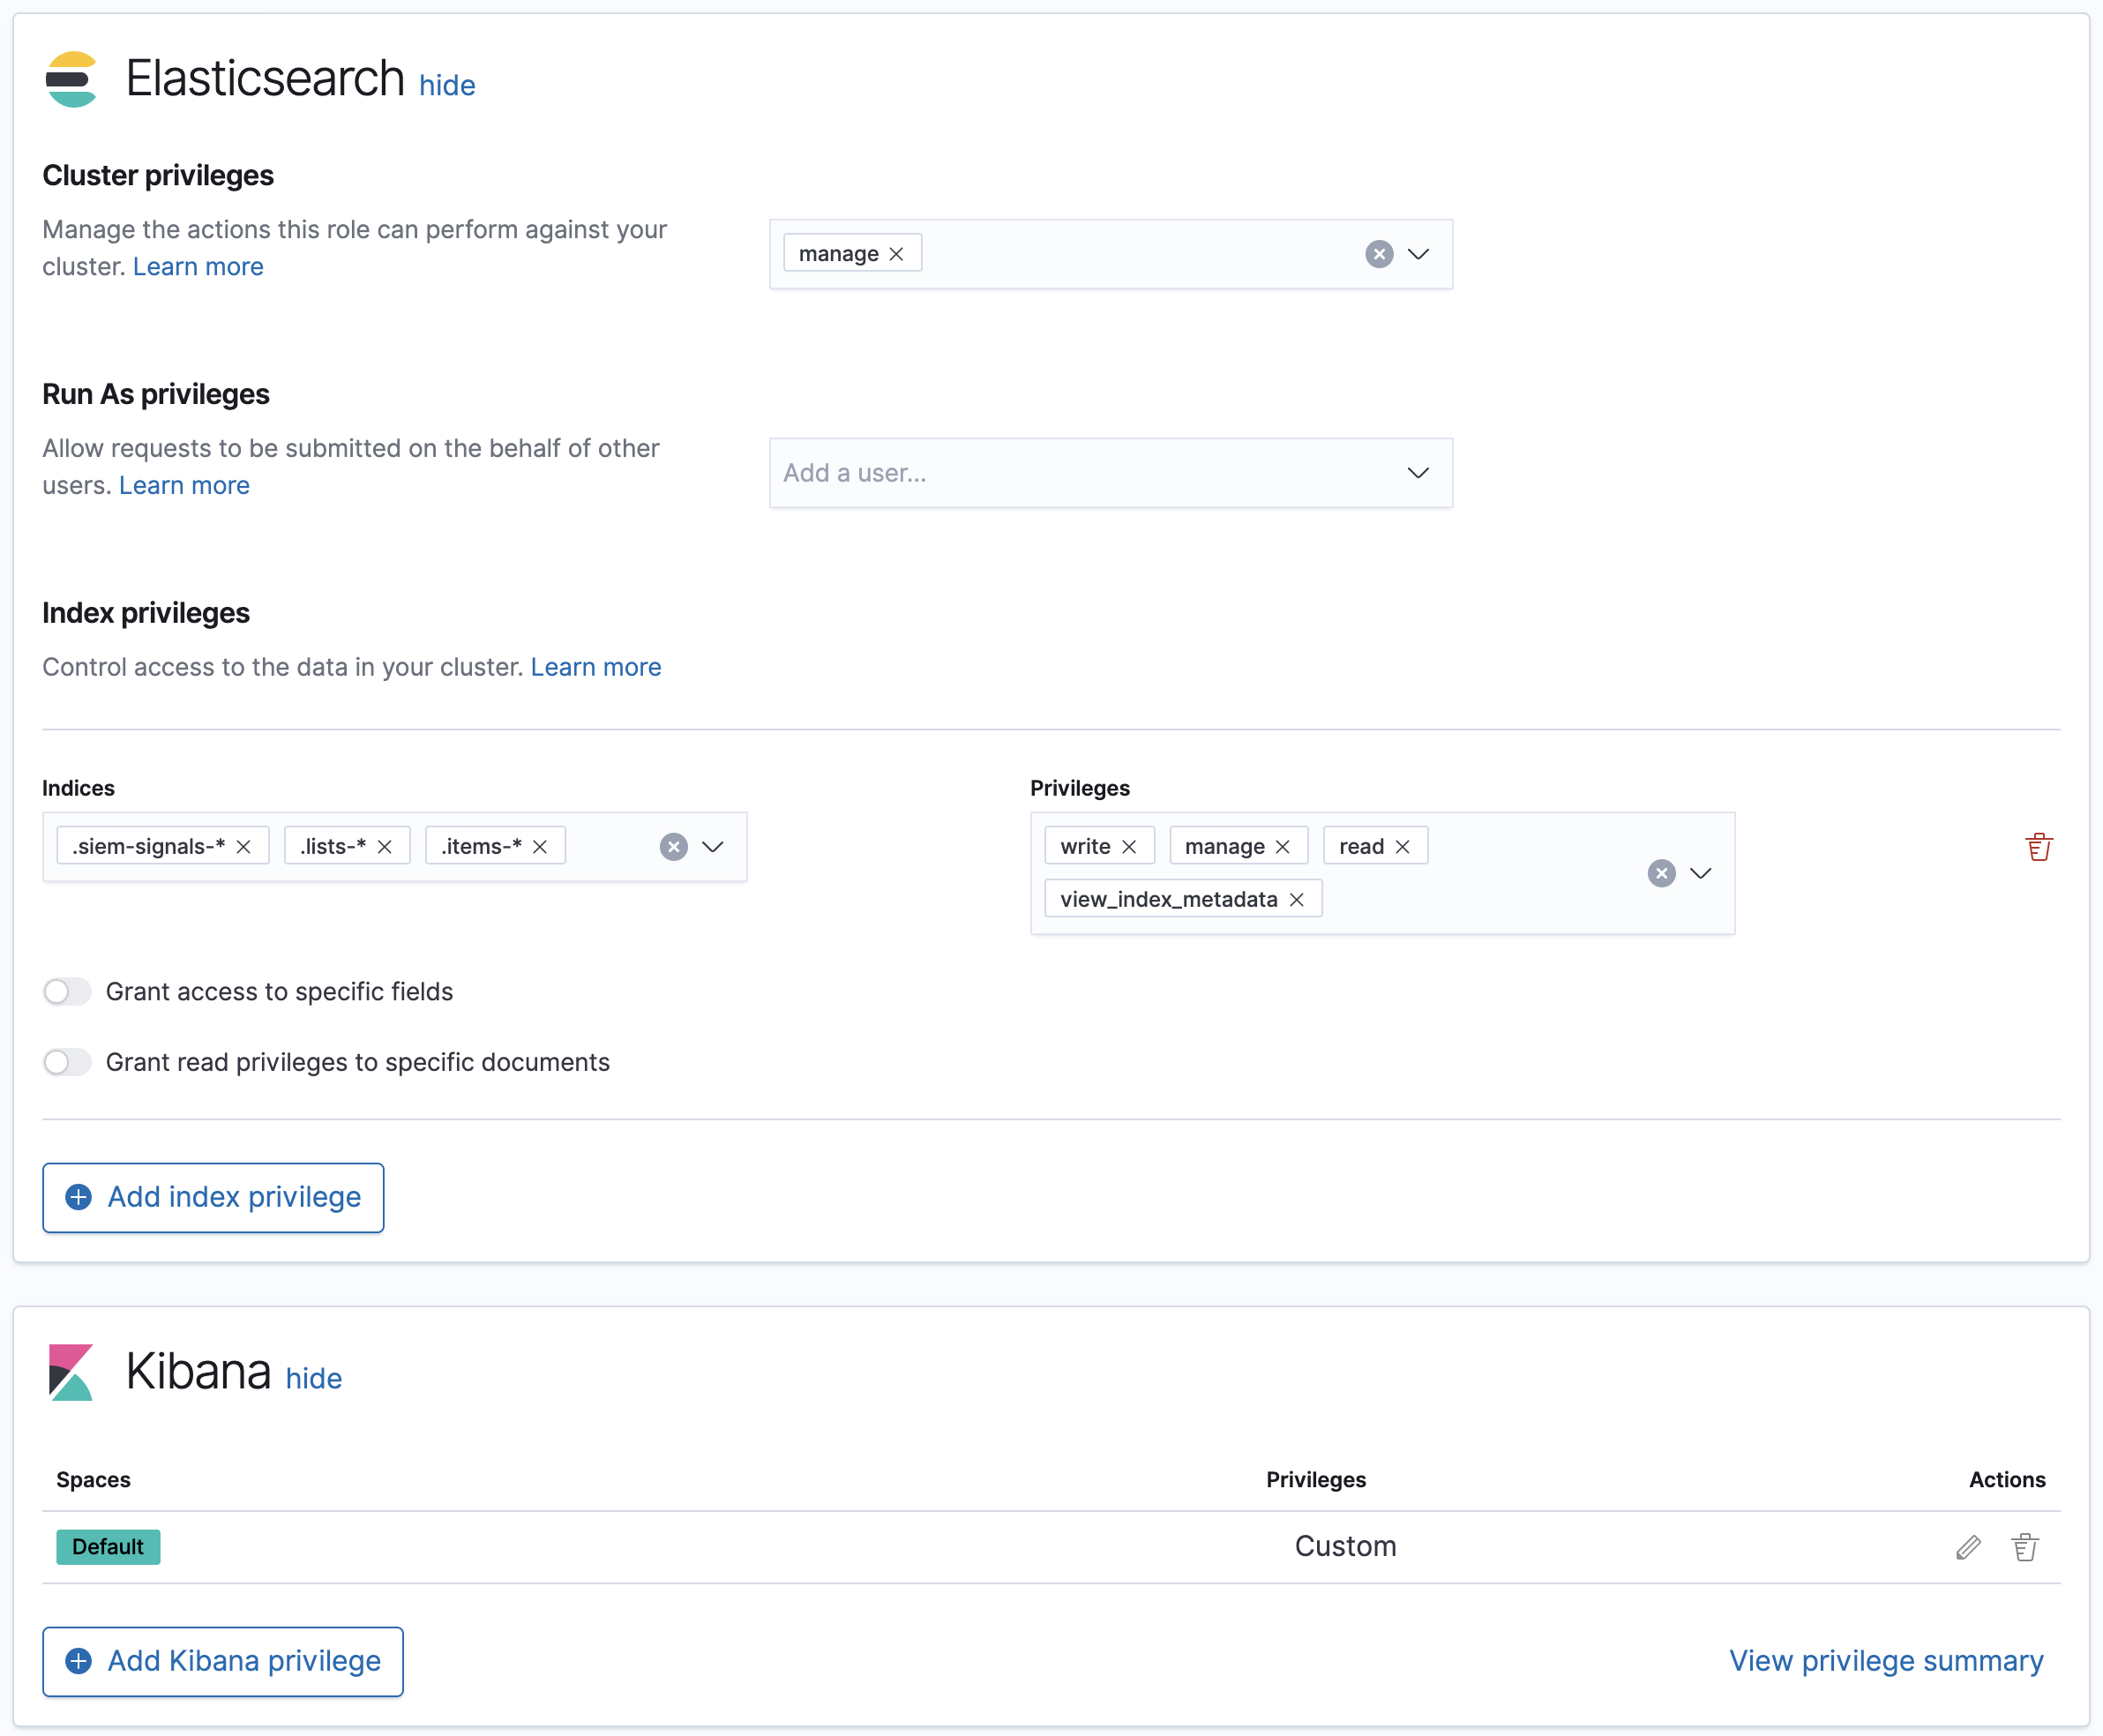
editTo enable the Detections feature, a user with these privileges must visit (click on) the Detections page:
-
The
managecluster privilege. -
Kibana space
Allprivileges for theSecurityfeature (see Feature access based on user privileges). -
The
manage,write,read, andview_index_metadataindex privileges for all of these system indices:-
.siem-signals-<kib-space> -
.lists-<kib-space> -
.items-<kib-space>Where
<kib-space>is the Kibana space name.
-
-
If you want to allow the user to create rules as well as enable the
Detections feature, Kibana space
Allprivileges for theSaved Objects Management.
For more information on cluster and index privileges, see Elasticsearch security privileges.
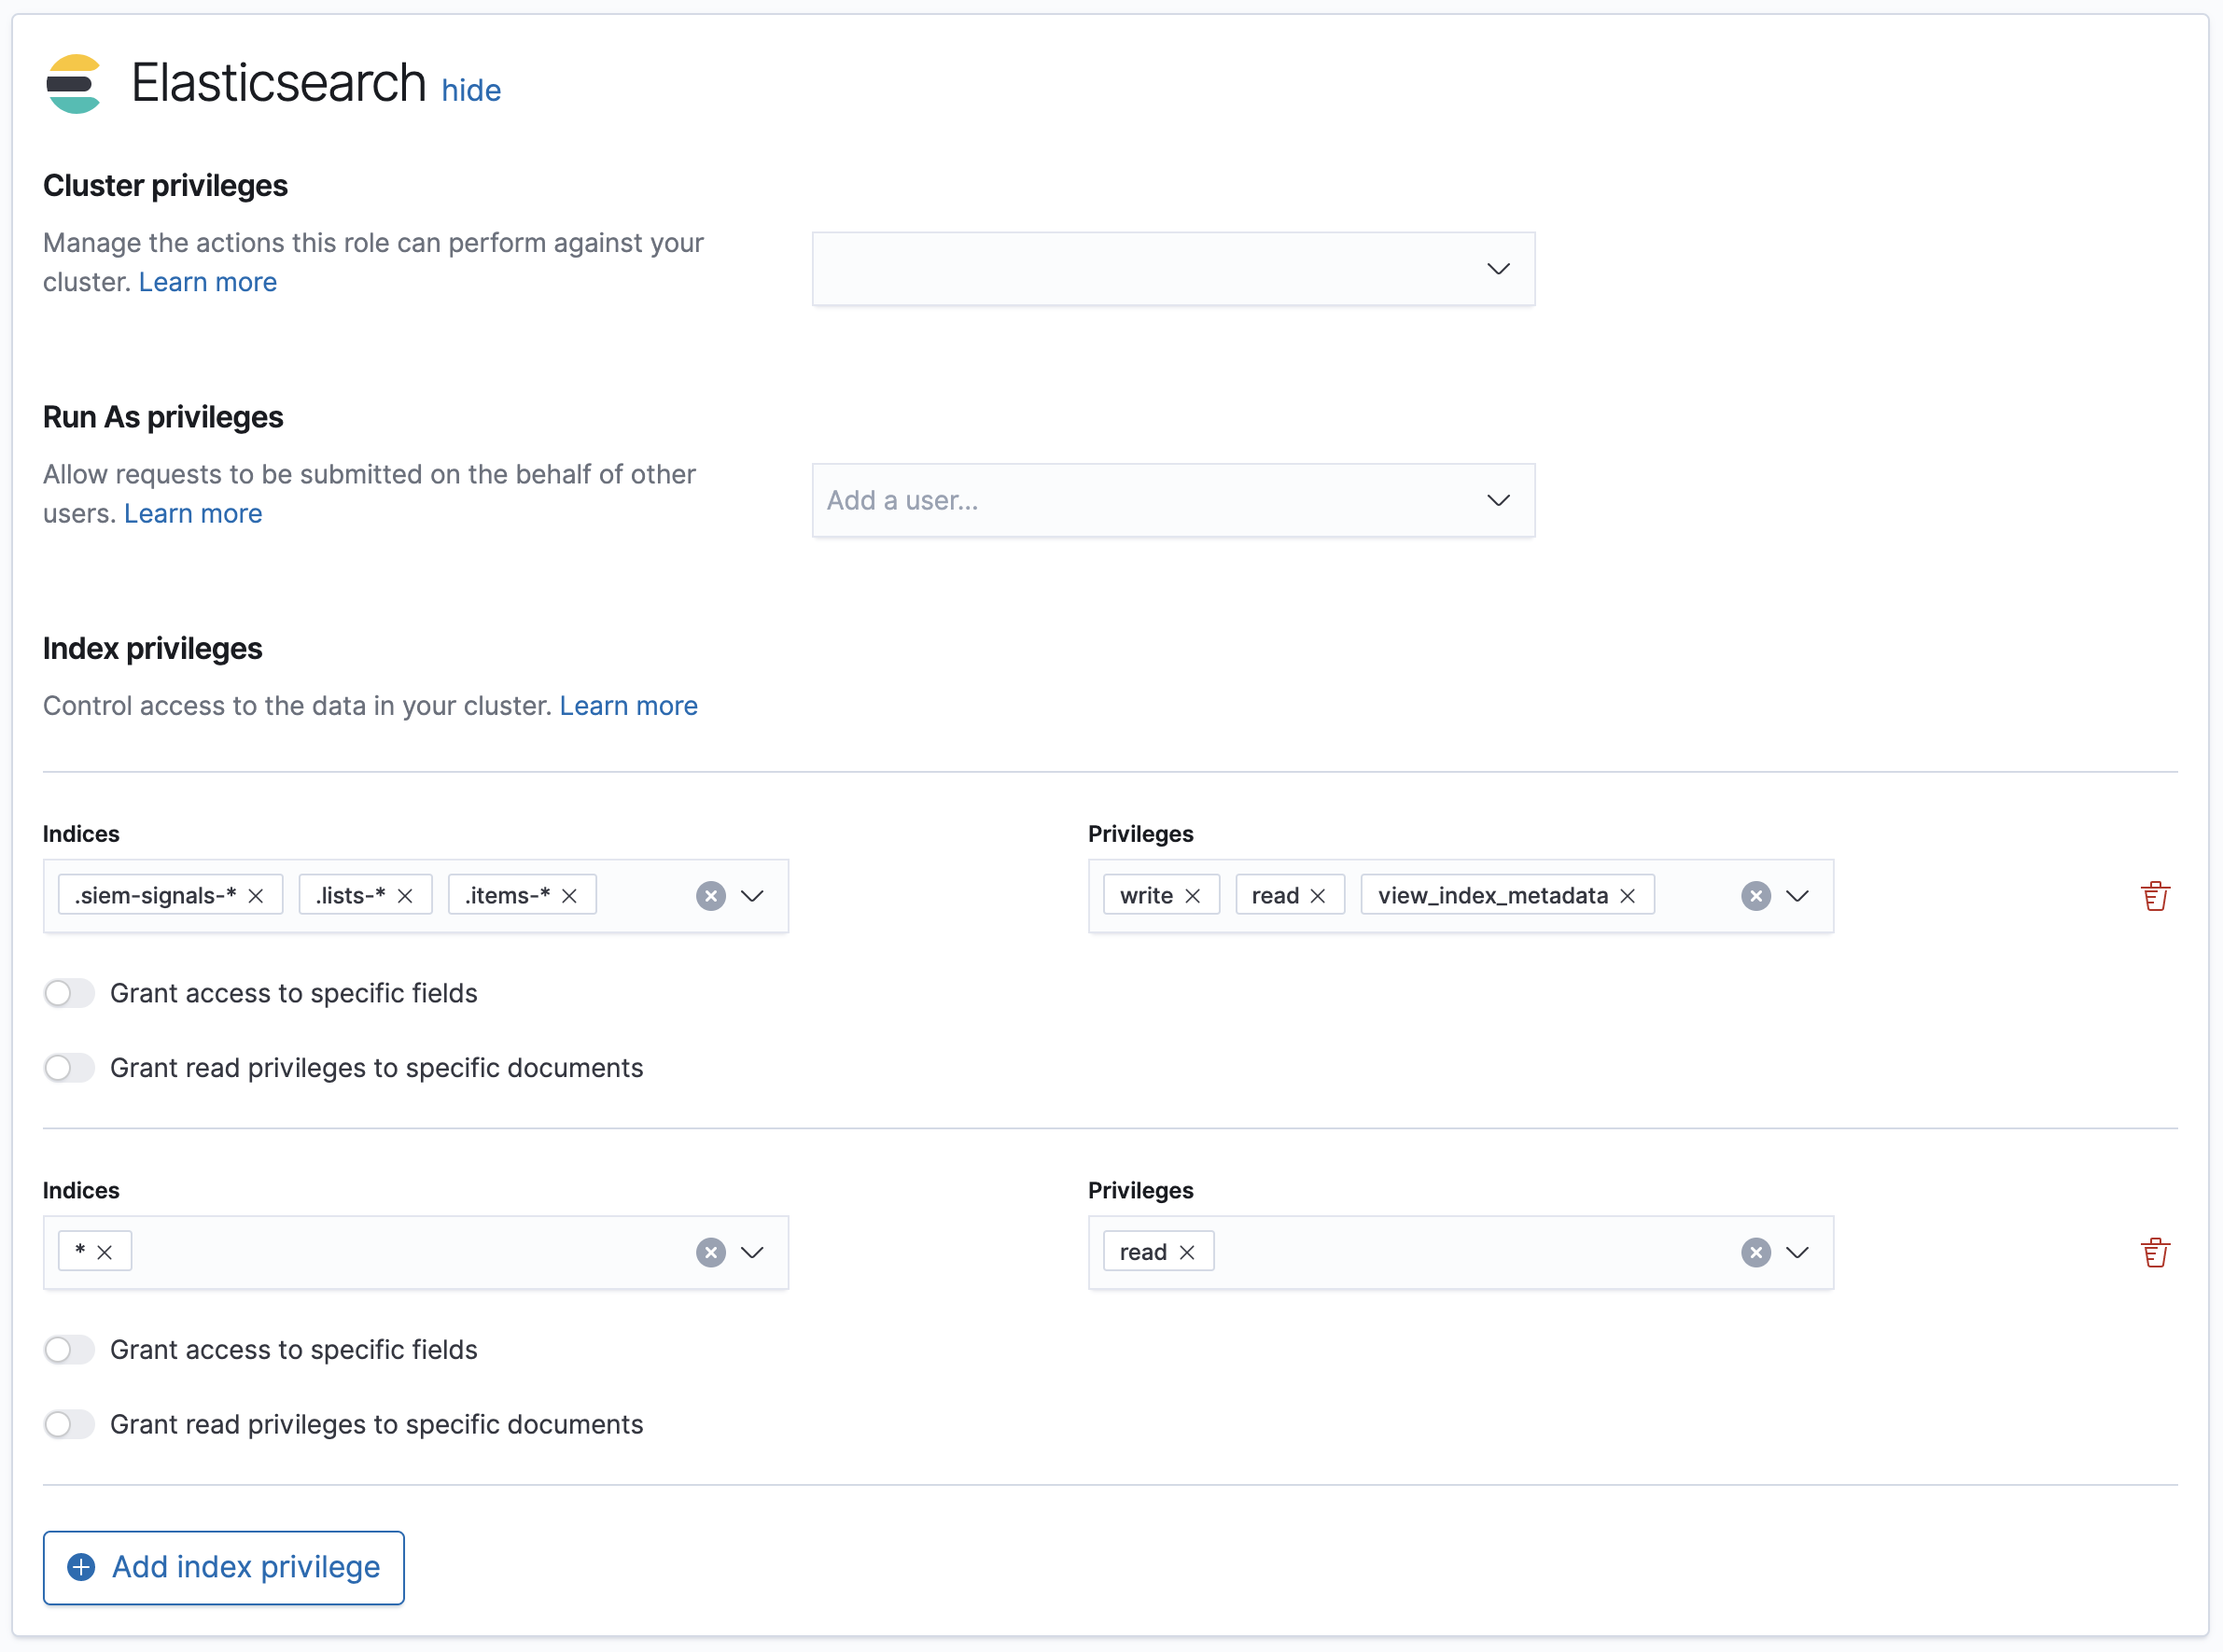
To create a user who can enable Detections in all Kibana spaces, use glob
patterns. For example, .siem-signals-*, .lists-*, and .items-*.
Here’s a screenshot of a user role that can enable Detections in all Kibana spaces:

Access and use Detections
editAfter enabling Detections, only users with these permissions can view and use rules and alerts on the Detections page:
All
These permissions are required for both rule and alert management:
-
Kibana space with
Allprivileges enabled forSecurity. -
The
read,write,view_index_metadata, andmaintenanceindex privileges for all of these system indices:-
.siem-signals-<kib-space> -
.lists-<kib-space> -
.items-<kib-space>Where
<kib-space>is the Kibana space name.
-

Rule
For rule management, make sure Kibana space with All privileges is enabled for both Security and Saved Objects Management features.
Alert
If you only want a user to update the status of alerts but not rule, only Kibana space with All privileges enabled for Security is required.
Configure list upload limits
editYou can set limits to the number of bytes and the buffer size used to upload values lists to Kibana.
To set the value:
-
Open
kibana.ymlconfiguration file or edit your Kibana cloud instance. -
Add any of these settings and their required values:
-
xpack.lists.maxImportPayloadBytes: Sets the number of bytes allowed for uploading Security Solution value lists (default9000000, maximum100000000). For every 10 megabytes, it is recommended to have an additional 1 gigabyte of RAM reserved for Kibana.For example, on a Kibana instance with 2 gigabytes of RAM, you can set this value up to 20000000 (20 megabytes).
-
xpack.lists.importBufferSize: Sets the buffer size used for uploading Security Solution value lists (default1000). Change the value if you are experiencing slow upload speeds or larger than wanted memory usage when uploading value lists. Set to a higher value to increase throughput at the expense of using more Kibana memory, or a lower value to decrease throughput and reduce memory usage.
-
For information on how to configure Elastic Cloud deployments, see Add Kibana user settings.