Rule exceptions and value lists
editRule exceptions and value lists
editTo prevent the creation of unwanted alerts, you can add exceptions to any rule. Exceptions contain the source event conditions that determine when alerts are not generated. They provide a convenient way of allowing trusted processes and network activity to function without producing unnecessary noise.
You can add multiple exceptions to one rule.
In addition to defining exception queries for source event values, you can use rule exceptions with value lists. Value lists are lists of items with the same Elasticsearch data type. You can create value lists with these types:
-
Keywords(many ECS fields are keywords) -
IP Addresses -
IP Ranges -
Text
After creating value lists, you can use is in list and is not in list
operators to define exceptions.
Operators is in list and is not in list are not available for
threshold and event correlation rules.
Create value lists
editTo create a value list:
-
Prepare a
txtorcsvfile with all the values you want to use for determining exceptions from a single list. If you use atxtfile, new lines act as value delimiters.All values in the file must be of the same Elasticsearch type.
- Go to Detect → Rules.
-
Click Upload value lists. The Upload value lists window opens.
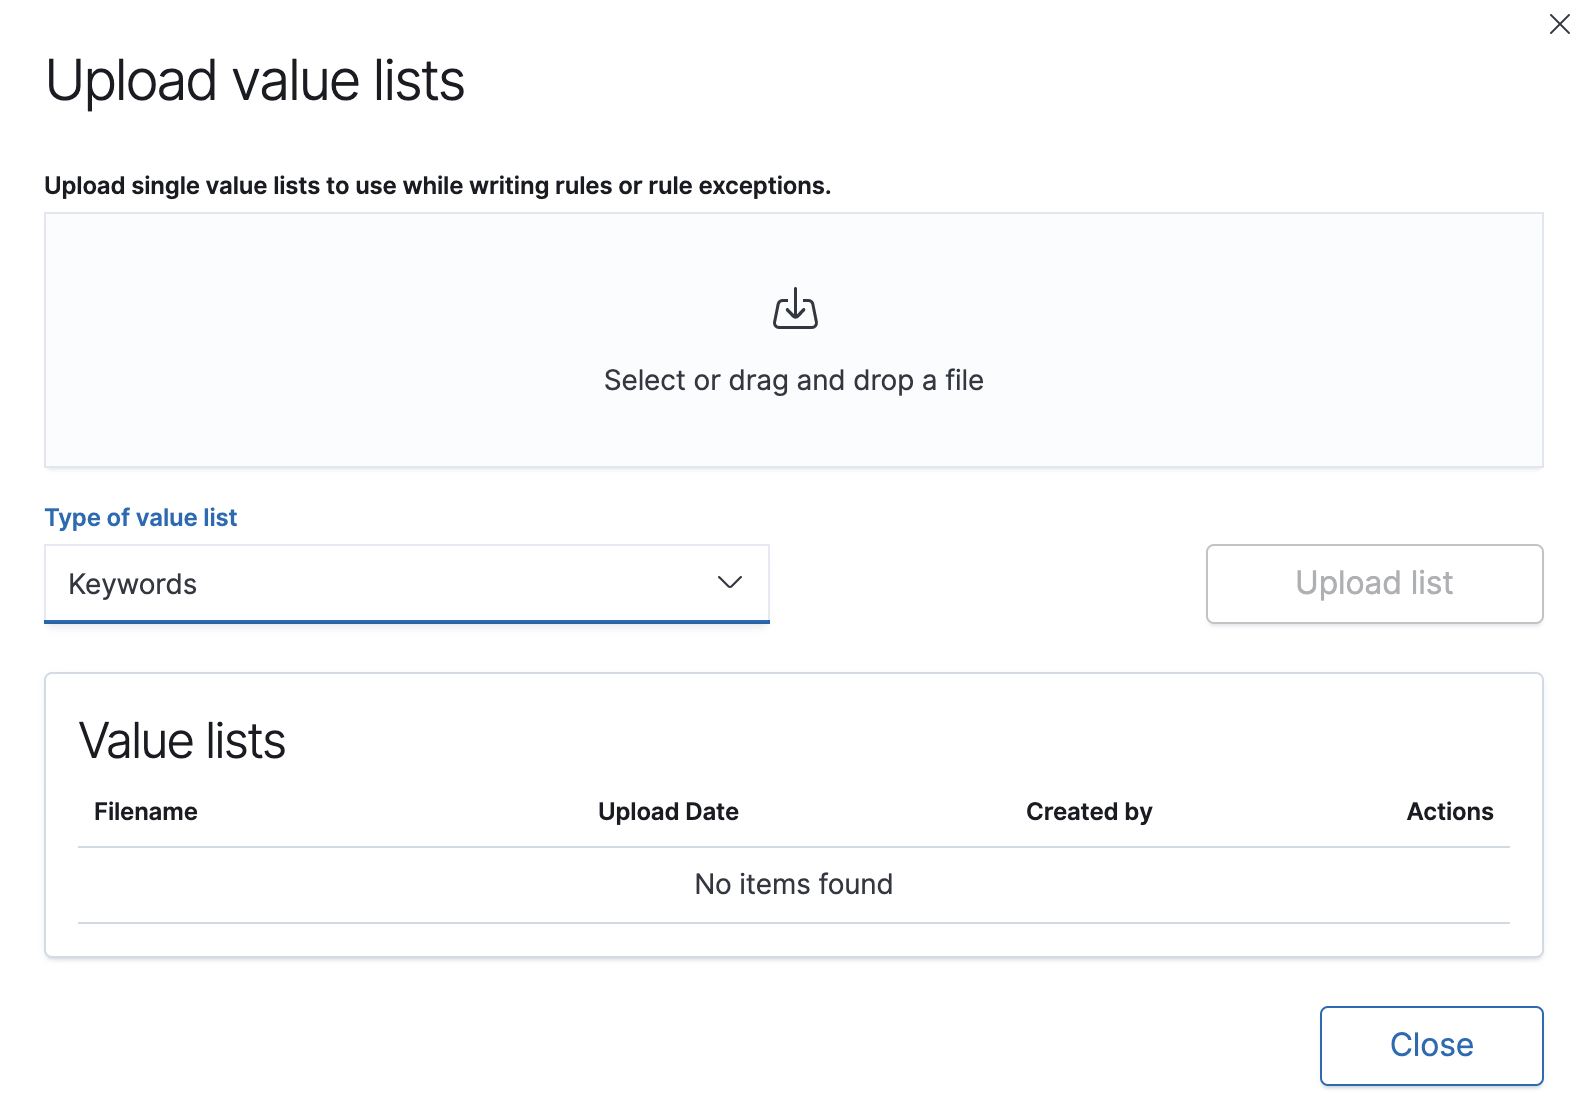
- Select the list type (Keywords, IP addresses, IP ranges, or Text) from the Type of value list drop-down.
-
Drag or select the
csvortxtfile that contains the values. - Click Upload list.
When the name of the file you are uploading already exists, the values in the new file are appended to the previously uploaded values.
Manage value lists
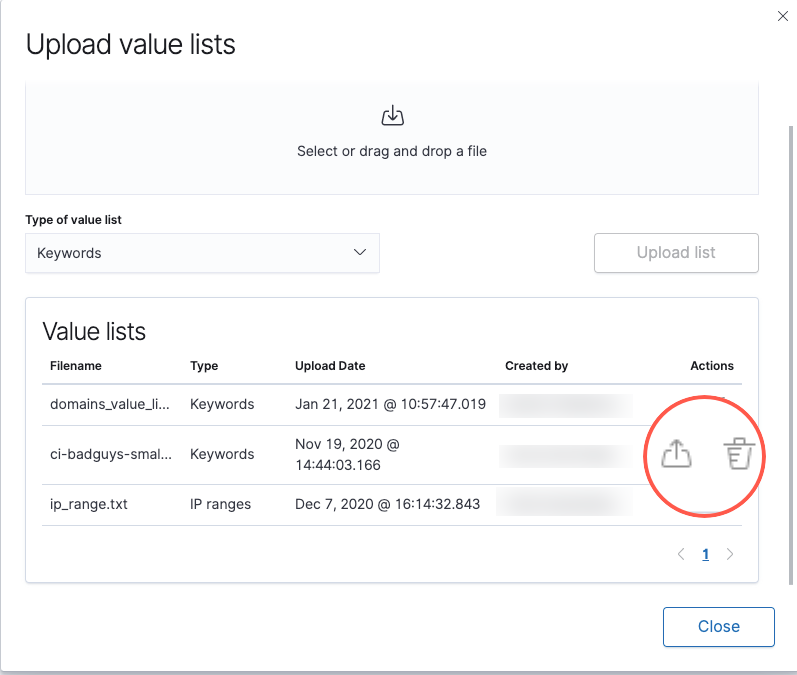
editTo view, delete, or export existing value lists:
- Go to Detect → Rules.
- Click Upload value lists. The Upload value lists window opens.
- In the Value lists table, click the required action button.
You can also use value lists as the indicator match index when creating an indicator match rule. See Use value lists with indicator match rules for more information.
Add exceptions to a rule
editYou can add exceptions to a rule via the rule details page or the Alerts table. When you add an exception, you can also close all alerts that meet the exception’s criteria.
To ensure an exception is successfully applied, make sure that the fields you’ve defined for the exception query are correctly and consistently mapped in their respective indices. Refer to ECS to learn more about supported mappings.
Be careful when adding exceptions to event correlation rules. Exceptions are evaluated against every event in the sequence, and when the exception matches any event(s) in the sequence, alerts are not generated. To exclude values from a specific event in the sequence, update the rule’s EQL statement. For example:
`sequence
  [file where file.extension == "exe"
  and file.name != "app-name.exe"]
  [process where true
  and process.name != "process-name.exe"]`
-
To add an exception via the rule details page:
- Go to the rule details page of the rule to which you want to add an exception (Detect → Rules → <rule name>).
-
Scroll down to the Trend histogram and select the Exceptions tab.
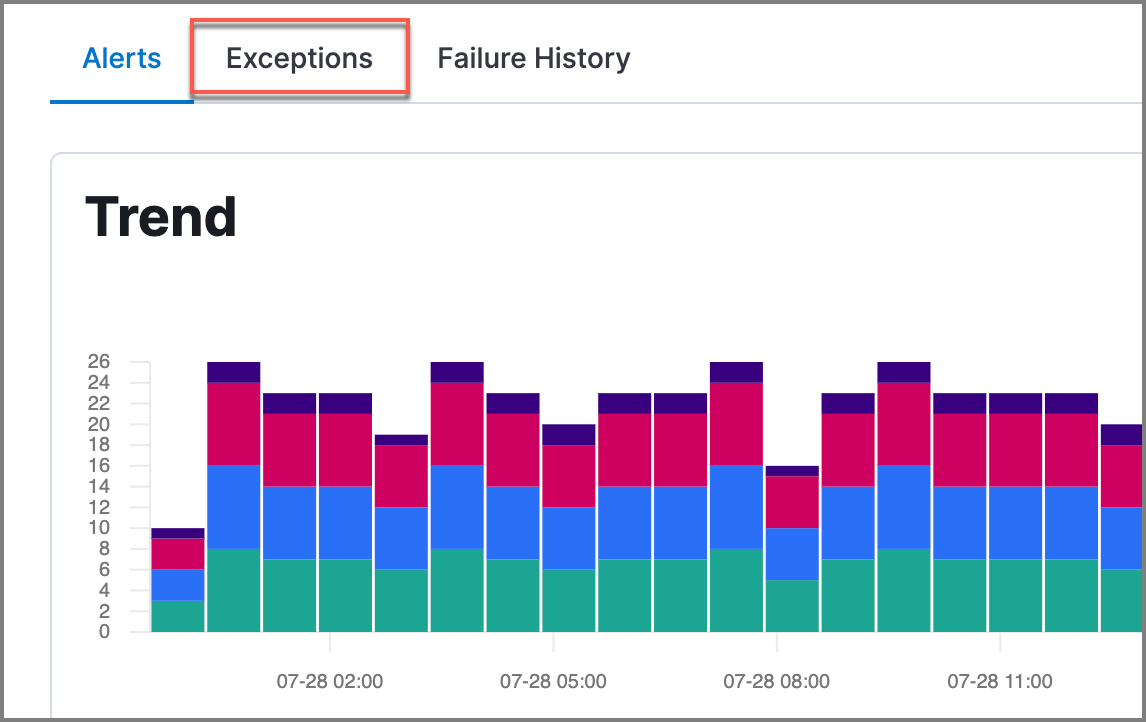
- Click Add new exception → Add rule exception.
-
To add an exception via the Alerts table:
- Go to Detect → Alerts.
-
Scroll down to the Alerts table and click the More Actions button (…), then select Add rule exception.
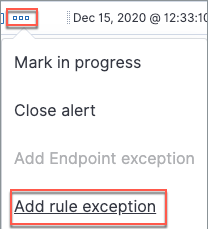
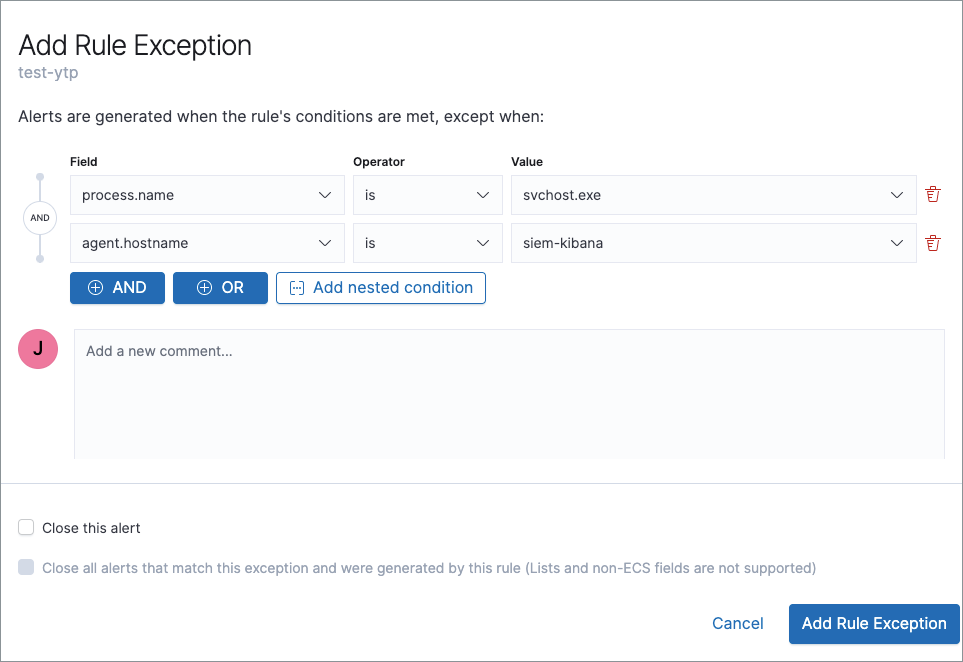
The Add Rule Exception window opens (via the Alerts table).
-
Add conditions that define when the exception prevents alerts. You can define multiple conditions with
ORandANDrelationships. In the example above, the exception prevents the rule from generating alerts when thesvchost.exeprocess runs on agent hostnamesiem-kibana.You can use nested conditions. However, this is only required for these fields. For all other fields, nested conditions should not be used.
If you have created value lists, you can use them to exclude or include all values in a list with
is in listandis not in listoperators: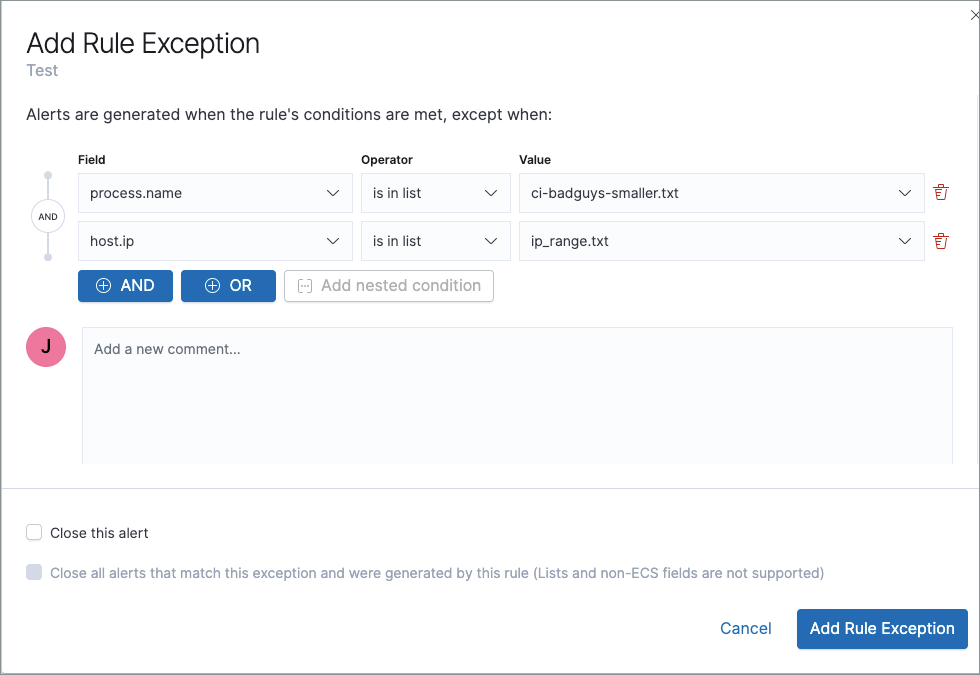
When using a list, all exception statements must use
is in listandis not in listoperators. -
Select one of the following alert actions:
- Close this alert: Closes the alert when the exception is added. This option is only available when adding exceptions via the Alerts table.
- Close all alerts that match this exception and were generated by this rule: Closes all alerts that match the exception’s conditions and were generated only by the current rule.
- Click Add Rule Exception.
Add Elastic Endpoint Security exceptions
editLike detection rule exceptions, you can add Endpoint agent exceptions via both the Elastic Endpoint Security rule and its generated alerts. Alerts generated from the Elastic Endpoint Security rule have the following fields:
-
signal.original_event.module determined:endpoint -
signal.original_event.kind:alert
Additionally, you can add Endpoint exceptions via rules that are associated with Elastic endpoint rule exceptions. To associate rules, when creating or editing a rule select the Elastic endpoint exceptions option.
When you add an exception to the Elastic Endpoint Security rule, you can select to add the exception to the endpoint. When selected, the exception is added to both the detection rule and the Elastic Endpoint agent on your hosts.
Binary fields are not supported in detection rule exceptions.
Exceptions added to the Elastic Endpoint Security rule affect all alerts sent from the Endpoint agent. Be careful not to unintentionally prevent some Endpoint alerts.
-
To add an Endpoint exception via the rule details page:
- Go to the rule details page (Detect → Rules), and then search for and select the Elastic Security Endpoint rule.
- Scroll down to the Trend histogram and select the Exceptions tab.
- Click Add new exception → Add Endpoint exception.
-
To add an exception via the Alerts table:
- Go to Detect → Alerts.
-
Scroll down to the Alerts table, and from an Elastic Security Endpoint alert, click the More actions button (…), then select Add Endpoint exception.
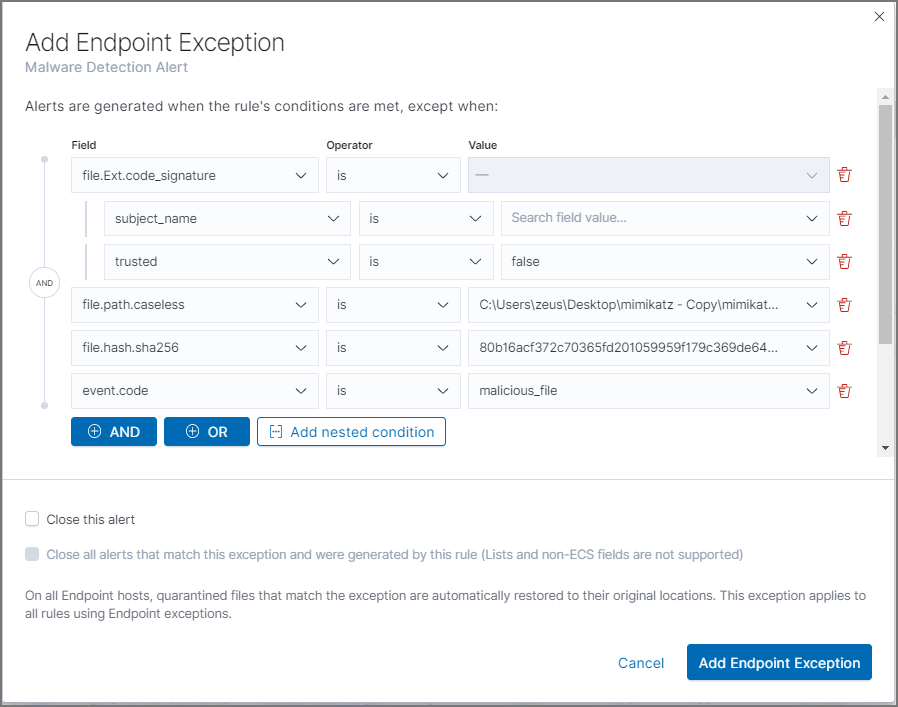
The Add Endpoint Exception window opens (via the Alerts table).
-
If required, modify the conditions.
Exceptions with nested conditions describes when nested conditions are required.
-
You can select any of the following:
- Close this alert: Closes the alert when the exception is added. This option is only available when adding exceptions via the Alerts table.
- Close all alerts that match this exception, including alerts generated by other rules: Closes all alerts that match the exception’s conditions.
-
Click Add Exception.
An exception is created for both the detection rule and the Elastic Endpoint agent.
Exceptions with nested conditions
editSome Endpoint objects contain nested fields, and the only way to ensure you are
excluding the correct fields is with nested conditions. One example is the
process.Ext object:
{
  "ancestry": [],
  "code_signature": {
    "trusted": true,
    "subject_name": "LFC",
    "exists": true,
    "status": "trusted"
  },
  "user": "WDAGUtilityAccount",
  "token": {
    "elevation": true,
    "integrity_level_name": "high",
    "domain": "27FB305D-3838-4",
    "user": "WDAGUtilityAccount",
    "elevation_type": "default",
    "sid": "S-1-5-21-2047949552-857980807-821054962-504"
  }
}
code_signature.subject_name refers to the process signature not the
process name.
Only these objects require nested conditions to ensure the exception functions correctly:
-
Endpoint.policy.applied.artifacts.global.identifiers -
Endpoint.policy.applied.artifacts.user.identifiers -
Target.dll.Ext.code_signature -
Target.process.Ext.code_signature -
Target.process.Ext.token.privileges -
Target.process.parent.Ext.code_signature -
Target.process.thread.Ext.token.privileges -
dll.Ext.code_signature -
file.Ext.code_signature -
file.Ext.macro.errors -
file.Ext.macro.stream -
process.Ext.code_signature -
process.Ext.token.privileges -
process.parent.Ext.code_signature -
process.thread.Ext.token.privileges
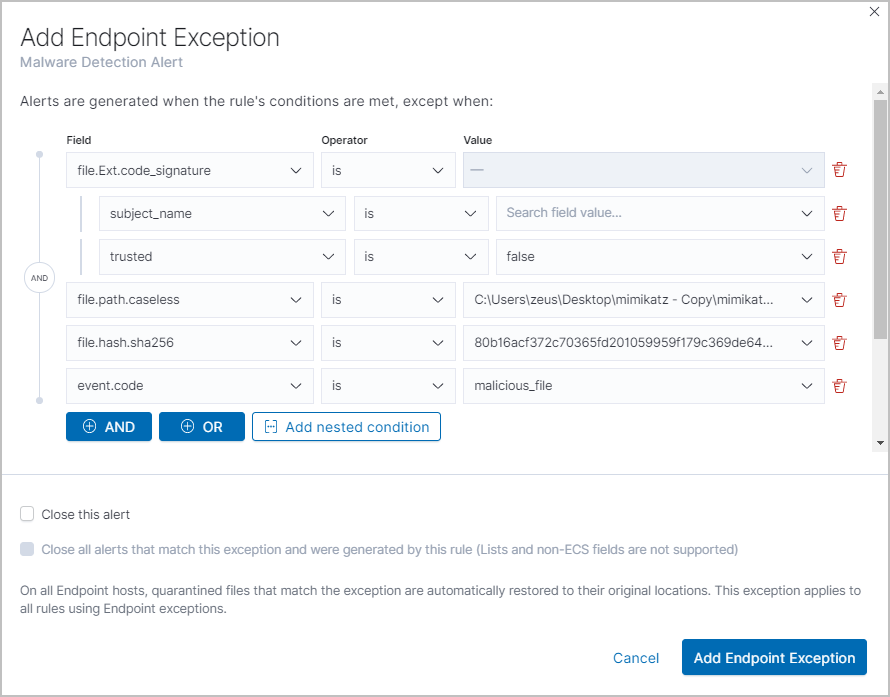
Nested condition example
editCreates an exception that excludes all LFC-signed trusted processes:
View and manage exception lists
editThe Exceptions table enables you to view and manage all exceptions that have been assigned to rules. To view the Exceptions table, go to Detect → Exceptions.
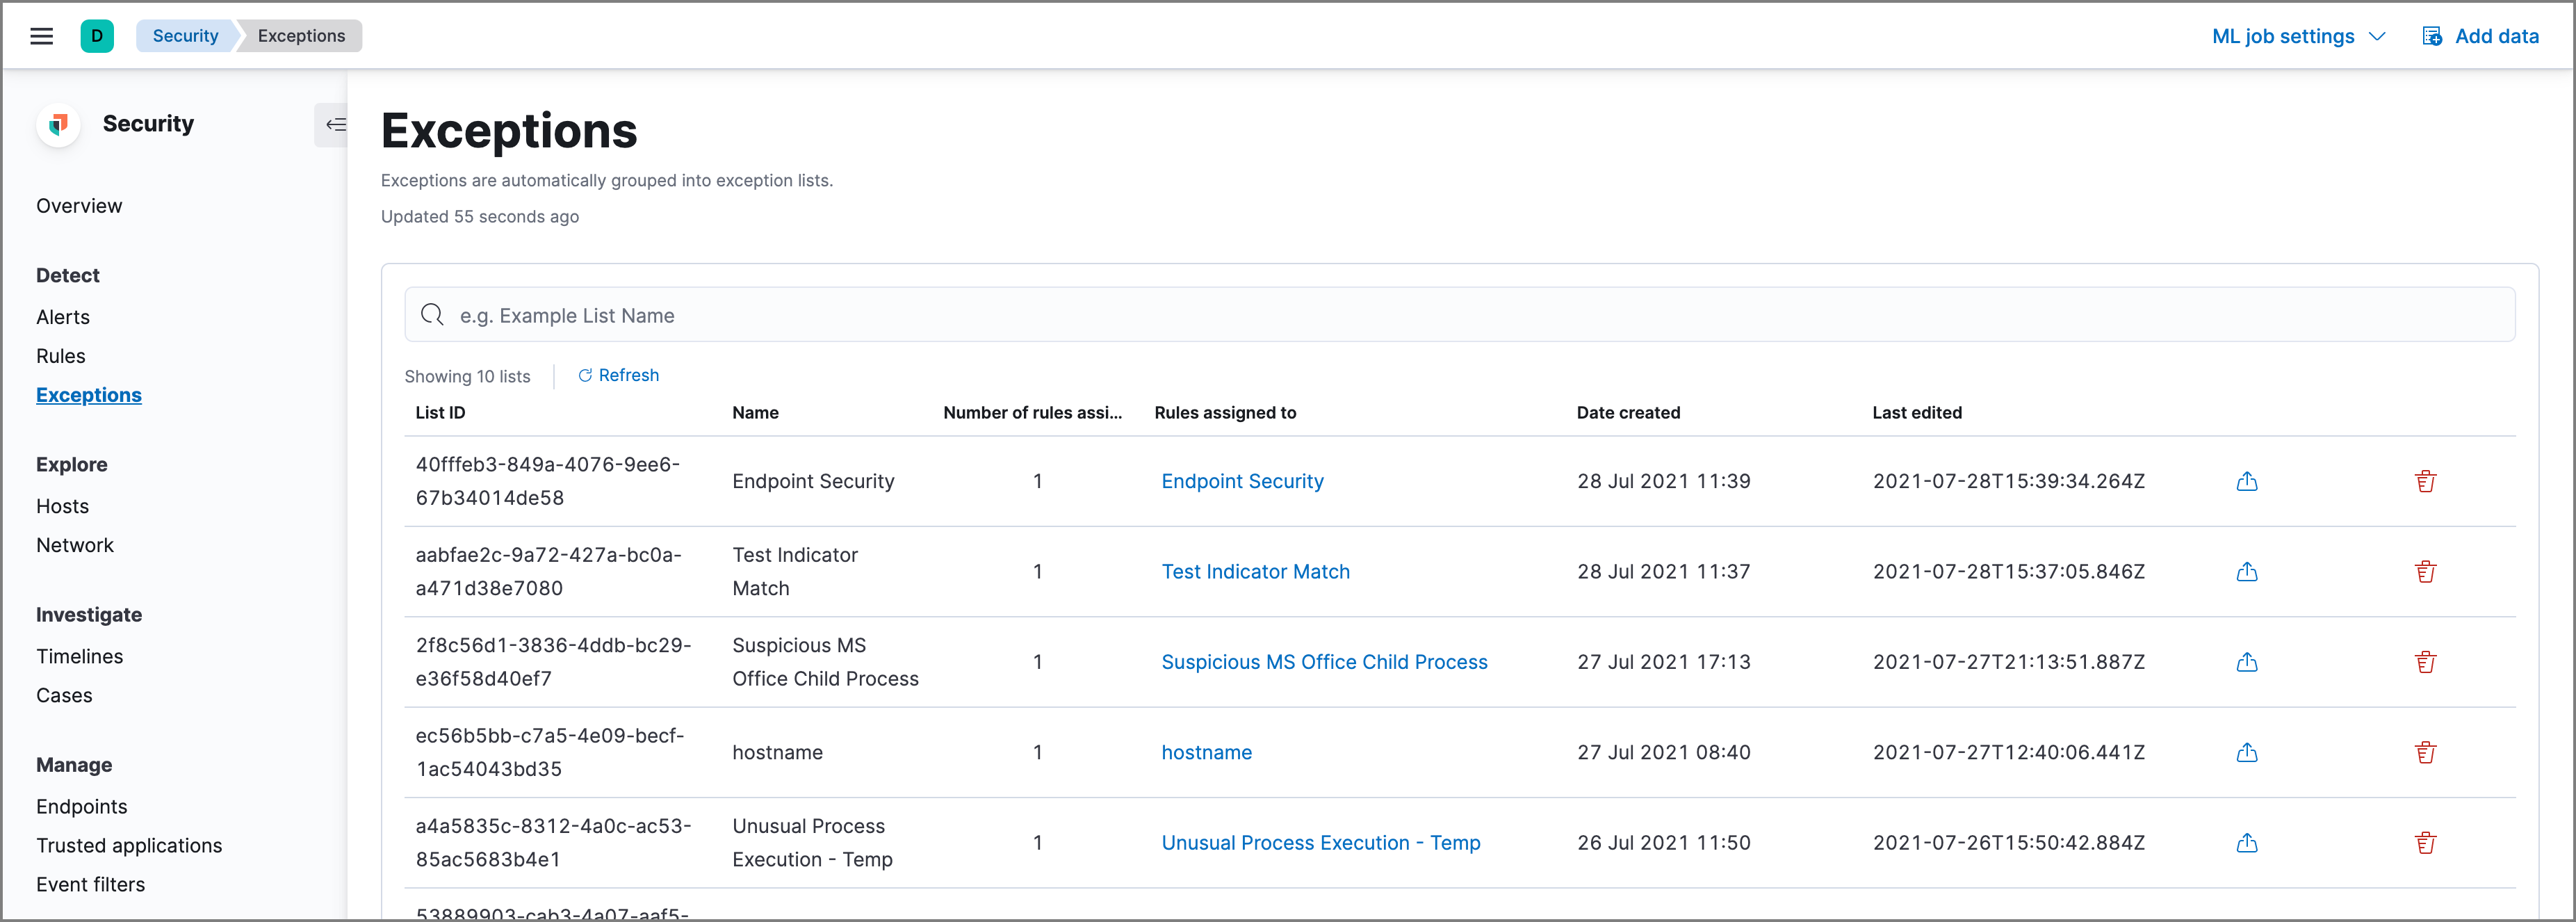
Exceptions are automatically grouped into exception lists. The table displays each exception list on an individual row, with the most recently created list at the top. Each row contains information such as the number and name of rule(s) the exception list is assigned to, the name of the rule(s) assigned to the exception list, the dates the list was created and last edited, and options to export or delete it.
To view details of the rule the exception list is assigned to, click the link in the Rules assigned to column.
To filter exception lists by a specific value, enter a query in the Search bar. You can search the following attributes:
-
name -
list_id -
created_by -
type -
tags
If no attribute is selected, the app searches the list name by default.
To export or delete an exception list, select the required action button on the appropriate list. Exception lists are exported to .ndjson format.
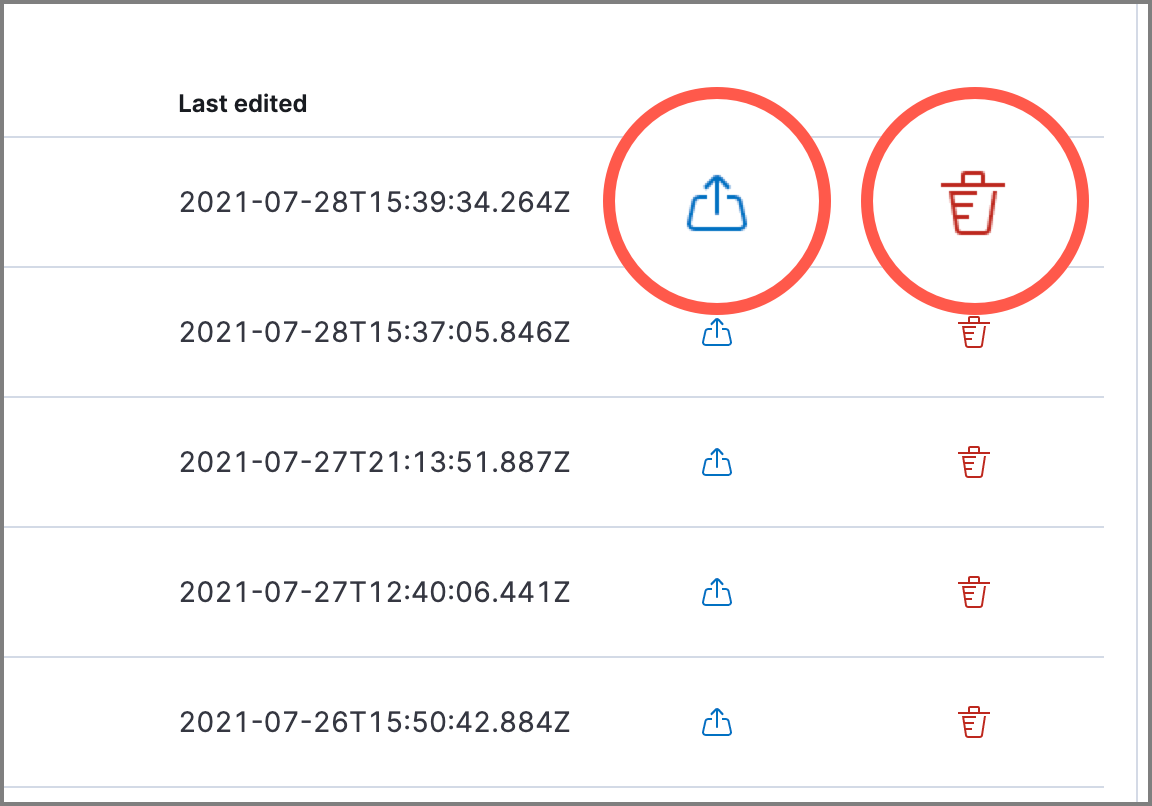
If a list is linked to any rules, you’ll see a warning appear that asks you to confirm the deletion. If no rules are linked to a list, it is deleted without confirmation.