How JetBrains uses .NET, Elasticsearch, CSVs, and Kibana for awesome dashboards
Recently, the JetBrains .NET advocacy team published a deep-dive post powered by data we retrieved from the official NuGet APIs with the goal of better understanding our community's OSS past and trying to predict trends into the future. This resulted in a giant dataset. Given our experience with Elasticsearch, we knew that the best tool to process millions of records was what we're calling the NECK stack: .NET, Elasticsearch, CSV, and Kibana.
In this blog, we'll explore what it took to retrieve the millions of package records, process them using .NET and JetBrains Rider, index them into Elasticsearch via the NEST client, and ultimately build the Kibana dashboards we used to generate our reports.
The NuGet API and Data
Most technology stacks have adopted open source and dependency management as core tenets, and Microsoft and .NET have done that enthusiastically so. For those unfamiliar with the .NET ecosystem, NuGet is the official package management protocol and service for .NET developers.
The NuGet ecosystem has grown substantially since its initial release in 2011, starting with a handful of packages to today's service hosting over 231,181 unique packages and close to 3 million permutations; that's a lot of data.
Luckily, Maarten Balliauw has done much of the heavy lifting to understand and retrieve the data from the NuGet API. In summary, we were able to loop through the NuGet API and retrieve the following pieces of information: Authors, icon URL, package Id, listing status, project URL, publish date, tags, target frameworks, package URL, package version, download numbers, and other unimportant data.
Once the process was complete, we had generated a 1.5 GB CSV file during our retrieval of data, likely the most massive CSV file we've ever seen. We attempted to open this file in some commonly-used spreadsheet tools like Excel, Google Spreadsheets, and Apple Numbers with no success, and frankly didn't have much hope of it working. Here's a small sample of that data.
PartitionKey,RowKey,Timestamp,Authors:String,IconUrl:String,Id:String,IsListed:Boolean,LicenseUrl:String,ProjectUrl:String,Published:DateTime,Tags:String,TargetFrameworks:String,Url:String,Version:String,VersionNormalized:String,VersionVerbatim:String,DownloadCount:Long,DownloadCountForAllVersions:Long,PackageType:String,IsVerified:Boolean
03.ADSFramework.Logging,1.0.0,2020-10-30T06:49:21.0291480Z,"ADSBI, Inc.",https://github.com/nathanadsbi/ADSIcon/blob/master/ads.ico?raw=true,03.ADSFramework.Logging,False,,"",1900-01-01T00:00:00.0000000Z,03.ADSBI 03.ADSFramework.Logging,"[""net461""]",https://globalcdn.nuget.org/packages/03.adsframework.logging.1.0.0.nupkg,1.0.0,1.0.0,1.0.0,,,,
03.ADSFramework.Logging,1.0.2,2020-10-30T06:49:22.4903642Z,"ADSBI, Inc.",https://github.com/nathanadsbi/ADSIcon/blob/master/ads.ico?raw=true,03.ADSFramework.Logging,False,,"",1900-01-01T00:00:00.0000000Z,03.ADSBI 03.ADSFramework.Logging,"[""net461""]",https://globalcdn.nuget.org/packages/03.adsframework.logging.1.0.2.nupkg,1.0.2,1.0.2,1.0.2,,,,
03.ADSFramework,1.0.0,2020-10-30T05:29:51.6321787Z,"Nathan Sawyer, Patrick Della Rocca, Shannon Fisher","",03.ADSFramework,False,,"",1900-01-01T00:00:00.0000000Z,"","[""net461"",""netstandard2.0""]",https://globalcdn.nuget.org/packages/03.adsframework.1.0.0.nupkg,1.0.0,1.0.0,1.0.0,,,,
We chose to represent the data in a comma-delimited format to allow for easy consumption of the information, which we'll see in the next section.
.NET Console Processing
Since adopting a cross-platform mantra, .NET has been a lot more interesting from a tooling and data-processing perspective. Developers can now write and execute the same code across all major operating systems: Windows, Linux, and macOS. As JetBrains .NET advocates, we love C#, and we also love the Elasticsearch client library, NEST, developed and maintained by Elastic. We were also able to tap into the OSS ecosystem and utilize the fantastic CsvHelper library, which makes processing CSV files effortless. Let's take a look at how we harnessed the OSS .NET ecosystem's power to consume and load 1.5 GB of data into Elasticsearch.
Processing CSVs using CSVHelper
CSV files aren't incredibly difficult to process, primarily when CsvHelper contributors have handled much of the hard work of determining and solving edge cases. To get started, we first need to install the NuGet package into our Console application, along with Newtonsoft.Json, a library designed to work with JSON.
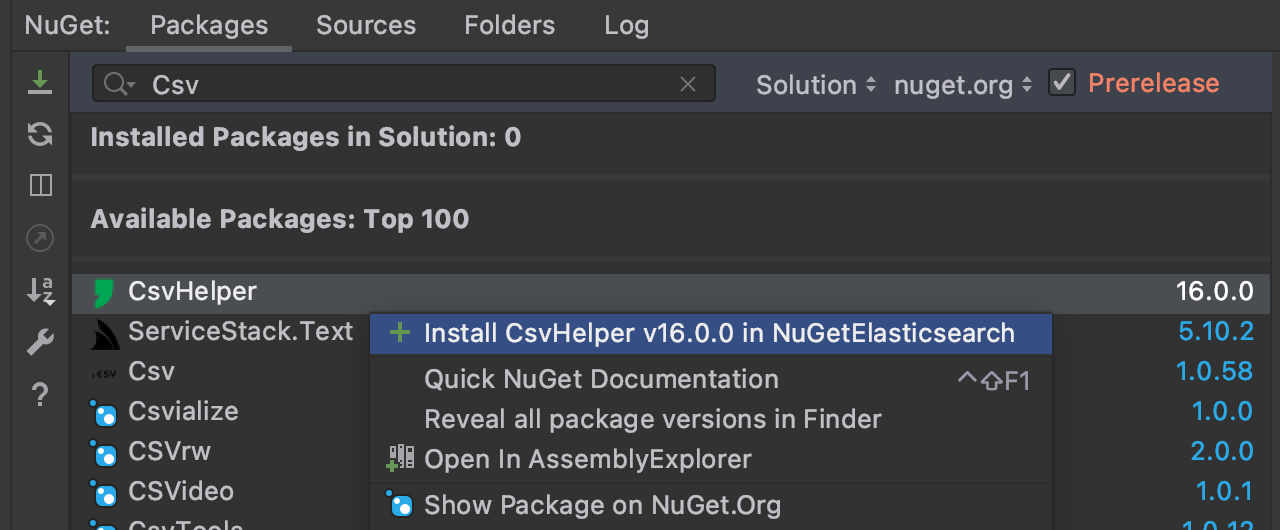
Once we install the package, we'll need to create a ClassMap definition. A ClassMap allows us to define which corresponding CSV columns we assign to our C# class properties. Like most data projects, our data is rarely perfect, and we need to account for strange edge cases and broken rows. We can also take this opportunity to normalize data before it goes into our Elasticsearch index.
public class NugetRecordMap : ClassMap<Package>
{
    public NugetRecordMap()
    {
        string [] ToStringArray(string value)
        {
            if (string.IsNullOrWhiteSpace(value))
                return new string [0];

            try
            {
                // just because we have brackets doesn't mean
                // we have a JSON Array... trust me
                if (
                    value.StartsWith("[") &&
                    value.EndsWith("]") &&
                    value.Count(x => x == '[') == 1 &&
                    value.Count(x => x == ']') == 1)
                {
                    return DeserializeObject<string []>(value);
                }
            }
            catch
            {
            }

            try
            {
                return value
                    .Replace("[", string.Empty)
                    .Replace("]", string.Empty)
                    .Split(' ', StringSplitOptions.TrimEntries | StringSplitOptions.RemoveEmptyEntries);
            }
            catch
            {
            }

            return new string[0];
        }

        var exclude = new [] { "LLC", "Inc." };

        // used for Elasticsearch
        Map(m => m.Id).Ignore();
        Map(m => m.License).Ignore();
        Map(m => m.PartitionKey).Name("PartitionKey");
        Map(m => m.RowKey).Name("RowKey");
        Map(m => m.Authors).ConvertUsing(r =>
            {
               return r
                    .GetField("Authors:String")?
                    .ToLowerInvariant()
                    .Replace("and other contributors", string.Empty)
                    .Replace("and contributors", string.Empty)
                    .Split(',', StringSplitOptions.RemoveEmptyEntries | StringSplitOptions.TrimEntries)
                    .Except(exclude, StringComparer.OrdinalIgnoreCase)
                    .ToArray();
            }
        );
        Map(m => m.IconUrl).Name("IconUrl:String");
        Map(m => m.PackageId).Name("Id:String");
        Map(m => m.IsListed).Name("IsListed:Boolean");
        Map(m => m.LicenseUrl).Name("LicenseUrl:String");
        Map(m => m.ProjectUrl).Name("ProjectUrl:String");
        Map(m => m.Published).Name("Published:DateTime");
        Map(m => m.Tags).ConvertUsing(r => ToStringArray(r.GetField("Tags:String")).Select(x => x.ToLowerInvariant()).ToArray());
        Map(m => m.TargetFrameworks).ConvertUsing(r => ToStringArray(r.GetField("TargetFrameworks:String")));
        Map(m => m.Url).Name("Url:String");
        Map(m => m.Version).Name("Version:String");
        Map(m => m.VersionNormalized).Name("VersionNormalized:String");
        Map(m => m.VersionVerbatim).Name("VersionVerbatim:String");
        Map(m => m.Prefix).ConvertUsing(r => {
            var id = r.GetField("Id:String");
            if (id.Contains('.')) {
                return id.Substring(0, id.IndexOf('.'));
            }
            return id.ToLowerInvariant();
        });
        Map(m => m.DownloadCount).ConvertUsing(m => {
            var field = m.GetField("DownloadCount:Long");
            if (long.TryParse(field, out var value))
                return value;

            return null;
        });
        Map(m => m.DownloadCountForAllVersions).ConvertUsing(m => {
            var field = m.GetField("DownloadCountForAllVersions:Long");
            if (long.TryParse(field, out var value))
                return value;

            return null;
        });
        Map(m => m.PackageType).ConvertUsing(m => {
            var field = m.GetField("PackageType:String");
            return string.IsNullOrWhiteSpace(field) ? "Dependency" : field;
        });
        Map(m => m.IsVerified).ConvertUsing(m => {
            var field = m.GetField("IsVerified:Boolean");
            if (bool.TryParse(field, out var value))
                return value;

            return false;
        });
    }
}
A good general rule when working with Elasticsearch is to clean as much of the data before indexing. Folks may have noticed that in the example rows, some of the columns contained arrays. Handling non-flat data in a flat representation means we need to take approaches to maintain data integrity without compromising on the simple format. In our case, we chose array syntax as we know Elasticsearch can straightforwardly handle array fields.
Eagle-eyed C# developers may have also recognized the empty catch blocks. We found a few lines in the 2.7 million rows that we could not process in our application runs. We erred on the side of processing the most records we could, rather than all of them. In the end, five rows were incorrect due to syntax issues. Folks considering this approach should consider error handling and whether data loss is acceptable for their use case.
Defining Our Index With NEST
Like CSVHelper, we can retrieve the NEST package from NuGet. NuGet package versions for NEST should match the version of our Elasticsearch instance. In this case, we are using Elasticsearch 7.9.0, but there are no specific features that we are utilizing that are exclusive to this particular version.
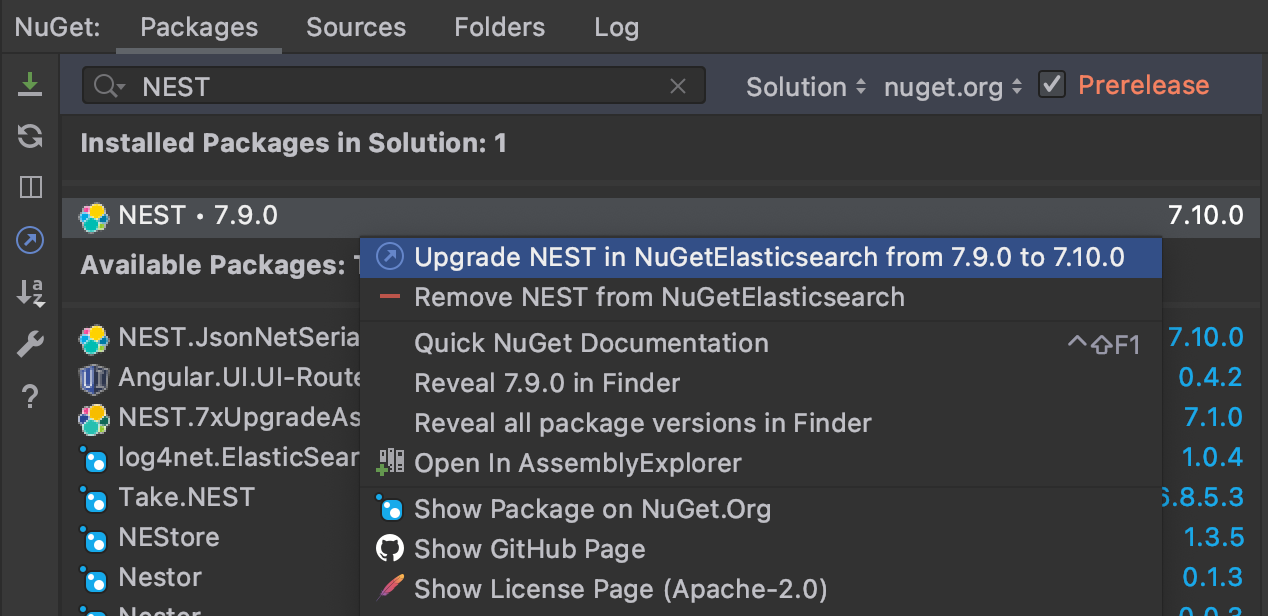
Next, we need to define our Elasticsearch index. Kibana will use our index to allow us to run interesting queries and generate meaningful dashboards. Luckily, NEST enables us to define indexes using C# objects and attributes.
ElasticsearchType(IdProperty = "Id", RelationName = "package")]
public record Package
{
    public string Id => $"{PackageId}_{Version}";

    [Text(Index = false, Store = false)] public string PartitionKey { get; set; }
    [Text(Index = false, Store = false)] public string RowKey { get; set; }
    [Date(Store = true)] public DateTime Timestamp { get; set; }

    [Text(Analyzer = "keyword", Store = true, Fielddata = true)]
    public string [] Authors { get; set; }

    [Text(Analyzer = "keyword", Store = false)]
    public string IconUrl { get; set; }

    [Text(Analyzer = "keyword", Store = true, Fielddata = true)]
    public string PackageId { get; set; }

    [Boolean(NullValue = false, Store = true)]
    public bool IsListed { get; set; }

    [Text(Analyzer = "keyword", Store = true, Fielddata = true)]
    public string LicenseUrl { get; set; }

    [Text(Analyzer = "keyword", Store = true, Fielddata = true)]
    public string ProjectUrl { get; set; }

    public DateTime Published { get; set; }

    [Text(Analyzer = "lowercase_keyword", Store = true, Fielddata = true)]
    public string [] Tags { get; set; }

    [Text(Analyzer = "lowercase_keyword", Store = true, Fielddata = true)]
    public string [] TargetFrameworks { get; set; }

    [Text(Analyzer = "keyword", Store = true, Fielddata = true)]
    public string Url { get; set; }

    [Text(Analyzer = "keyword", Store = true, Fielddata = true)]
    public string Version { get; set; }

    [Text(Analyzer = "keyword", Store = true, Fielddata = true)]
    public string VersionNormalized { get; set; }

    [Text(Analyzer = "keyword", Store = true, Fielddata = true)]
    public string VersionVerbatim { get; set; }

    [Text(Analyzer = "keyword", Store = true, Fielddata = true)]
    public string Prefix { get; set; }

    [Text(Analyzer = "keyword", Store = true, Fielddata = true)]
    public string License {
        get
        {
            if (string.IsNullOrWhiteSpace(LicenseUrl))
                return "Unspecified";

            if (LicenseUrl.Contains("deprecateLicenseUrl", StringComparison.OrdinalIgnoreCase))
                return "Deprecated";

            if (LicenseUrl.Contains("mit", StringComparison.OrdinalIgnoreCase))
                return "MIT";

            if (LicenseUrl.Contains("apache", StringComparison.OrdinalIgnoreCase))
                return "Apache";

            if (LicenseUrl.Contains("BSD", StringComparison.OrdinalIgnoreCase))
                return "BSD";

            if (LicenseUrl.Contains("LGPL", StringComparison.OrdinalIgnoreCase))
                return "LGPL";

            return "Custom";
        }
    }

    [Number(NumberType.Long, Store = true, NullValue = 0)]
    public long? DownloadCount { get; set; }

    [Number(NumberType.Long, Store = true, NullValue = 0)]
    public long? DownloadCountForAllVersions { get; set; }

    [Text(Analyzer = "keyword", Store = true, Fielddata = true)]
    public string PackageType { get; set; }

    [Boolean(NullValue = false, Store = true)]
    public bool? IsVerified { get; set; }
}
We define the type of data and the analyzer for indexing because the standard analyzer filters out stop words and tokenizes our values for search. In our case, we aren’t searching, but reporting on our documents. When working with Kibana, it’s essential to set the value of Store to true, as explained by the Elasticsearch documentation:
By default, field values are indexed to make them searchable, but they are not stored. This means that the field can be queried, but the original field value cannot be retrieved.
Kibana is an analytical tool and performs aggregates and results based on exact matches. We also need to treat date and time, booleans, and integers differently. You may even notice the index has array definitions for Authors, Tags, and TargetFrameworks. Unlike traditional relational databases, we can store these values as arrays directly in the document, and Elasticsearch will index them appropriately.
Streaming from CSV to Elasticsearch
Now that we have our CSV map and our Elasticsearch Index defined, let's start processing some records. We need to open our 1.5 GB file and stream the information to Elasticsearch. In .NET, we can use native file APIs alongside CSVHelper to accomplish this in a few lines of C#.
private static CsvReader GetCsvReader(string filename)
{
    var stream = File.OpenRead(filename);
    var reader = new StreamReader(stream);
    var csv = new CsvReader(reader, CultureInfo.InvariantCulture)
    {
        Configuration =
        {
            HasHeaderRecord = true,
            MissingFieldFound = (headers, indexName, ctx) =>
            {
                // skip the row
                Console.WriteLine($"Bad row - {ctx.Row} : {ctx.RawRecord}");
            },
            BadDataFound = (ctx) =>
            {
                // skip the row
                Console.WriteLine($"Bad row - {ctx.Row} : {ctx.RawRecord}");
            },
            TrimOptions = TrimOptions.Trim
        }
    };
    csv.Configuration.RegisterClassMap<NugetRecordMap>();

    return csv;
}
We can also use the extension points of CSVHelper to handle missing fields and incorrect data rows. In this case, we write the misbehaving data to the console output and make a mental note.
We need to create an instance of ElasticClient, which we will use to make HTTP calls to the web API exposed by our Elasticsearch instance. This defaults to use the URI of localhost:9200, where we’ll be writing our index and documents.
static async Task Main(string [] args)
{
    var client = new ElasticClient();
    await LoadPackages(client);
    Console.WriteLine("Hello World!");
}
Next, we'll need to start processing the data into an Elasticsearch instance. The BulkAll method in NEST makes easy work of even the most intense workloads.
public static async Task LoadPackages(ElasticClient client)
{
    var indexName = "nuget-packages";
    // attempt to delete old index first.
    var delete = await client.Indices.DeleteAsync(indexName);

    // create ES index
    var createIndexResponse = await client.Indices.CreateAsync(indexName, c => c
        .Map<Package>(m => m.AutoMap())
        .Settings(s => s
            .Analysis(a => a
                .Analyzers(aa => aa
                    .Custom("lowercase_keyword", lk => lk
                        .Filters("trim", "lowercase", "unique")
                        .Tokenizer("keyword")
                    )
                )
            )
        )
    );

    var csv = GetCsvReader("data.csv");
    var bulkPackage = client.BulkAll(
            csv.GetRecords<Package>(),
            b => b
                .Index(indexName)
                .BackOffTime("30s")
                .BackOffRetries(2)
                .RefreshOnCompleted()
                .MaxDegreeOfParallelism(Environment.ProcessorCount)
                .Size(1000)
        )
        .Wait(TimeSpan.FromDays(1), next =>
        {
            // do something e.g. write number of pages to console
            Console.WriteLine($"Current on {next.Page}...");
        });
}
In five code lines, we can delete an existing instance of our index, create a new index, retrieve a handle to the CSV file, and then begin streaming our data to Elasticsearch in 1000 record increments. Now we can combine these two methods to start processing our data.
It's important to note that csv.GetRecords<Package> will start to stream from disk as efficiently as possible. This approach can still be very memory intensive. We can see memory utilization and traffic highlighted in code by Dynamic Program Analysis (DPA) here. This feature is available in JetBrains ReSharper and Rider and can help catch potential excessive memory usage and memory allocation issues during development.
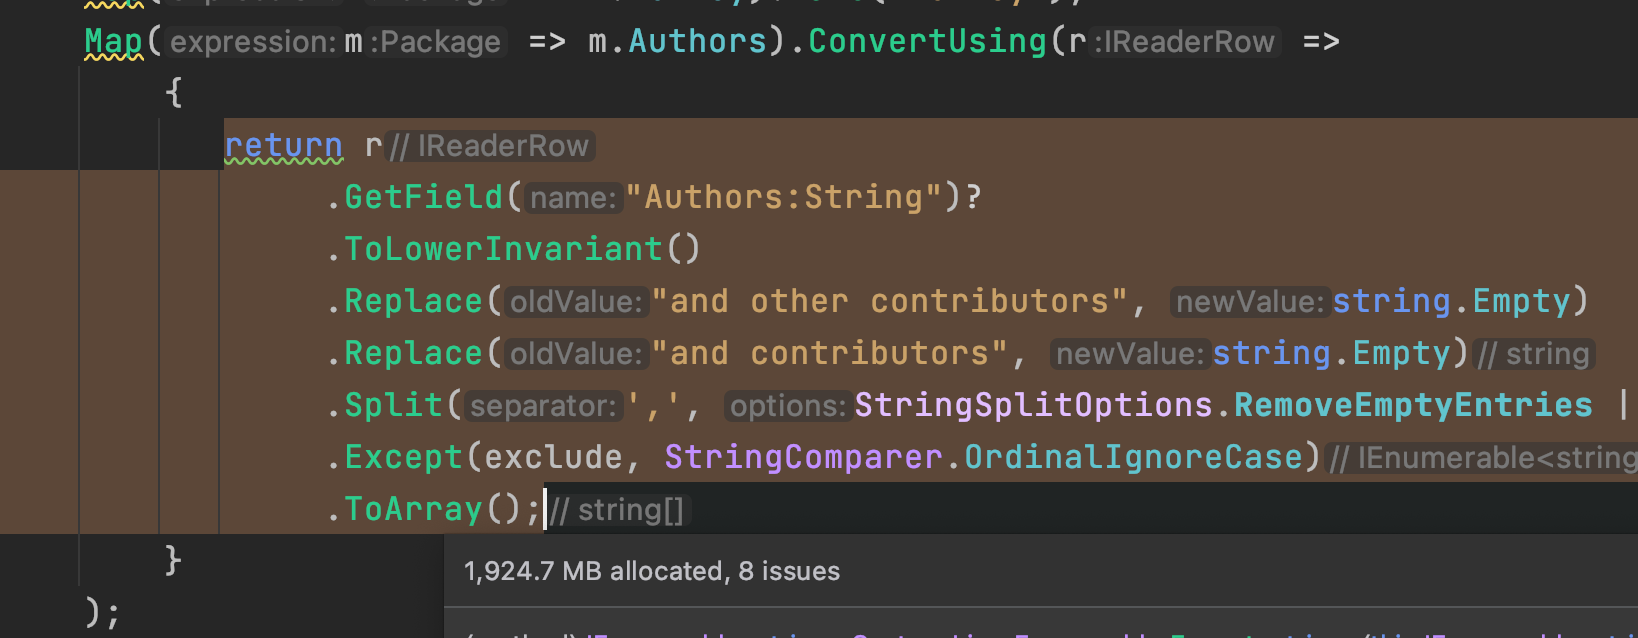
The most memory we utilize reaches a whopping 9 GB. Saying this code has room for optimizations is an understatement. Every record that makes up our CSV is a string, and we’re cleaning up the data as we go. The approach causes some memory traffic (allocations and garbage collections), which we expect, given we have a fair amount of data.
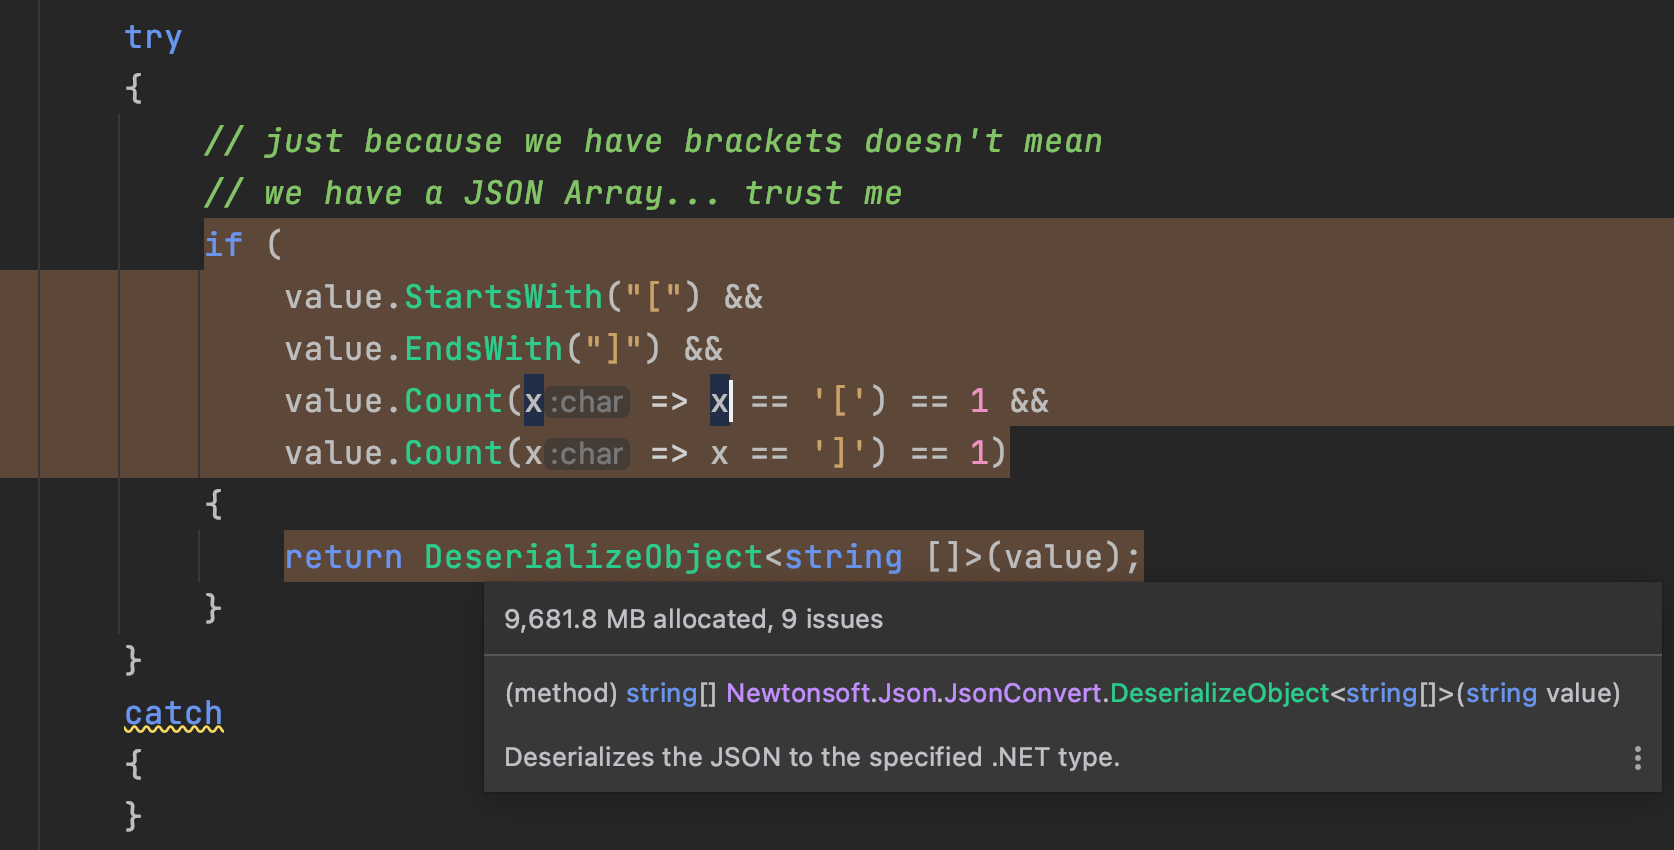
While memory usage might be high for some folks, we can see the benefits in the speed that Elasticsearch can process and index our data. On my local MacBook Pro 16", we can index all 3.3 million records in just under 5 minutes into an Elasticsearch instance running in Docker. Just long enough to get some coffee and pet the dogs.
We only run this process once, so memory usage and optimization aren't critical for our use case. As always, folks looking to use this approach should consider their situation and adjust accordingly.
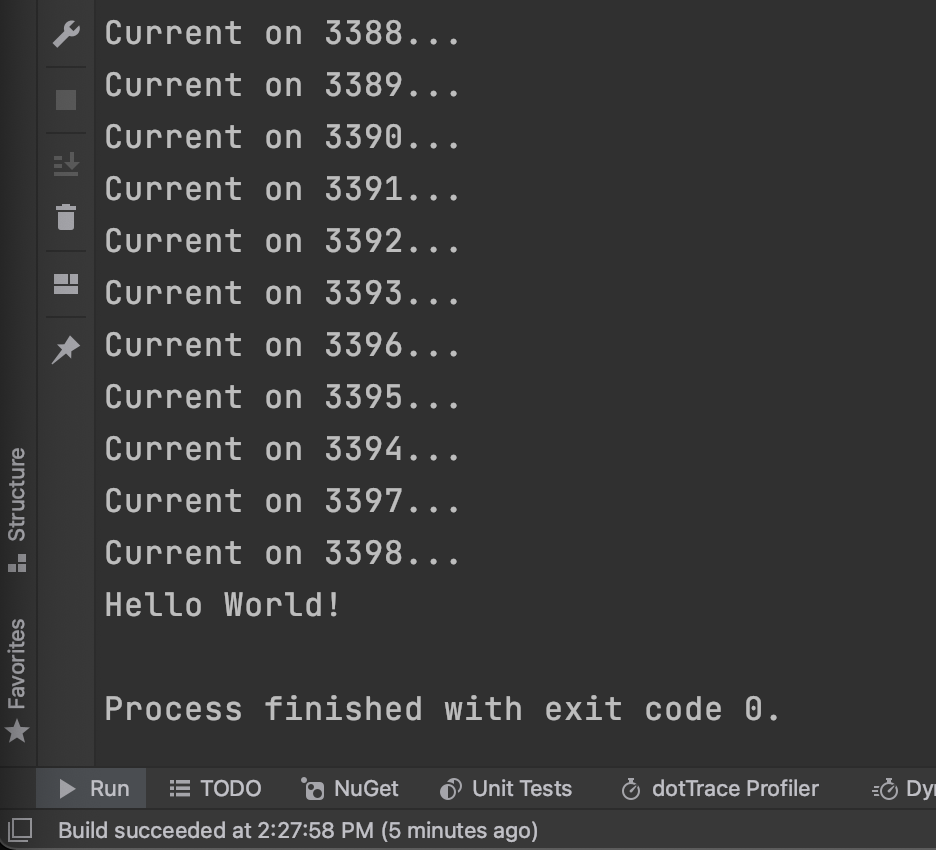
Now, we're ready to create some dashboards!
Kibana, Visualizations, and Dashboards
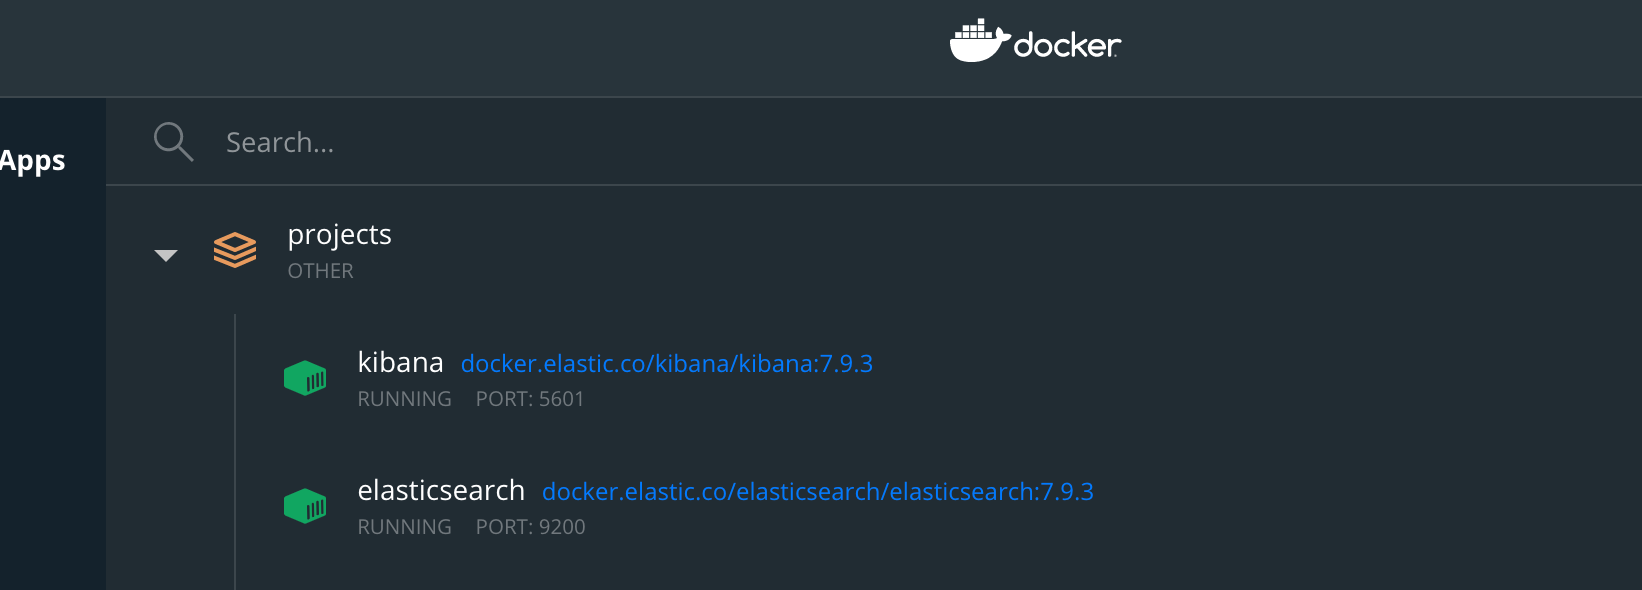
One of the biggest reasons we chose Kibana is its ability to run locally. Since this was a research project, we didn't need to share our dashboards or indexes with others, even though we could. Additionally, running Elasticsearch and Kibana inside Docker containers means we could create and upgrade instances without much fuss. We can also launch the Kibana dashboard right from the Docker desktop dashboard.
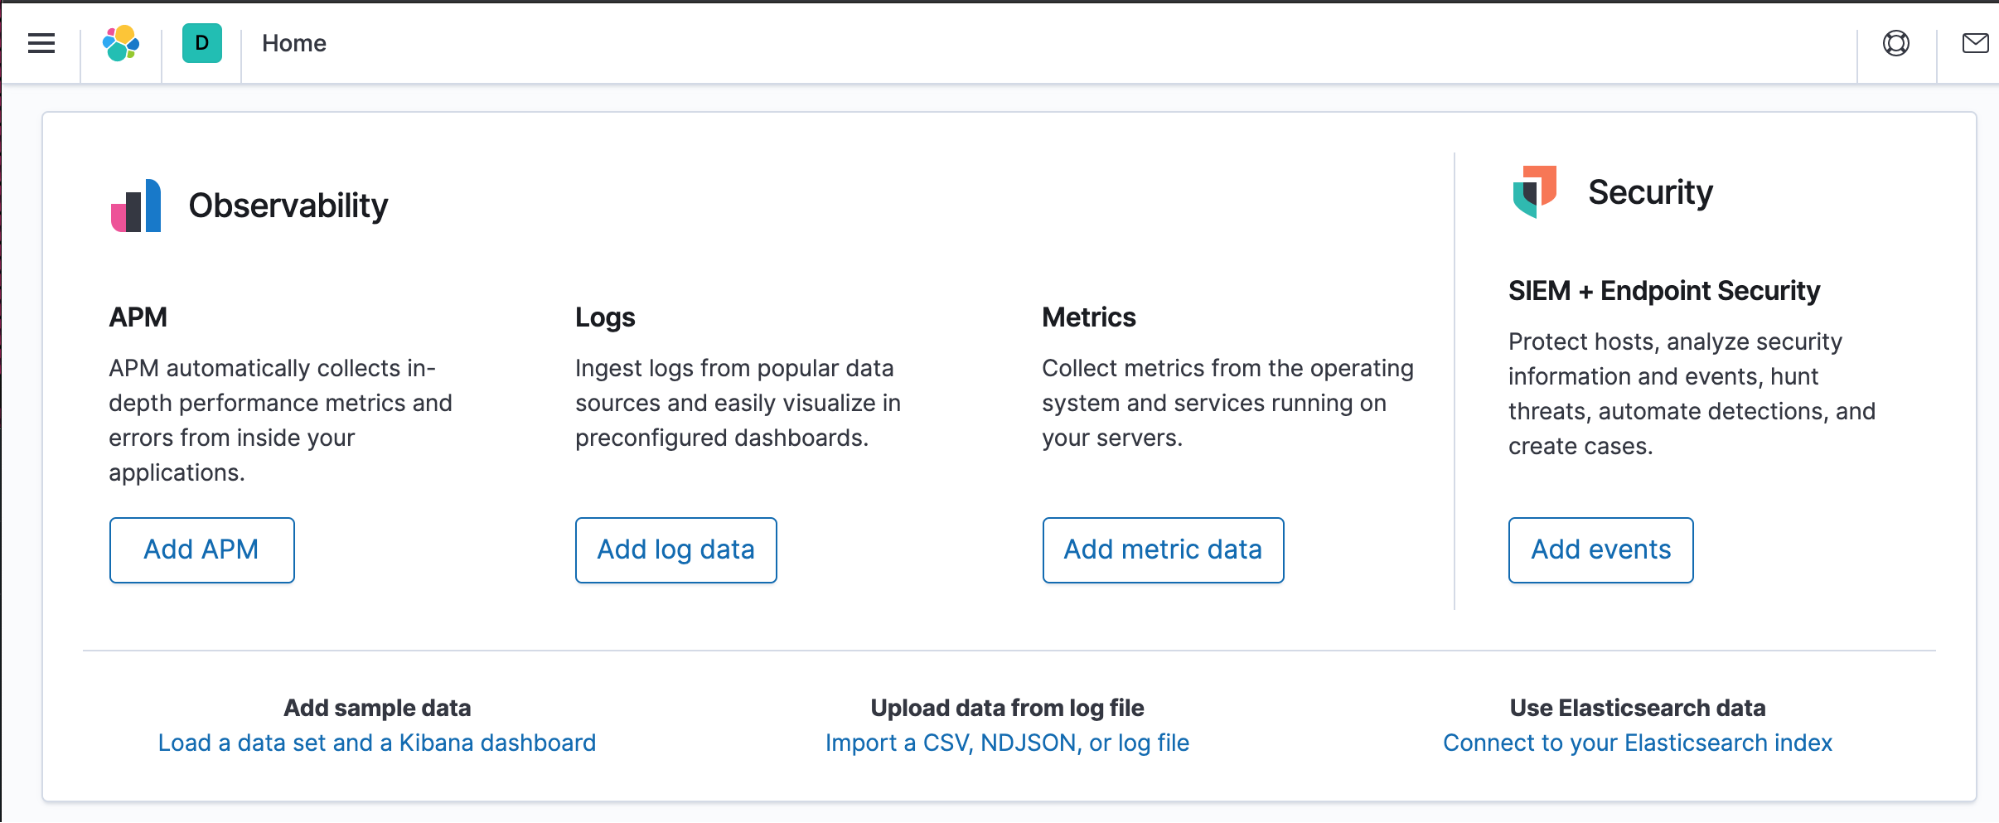
Once we load the Kibana dashboard in the browser, we need to create a new index pattern. We do that by clicking the Connect to your Elasticsearch Indexin the hero card's bottom-right.
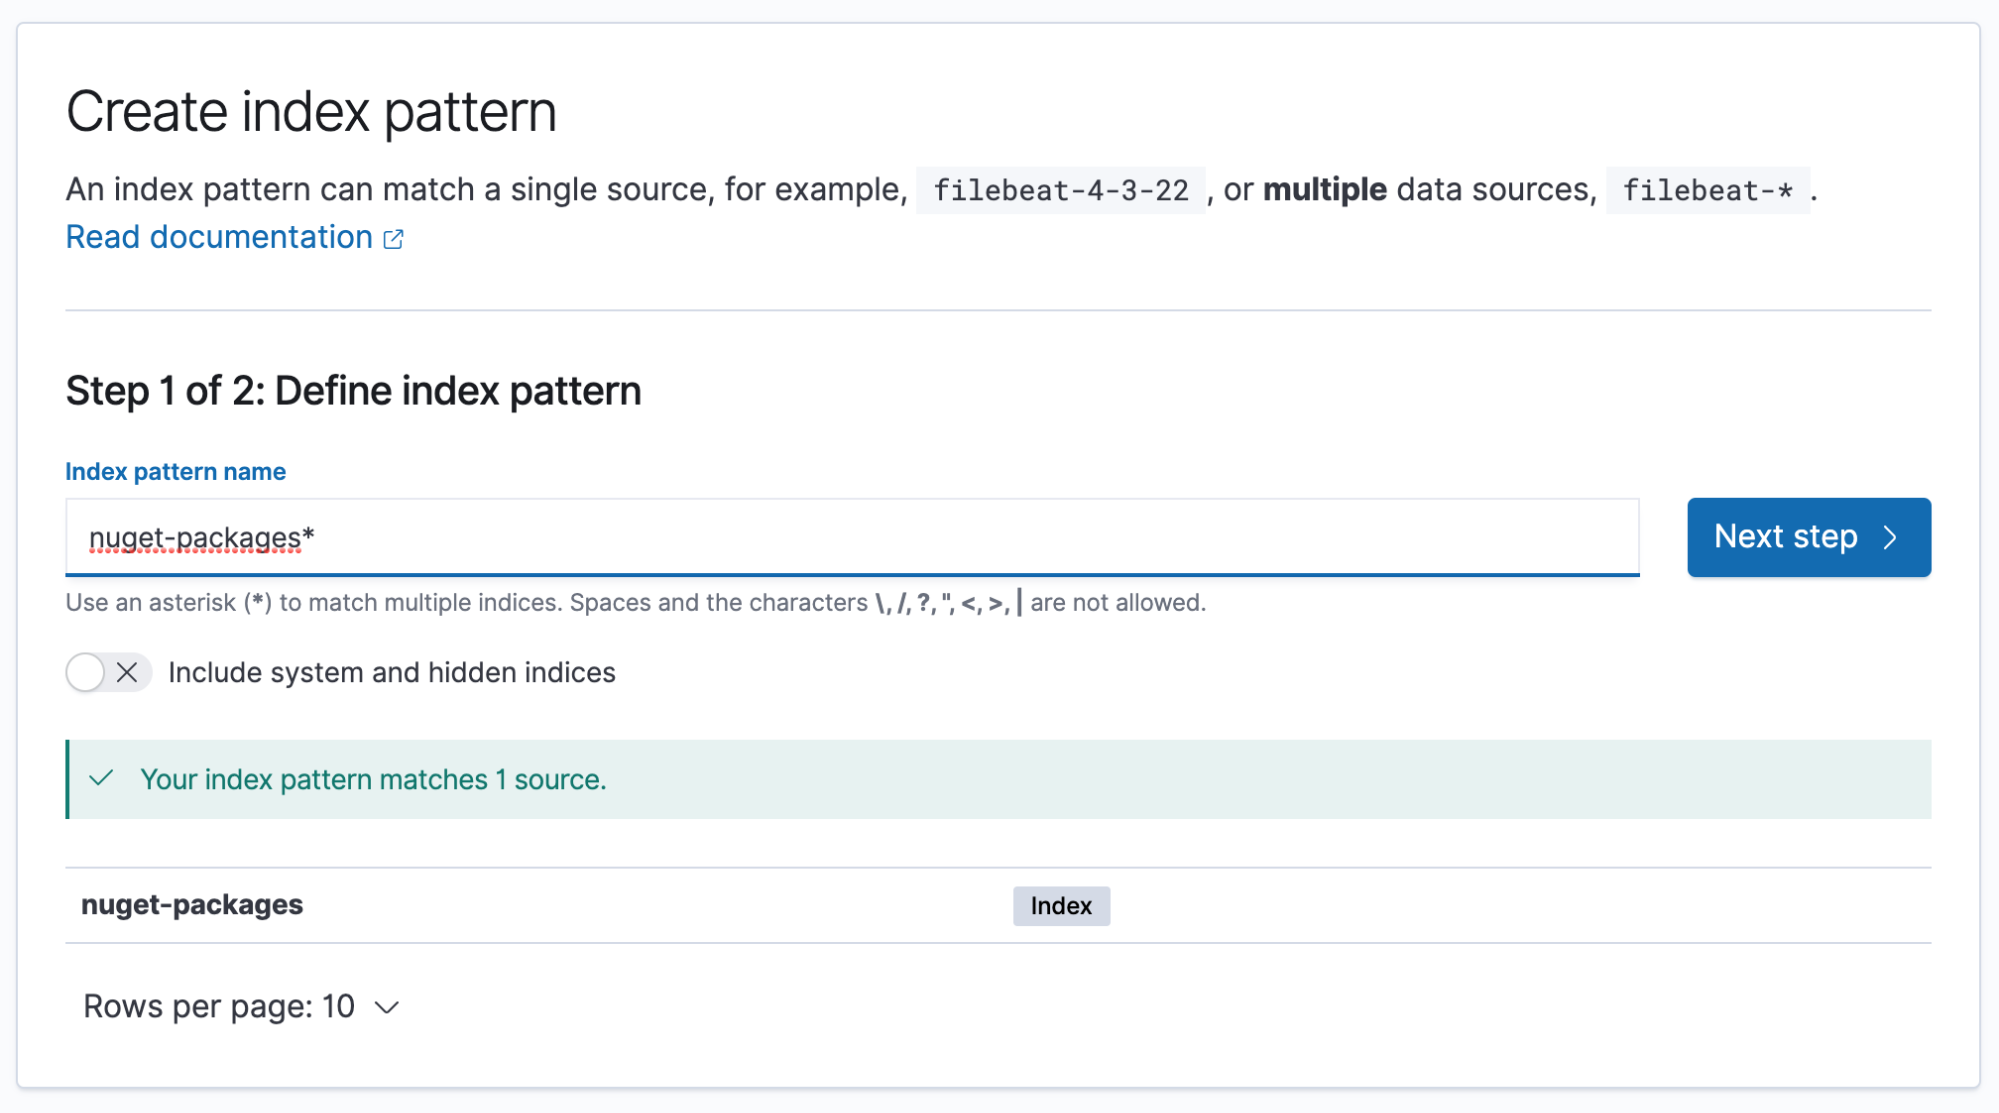
From here, we need to click the Create index pattern button in the top-right. Once into the index pattern page, we can type our index name nuget-packages and click Next step.
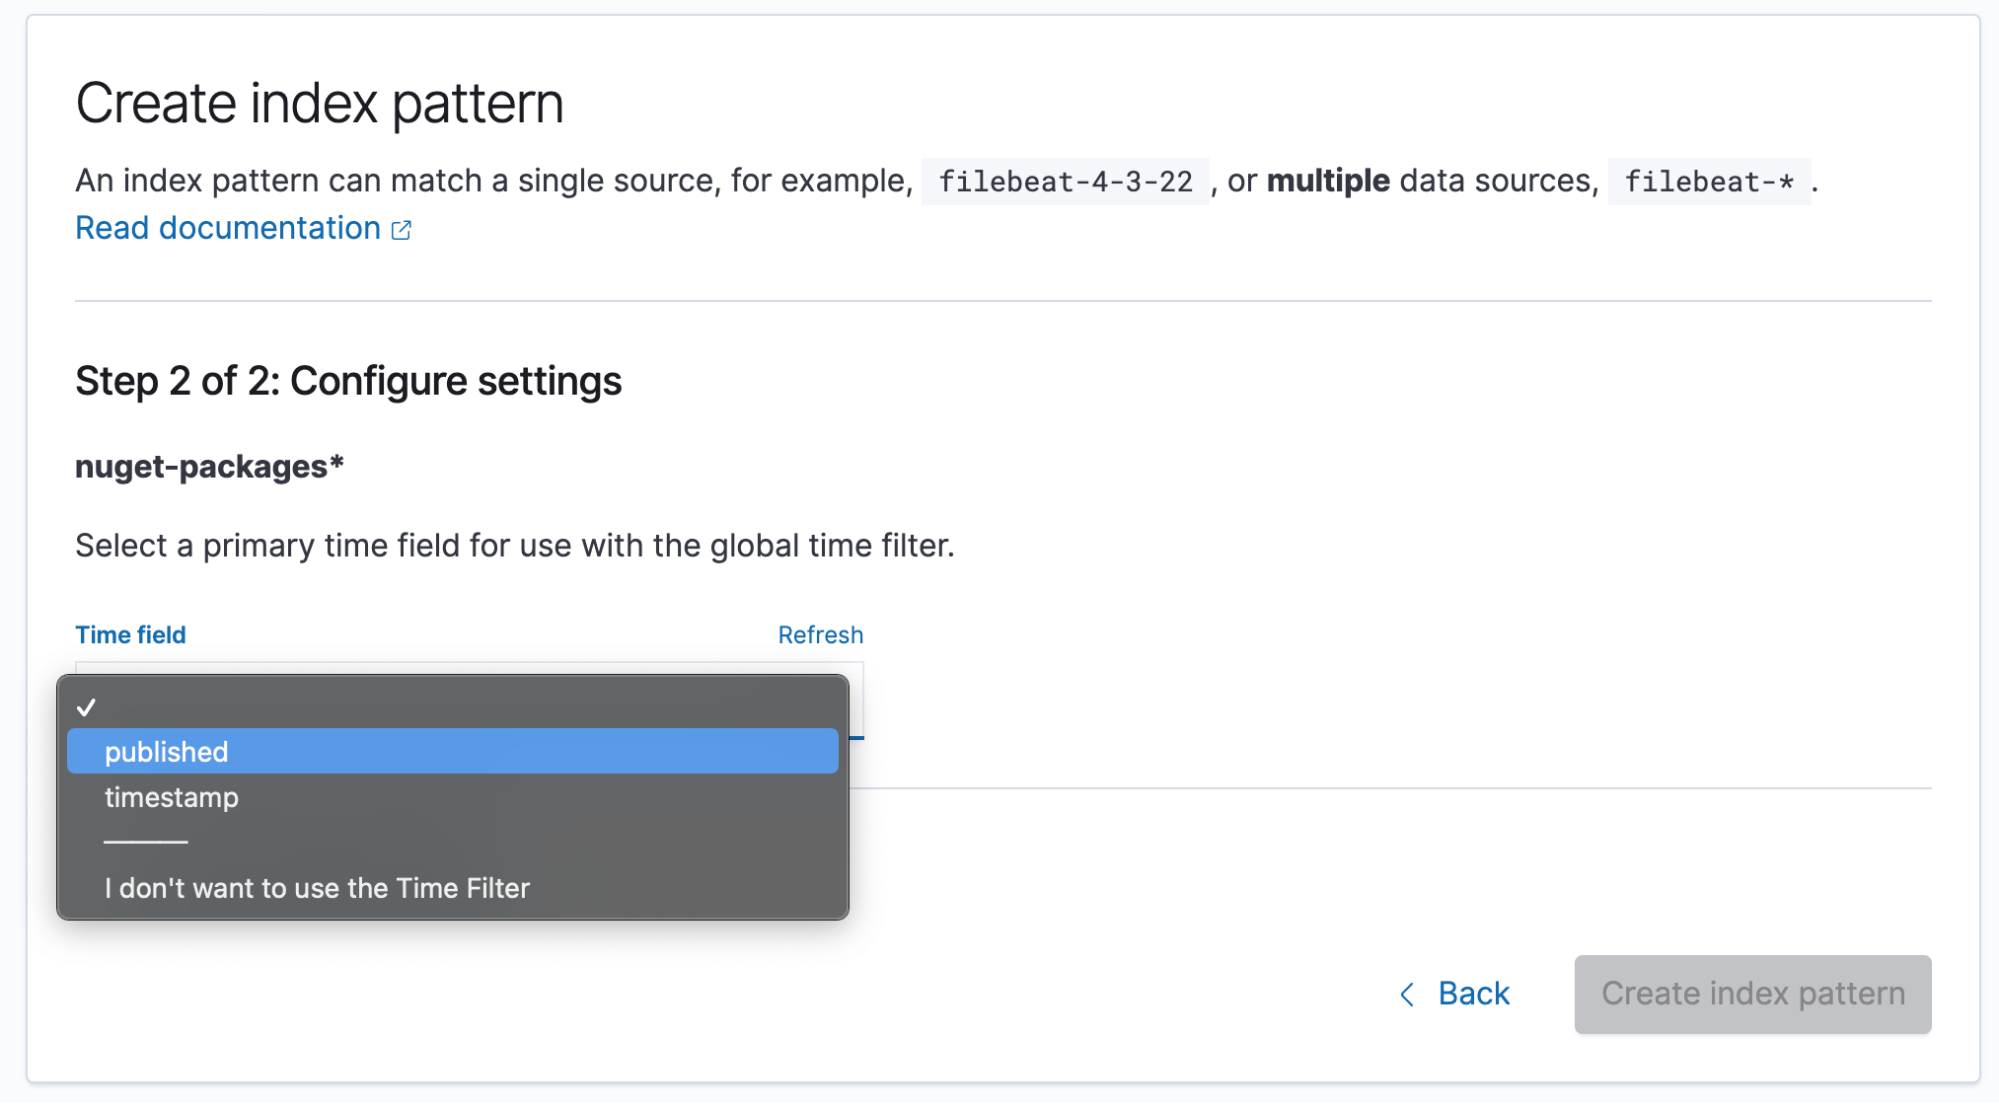
Our NuGet data has a time element that we want to utilize in our queries to show changes over time. In some cases, it is best not to select a time field if our data is not time-sensitive. In our current research of published packages on NuGet, we need to select published. Now we're ready to create some visualizations.
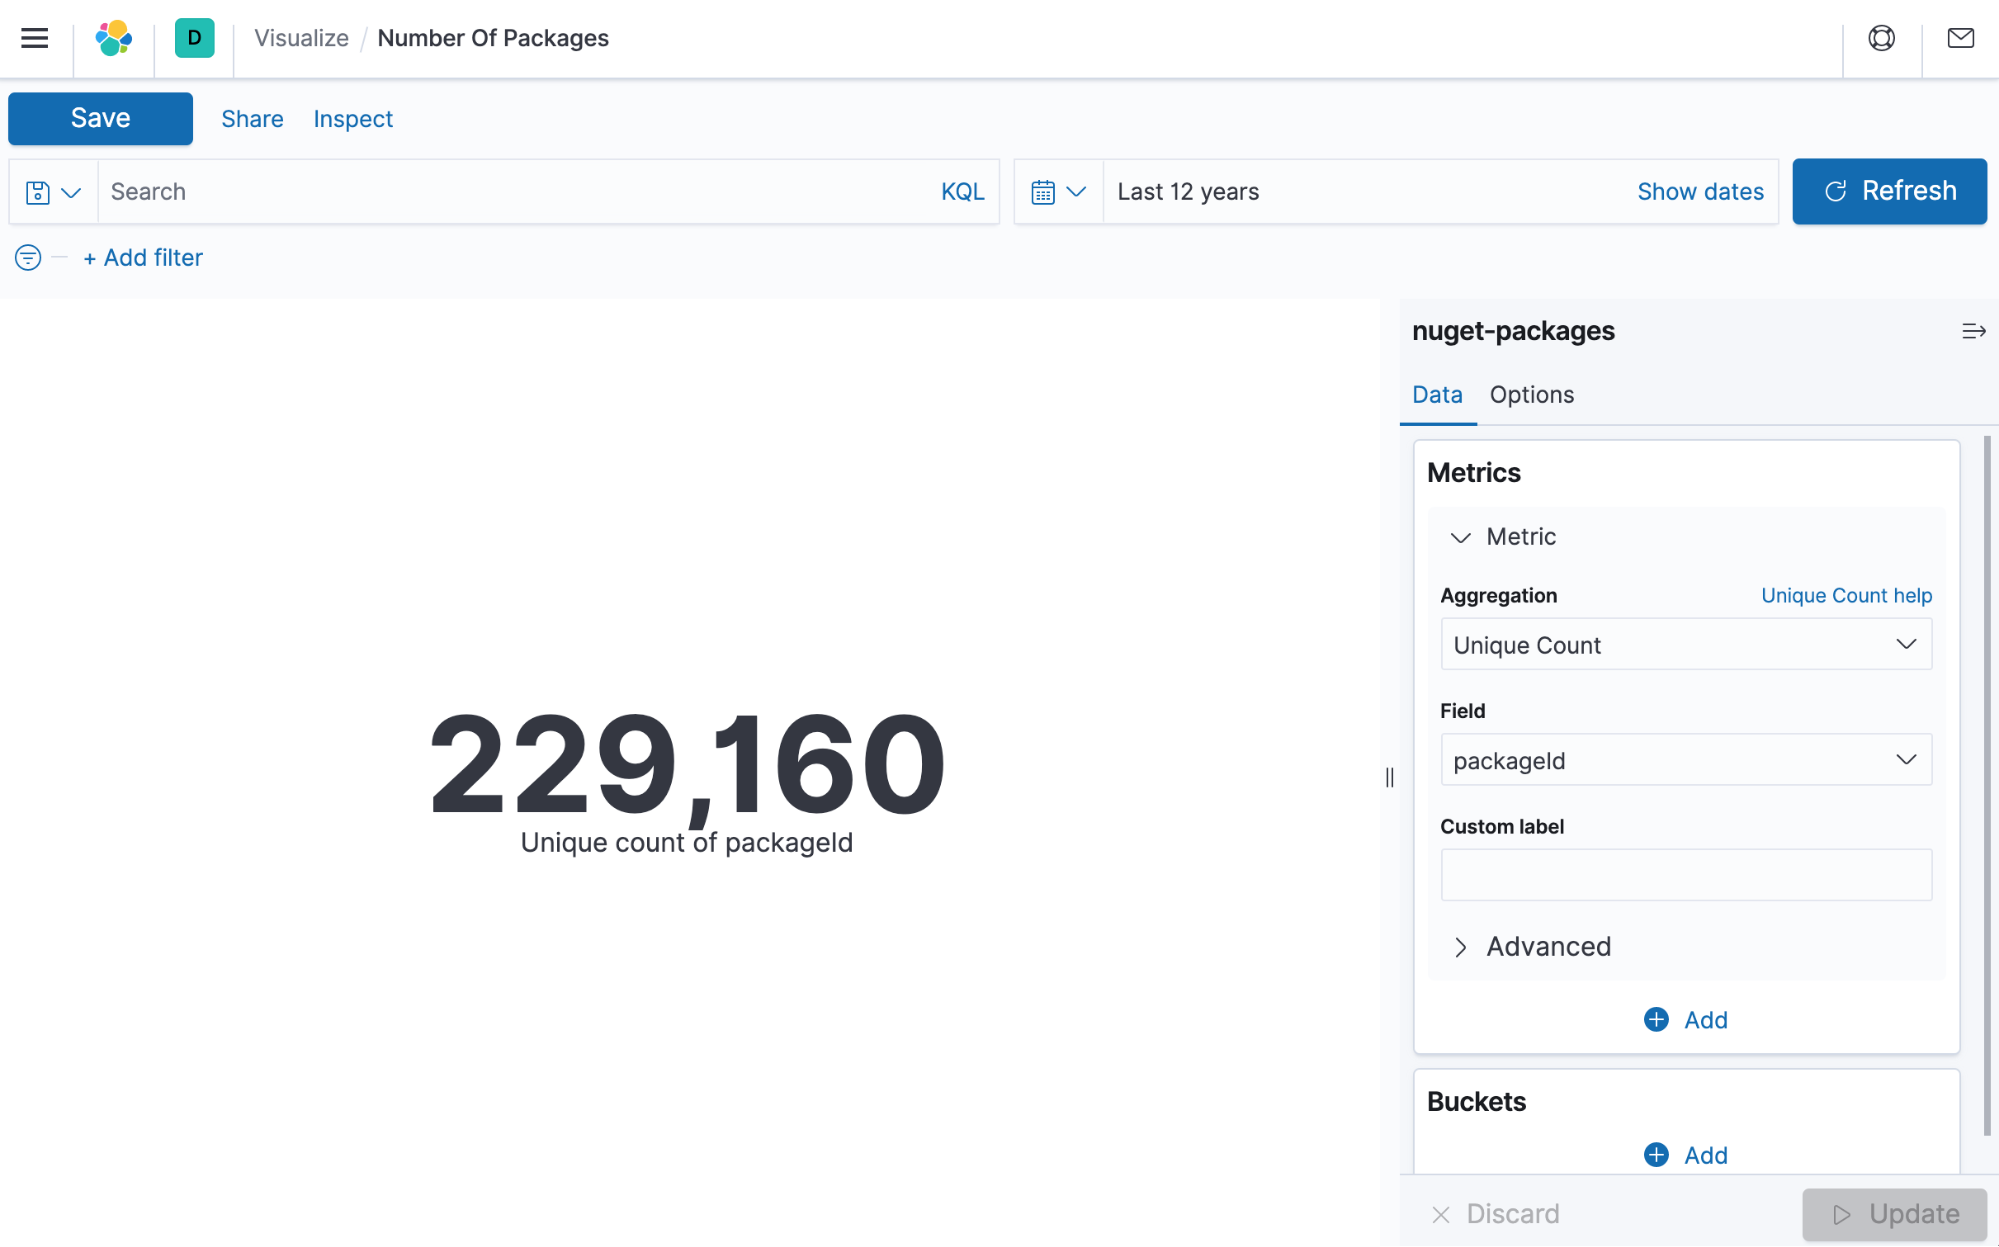
From the Kibana menu, we can select Visualize, which will allow us to create visualizations to use independently or on a cumulative dashboard. Our first visualization is a simple "Unique count of packages" in the ecosystem. We can accomplish this by adding a new metric visualization and aggregating with a Unique Count over PackageId. Since our index-pattern is also time relevant, we need to set a date filter to include data from the last 12 years. Changing the time range can help us determine what occurred within a current period, which helps chart changes over time.
After creating several visualizations, we can create a dashboard to help us get a larger image of what's happening. In this example, let's see what packages Elastic has authored with the KQL query authors:elastic.
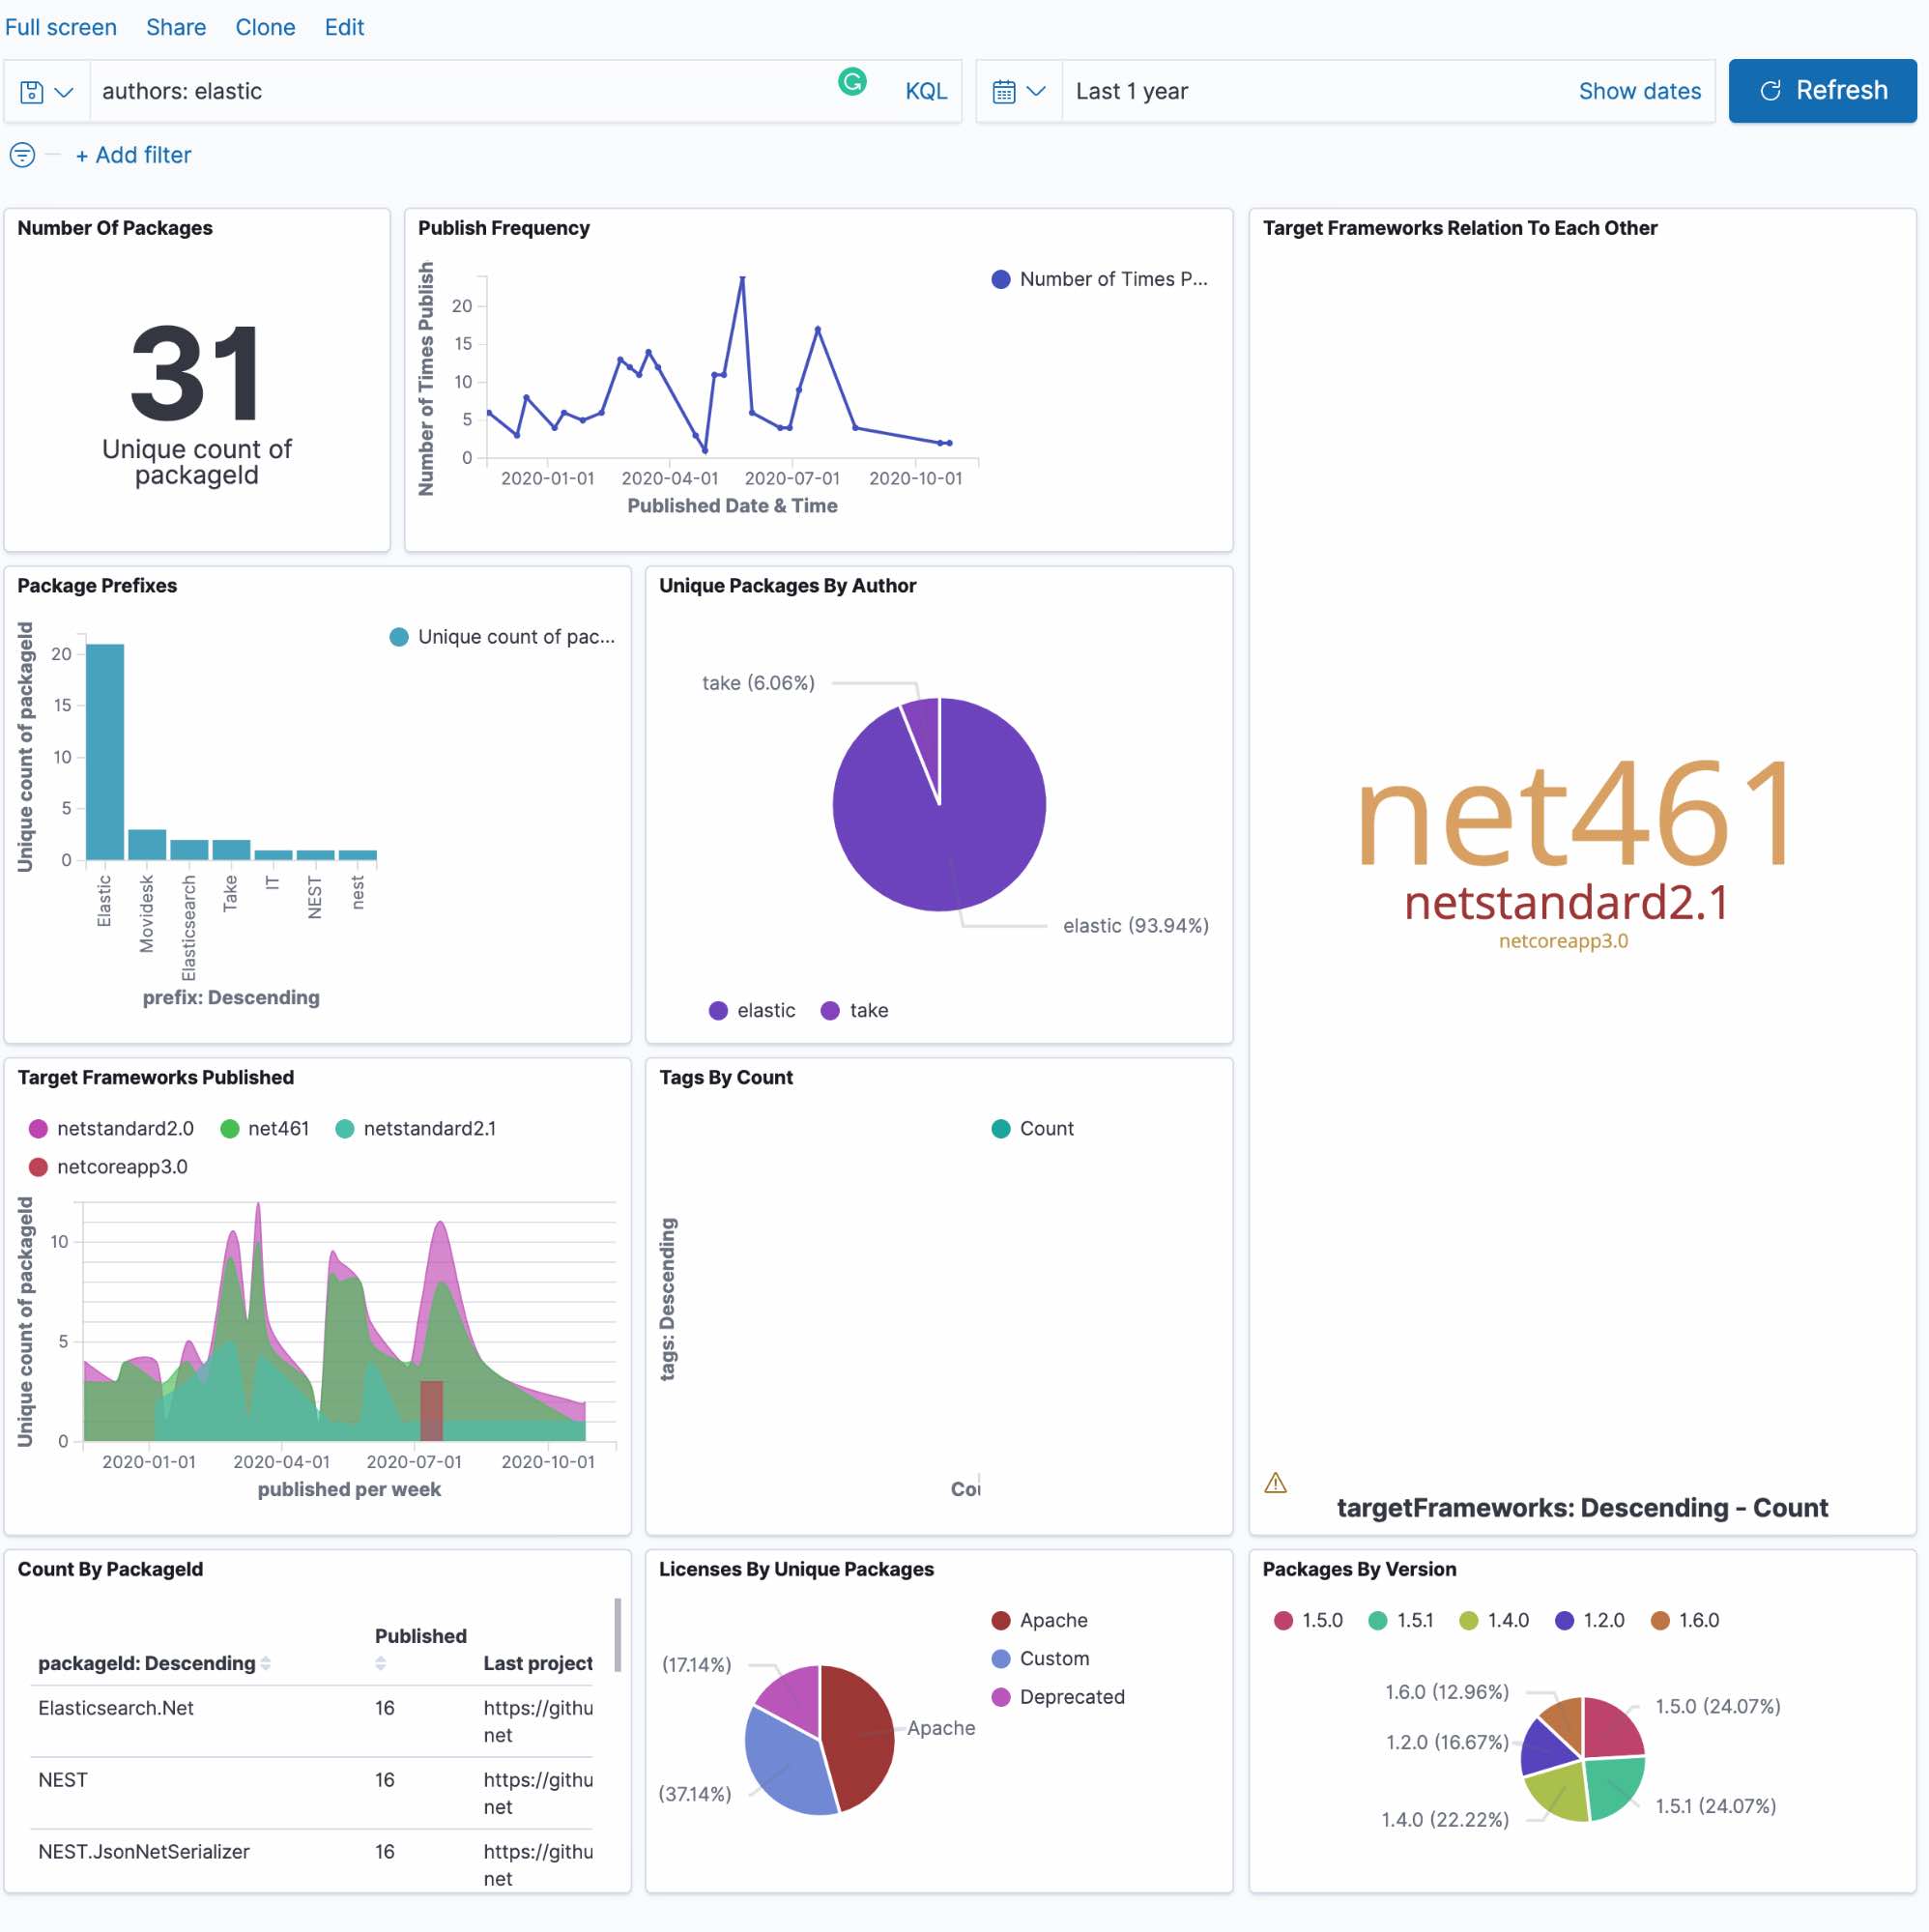
It's important to note that Kibana is impressive, but be careful with the time picker. We are analyzing a dataset of 3 million records spanning 12 years. If our queries are excessive, then we will start seeing some of our visualizations time out (unless you’re using newer versions of Kibana that let you run queries beyond the timeout window). Elasticsearch does offer async search for giant queries, so we’re excited to see if that comes to Kibana dashboards soon.
Conclusion
Elasticsearch and Kibana are an excellent combination for anyone looking to discover exciting facts about their data. Using .NET and packages from the OSS ecosystem make it that much nicer. Additionally, using JetBrains Rider can help folks write, understand, and optimize their data loading process. To read the original article and understand more about the NuGet ecosystem, head over to the JetBrains .NET blog and be sure to follow us on Twitter at @JetBrains, @ReSharper, and @JetBrainsRider. As always, thank you to Elastic and the folks who work on the fantastic Elasticsearch NEST client because, without them, this post would not be possible.