How to set up Okta SAML login for Kibana on Elastic Cloud


 Share on Twitter
Share on Twitter

 Share on LinkedIn
Share on LinkedIn

 Share on Facebook
Share on Facebook

 Share by Email
Share by Email

 Print this page
Print
Identity Providers (IdPs) are responsible for providing users with web-based single sign-on (SSO) authentication and then sharing the user’s authorization criteria with designated service providers, like Elastic. Elasticsearch and Kibana support multiple SSO options. In this post, we’ll show how to secure an Elastic Cloud Kibana deployment with example IdP Okta via its Security Assertion Markup Language (SAML) 2.0 integration.
Prepare Elastic Cloud
To get started, we’ll create an Elastic Cloud Deployment with Elasticsearch and Kibana enabled. Our Deployment stack version is v8.14.3.
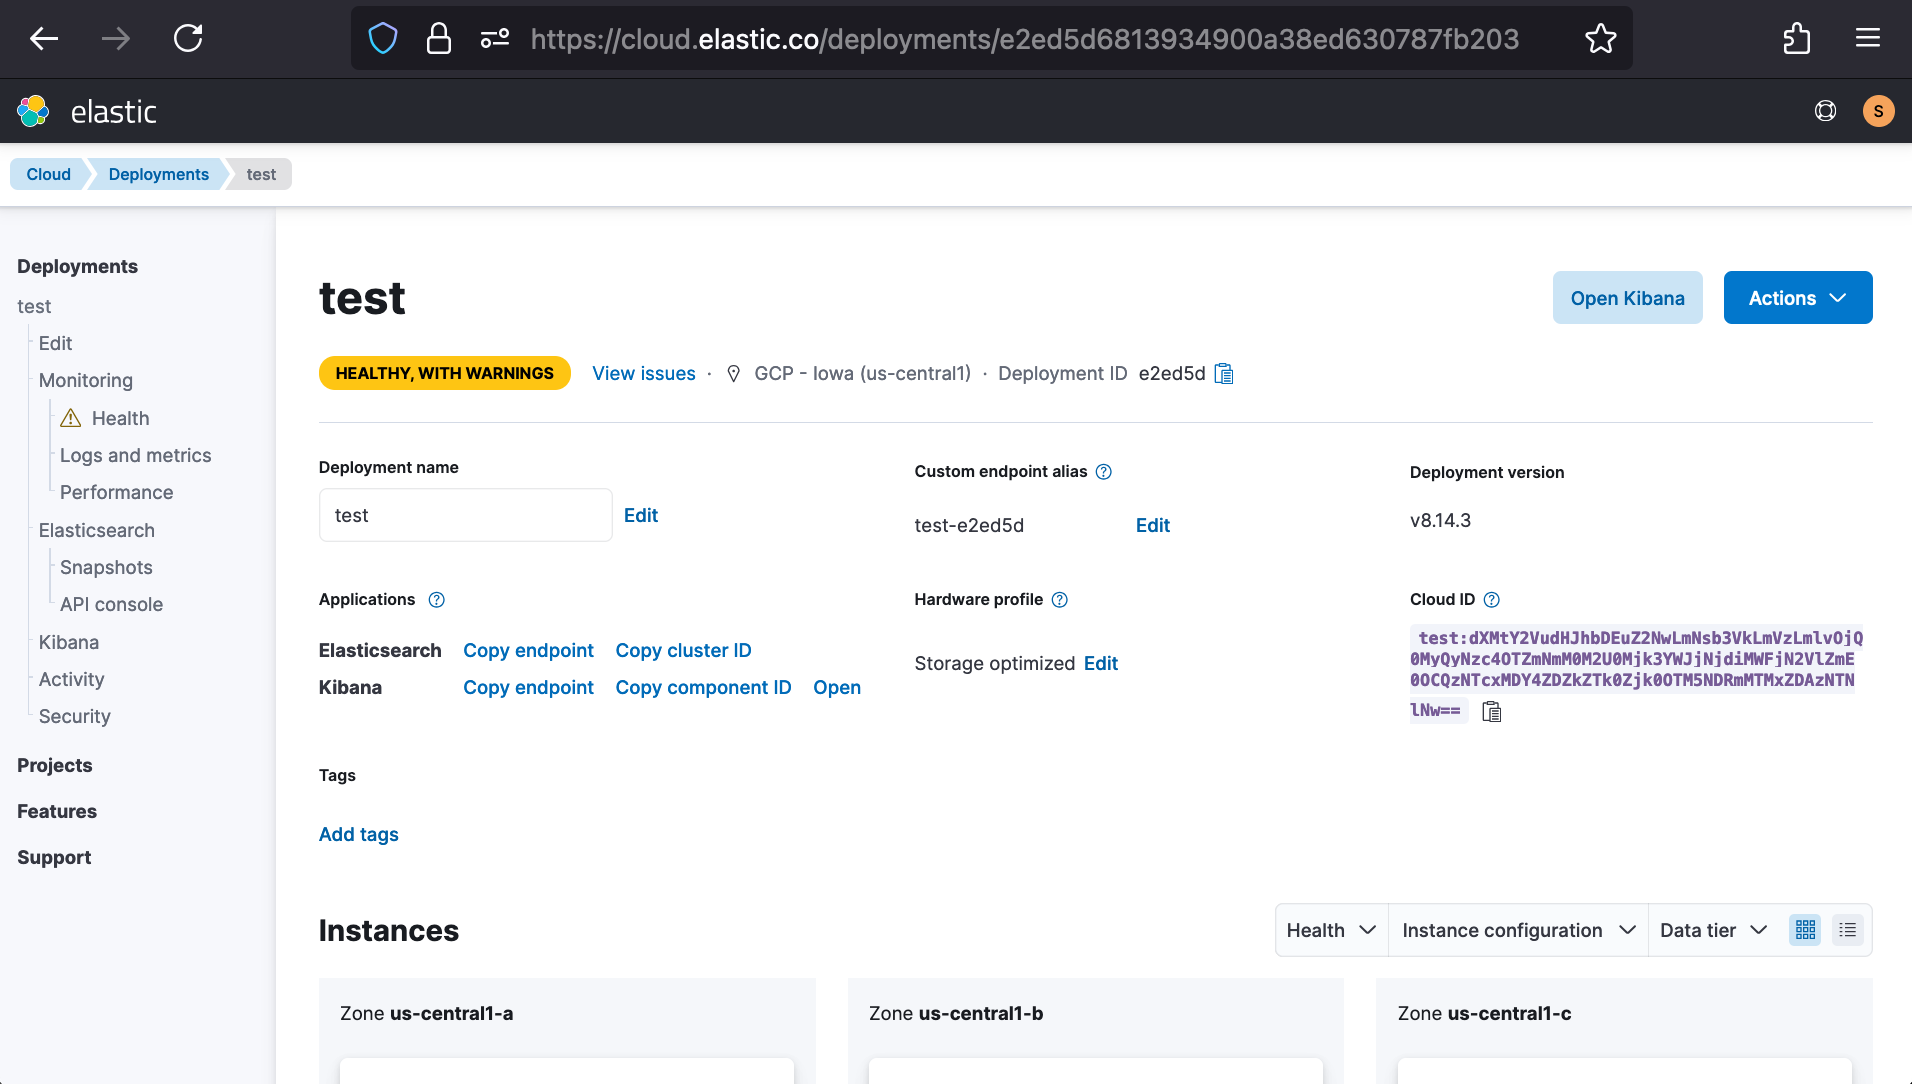
Once created, click the Copy endpoint button for Kibana and use it to fill out the KIBANA_URL placeholder of Elasticsearch’s SAML settings, which’ll go from
xpack.security.authc.realms.saml.saml1:
  order: 2
  attributes.principal: "TBD_FROM_OKTA"
  attributes.groups: "TBD_FROM_OKTA"
  idp.metadata.path: "TBD_FROM_OKTA"
  idp.entity_id: "TBD_FROM_OKTA"
  sp.entity_id: "KIBANA_URL/"
  sp.acs: "KIBANA_URL/api/security/saml/callback"
sp.logout: "KIBANA_URL/logout"To
xpack.security.authc.realms.saml.saml1:
  order: 2
  attributes.principal: "TBD_FROM_OKTA"
  attributes.groups: "TBD_FROM_OKTA"
  idp.metadata.path: "TBD_FROM_OKTA"
  idp.entity_id: "TBD_FROM_OKTA"
  sp.entity_id: "https://test-e2ed5d.kb.us-central1.gcp.cloud.es.io:9243/"
  sp.acs: "https://test-e2ed5d.kb.us-central1.gcp.cloud.es.io:9243/api/security/saml/callback"
sp.logout: "https://test-e2ed5d.kb.us-central1.gcp.cloud.es.io:9243/logout"Kindly note the further placeholders above, which will be filled in as we progress with the Okta-side of our integration setup.
Set up Okta application
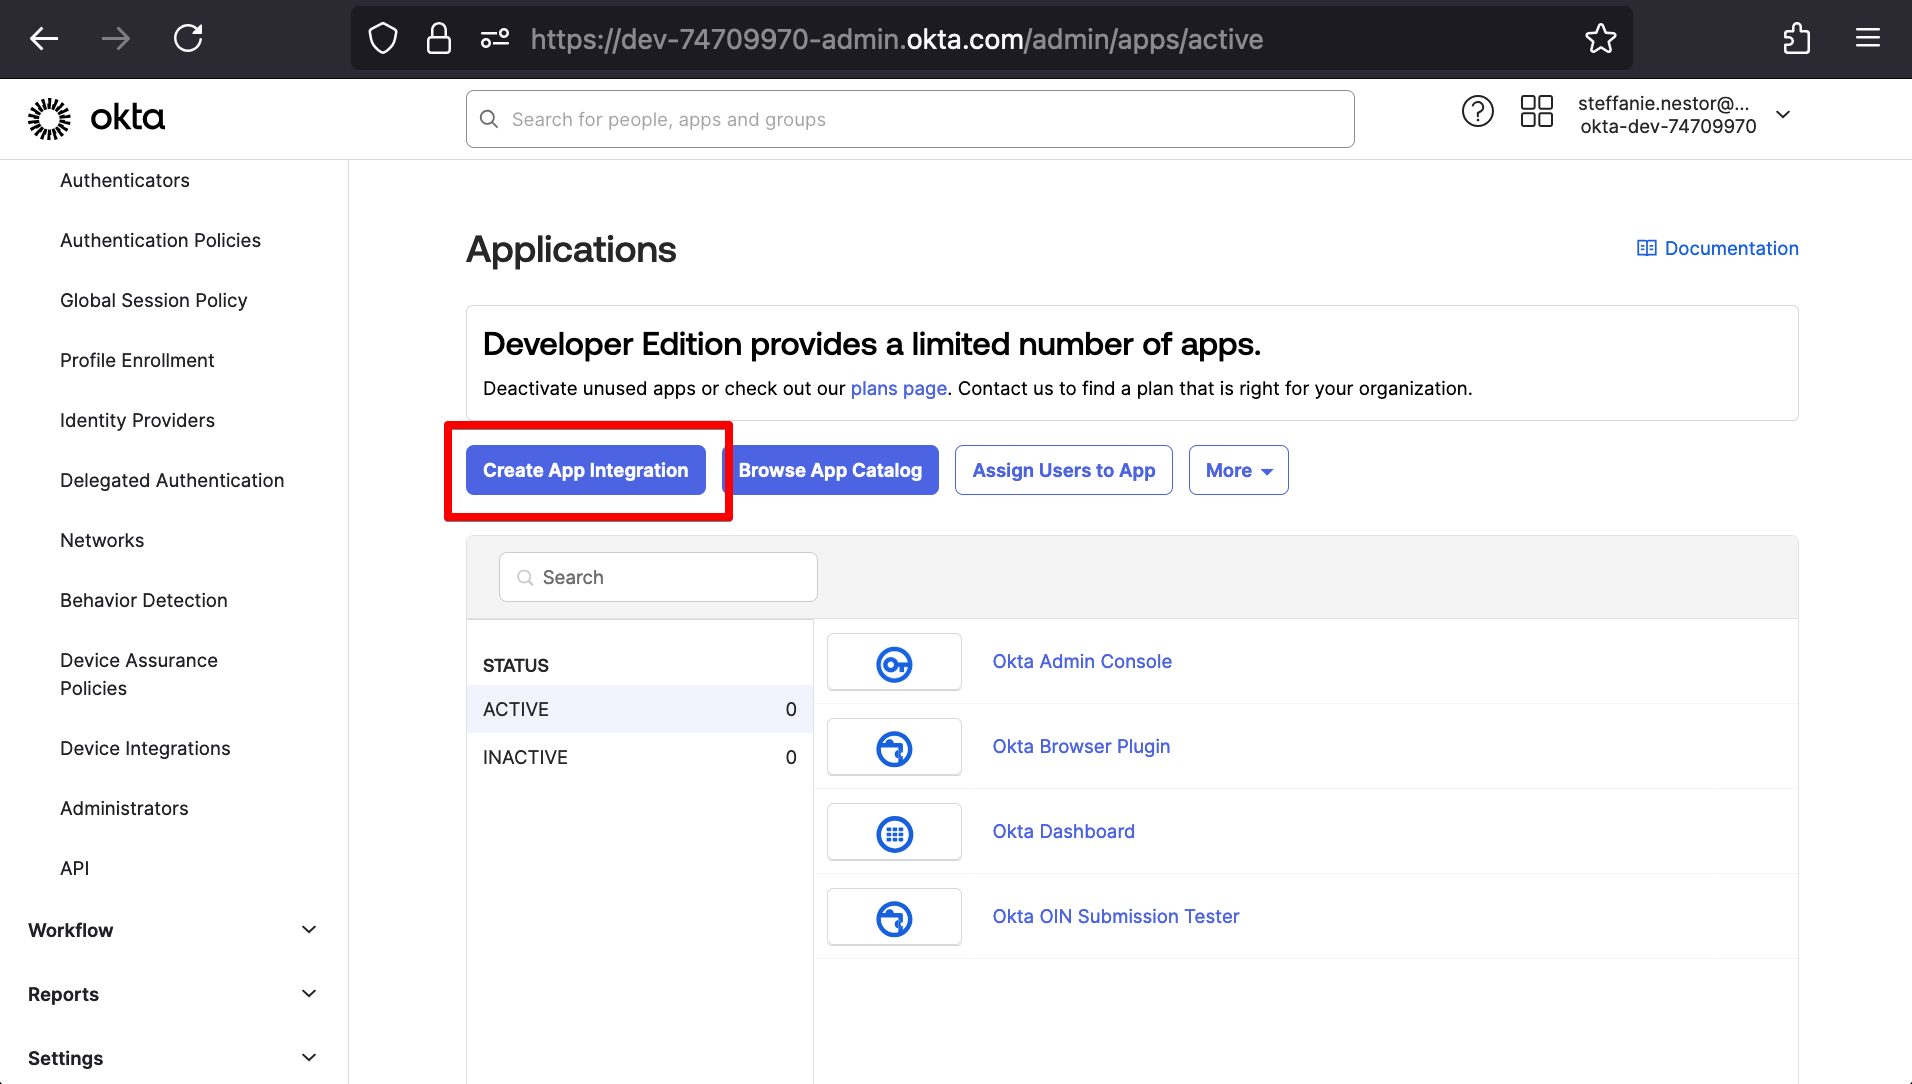
For our demonstration, we created a temporary Okta sign-up under “Workforce Identity Cloud” to use an Okta Developer Account. Under Okta, we’ll create a new SAML application by navigating from the main menu to Applications > Applications > Create App Integration.
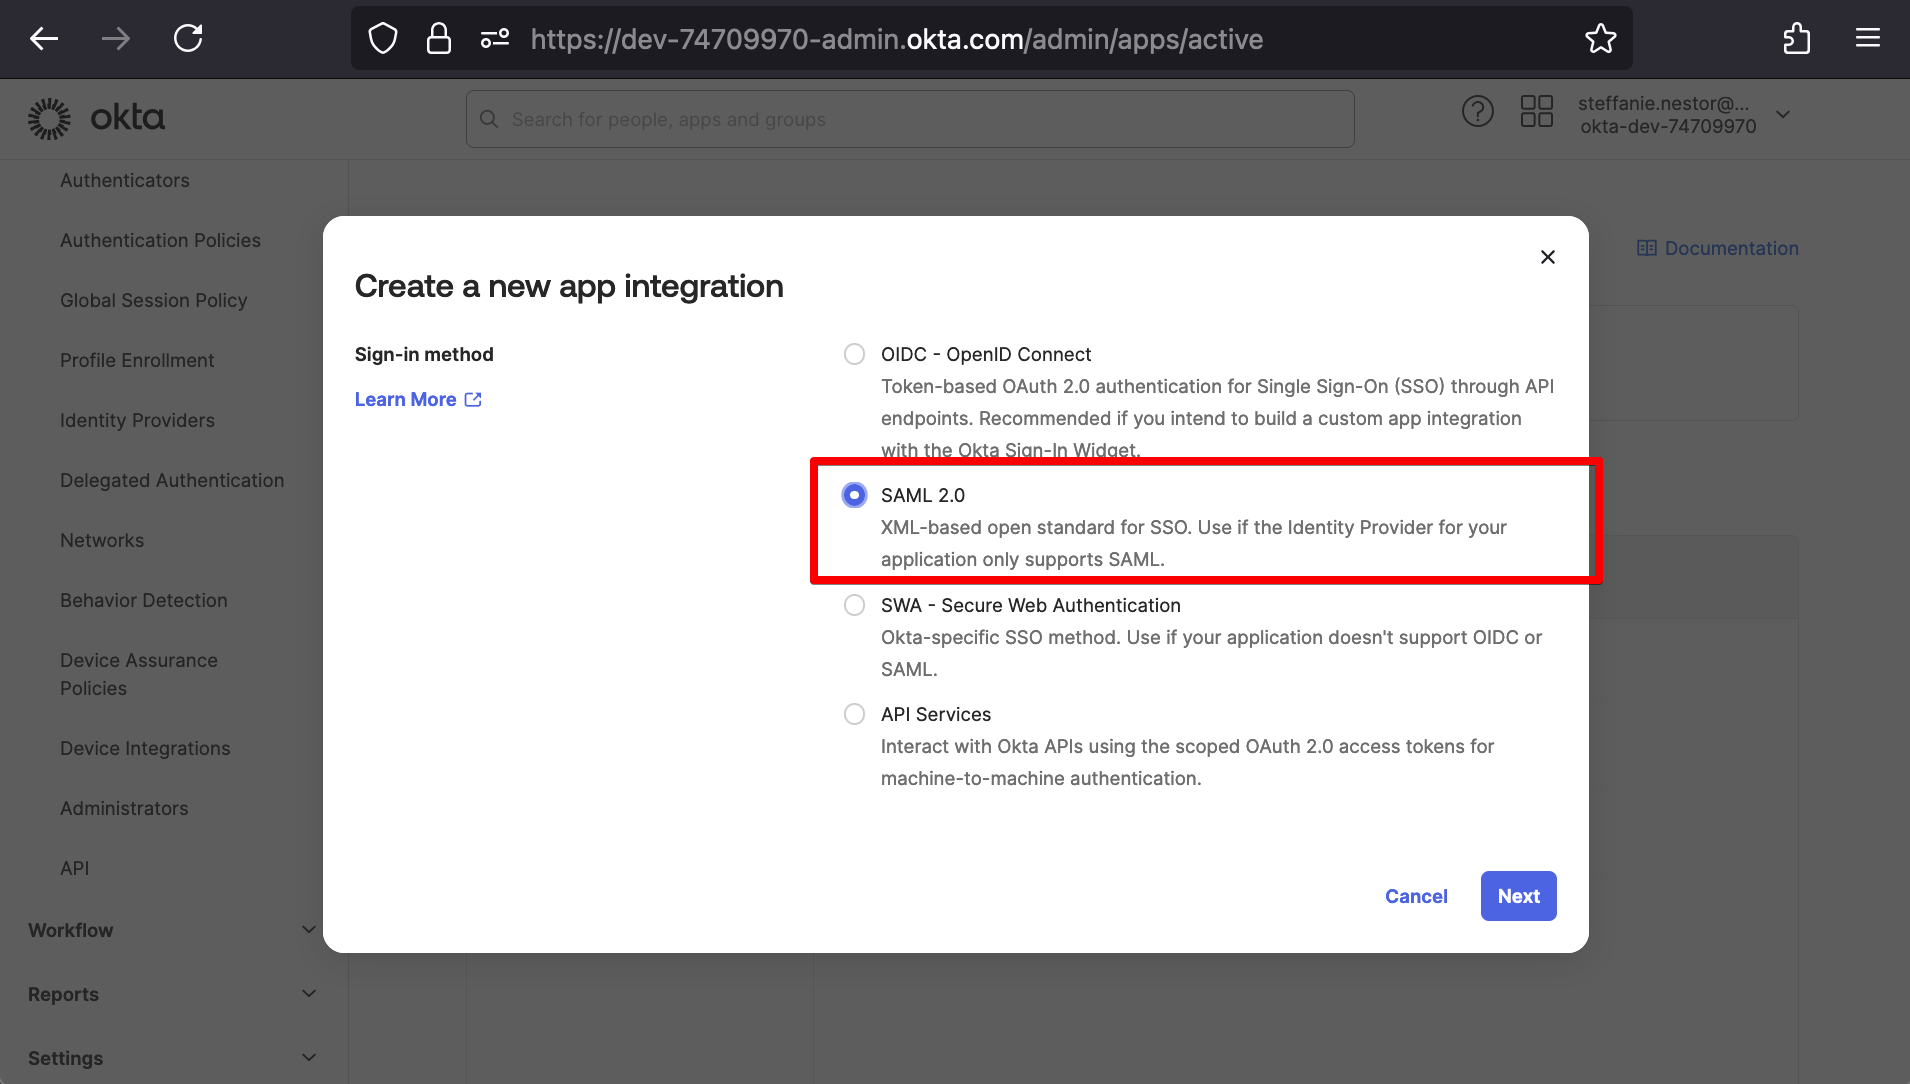
This will show a pop-in window labeled “Create a new app integration” form. Under “Sign-in method,” we’ll select SAML 2.0.
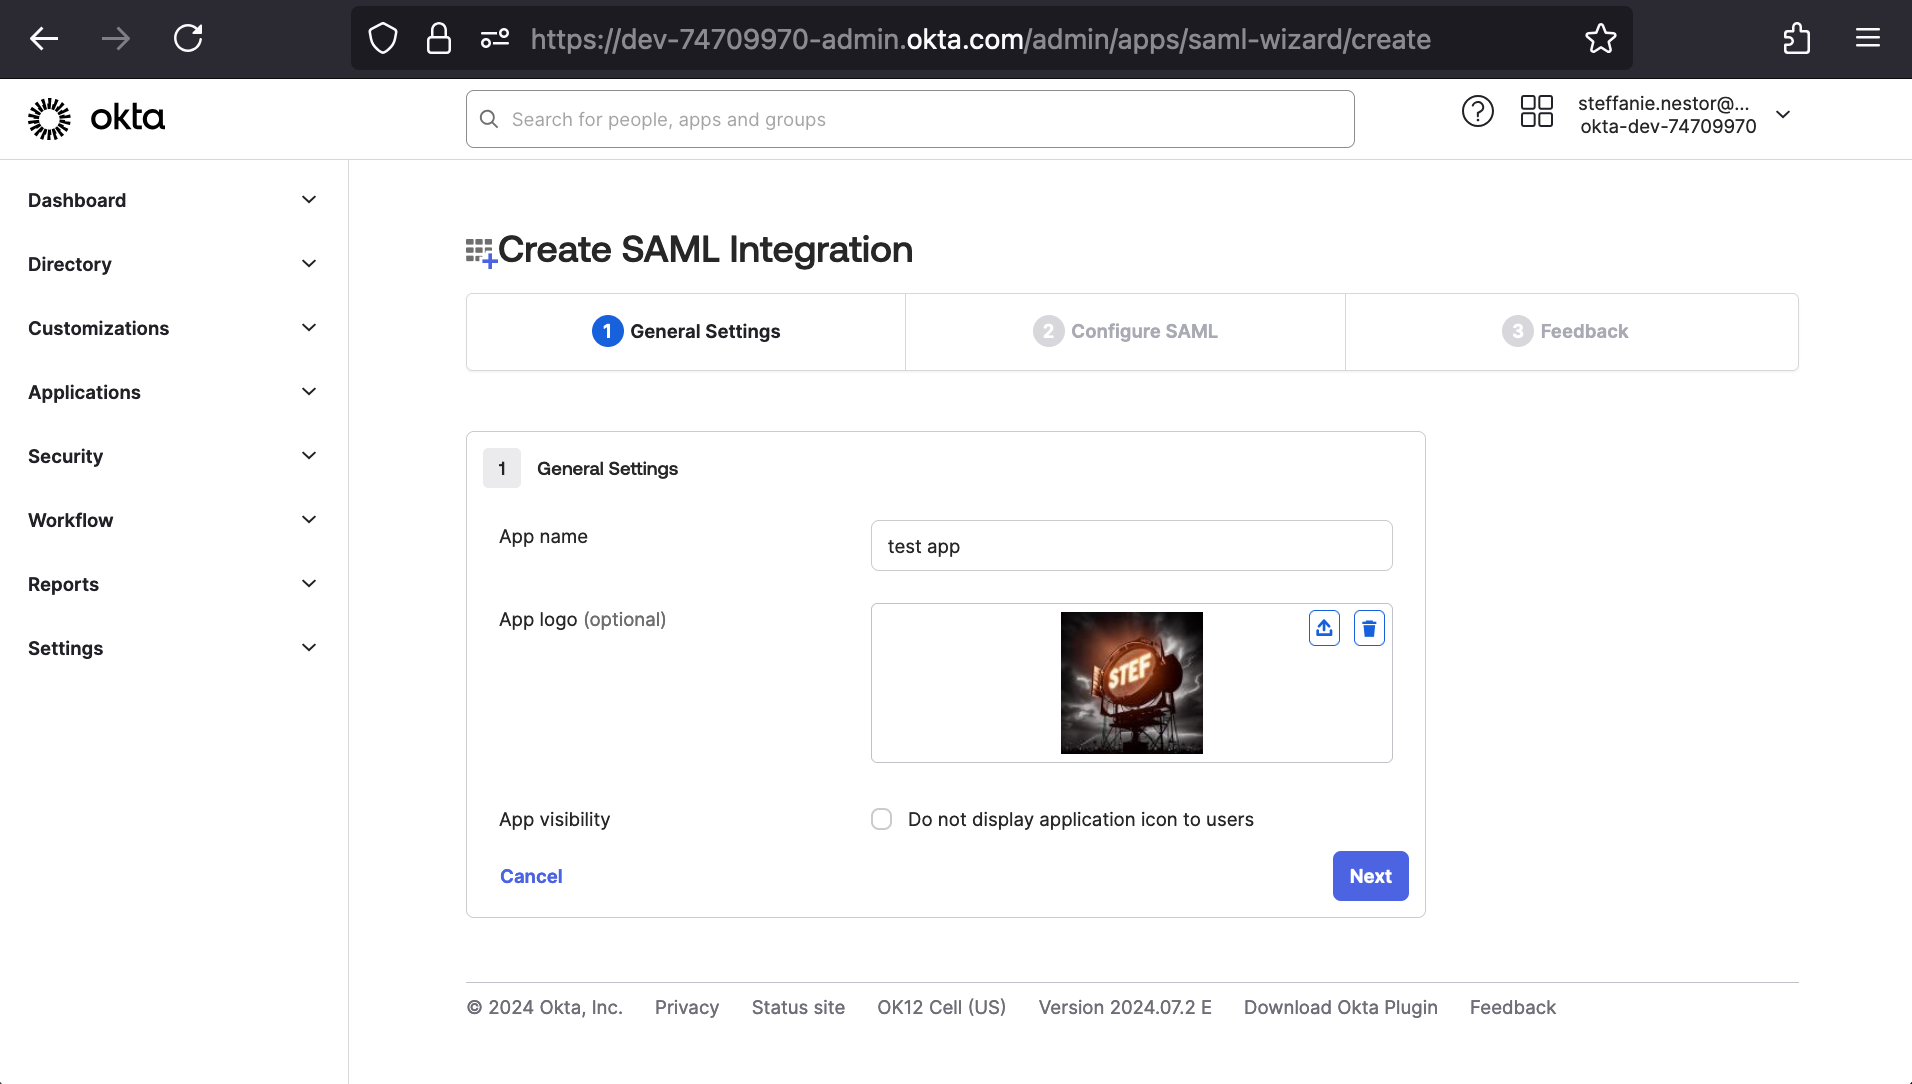
After clicking Next, we’ll be taken to Okta’s Create SAML Integration wizard. Under (1) General Settings, we’ll input an App name and App logo (optional).
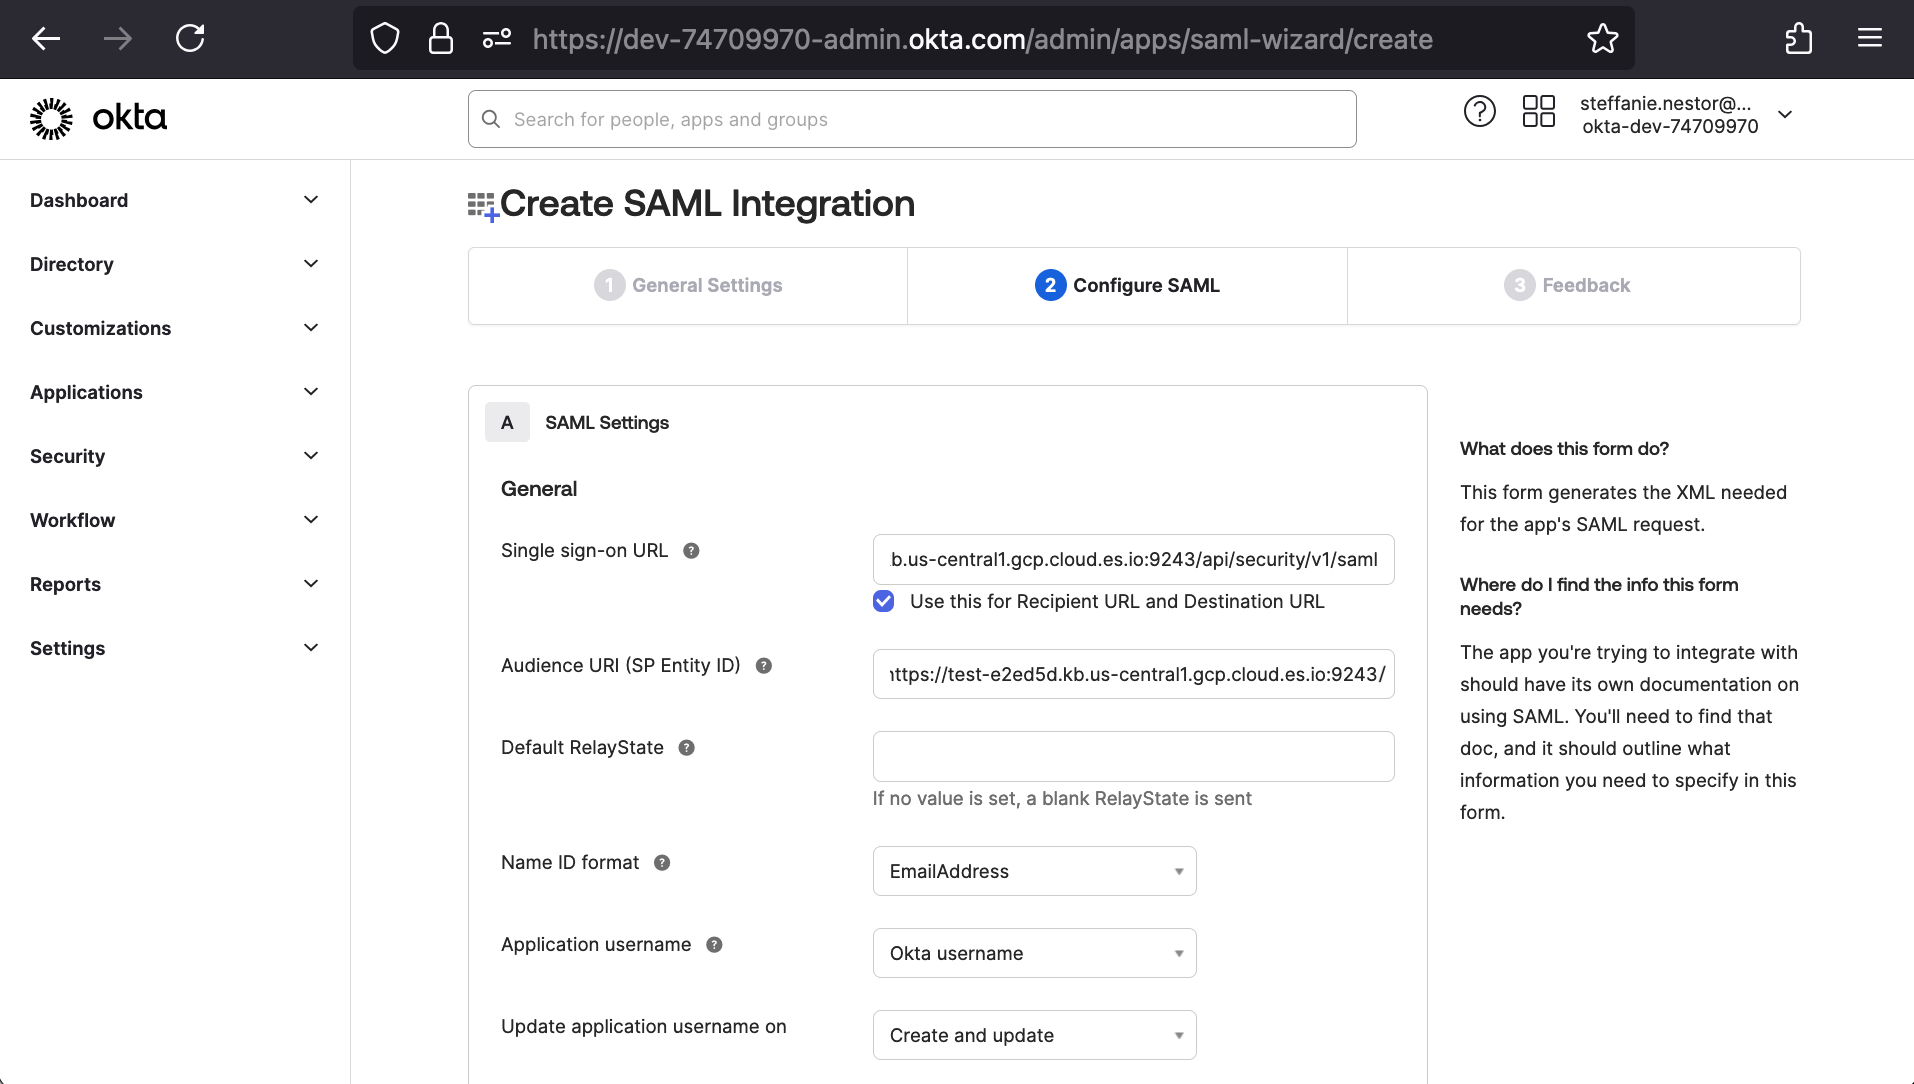
After clicking Next, we’ll be taken to (2) Configure SAML. Under (A) SAML Settings, we’ll first cross-pollinate some of the earlier Elasticsearch SAML settings’ values. We’ll copy the value for “sp.acs” into Okta’s “Single sign-on URL” and the value for “sp.entity_id” into Okta’s “Audience URI (SP Entity ID)”.
The next fields’ values depend on the Okta-side setup. For our demonstration, we’ll leave the default field states for Default RelayState, Application username, and Update application username on and update Name ID format to “EmailAddress.”
Scrolling down a bit, we’ll set Group Attribute Statements (Optional) to our target group “Everyone”.
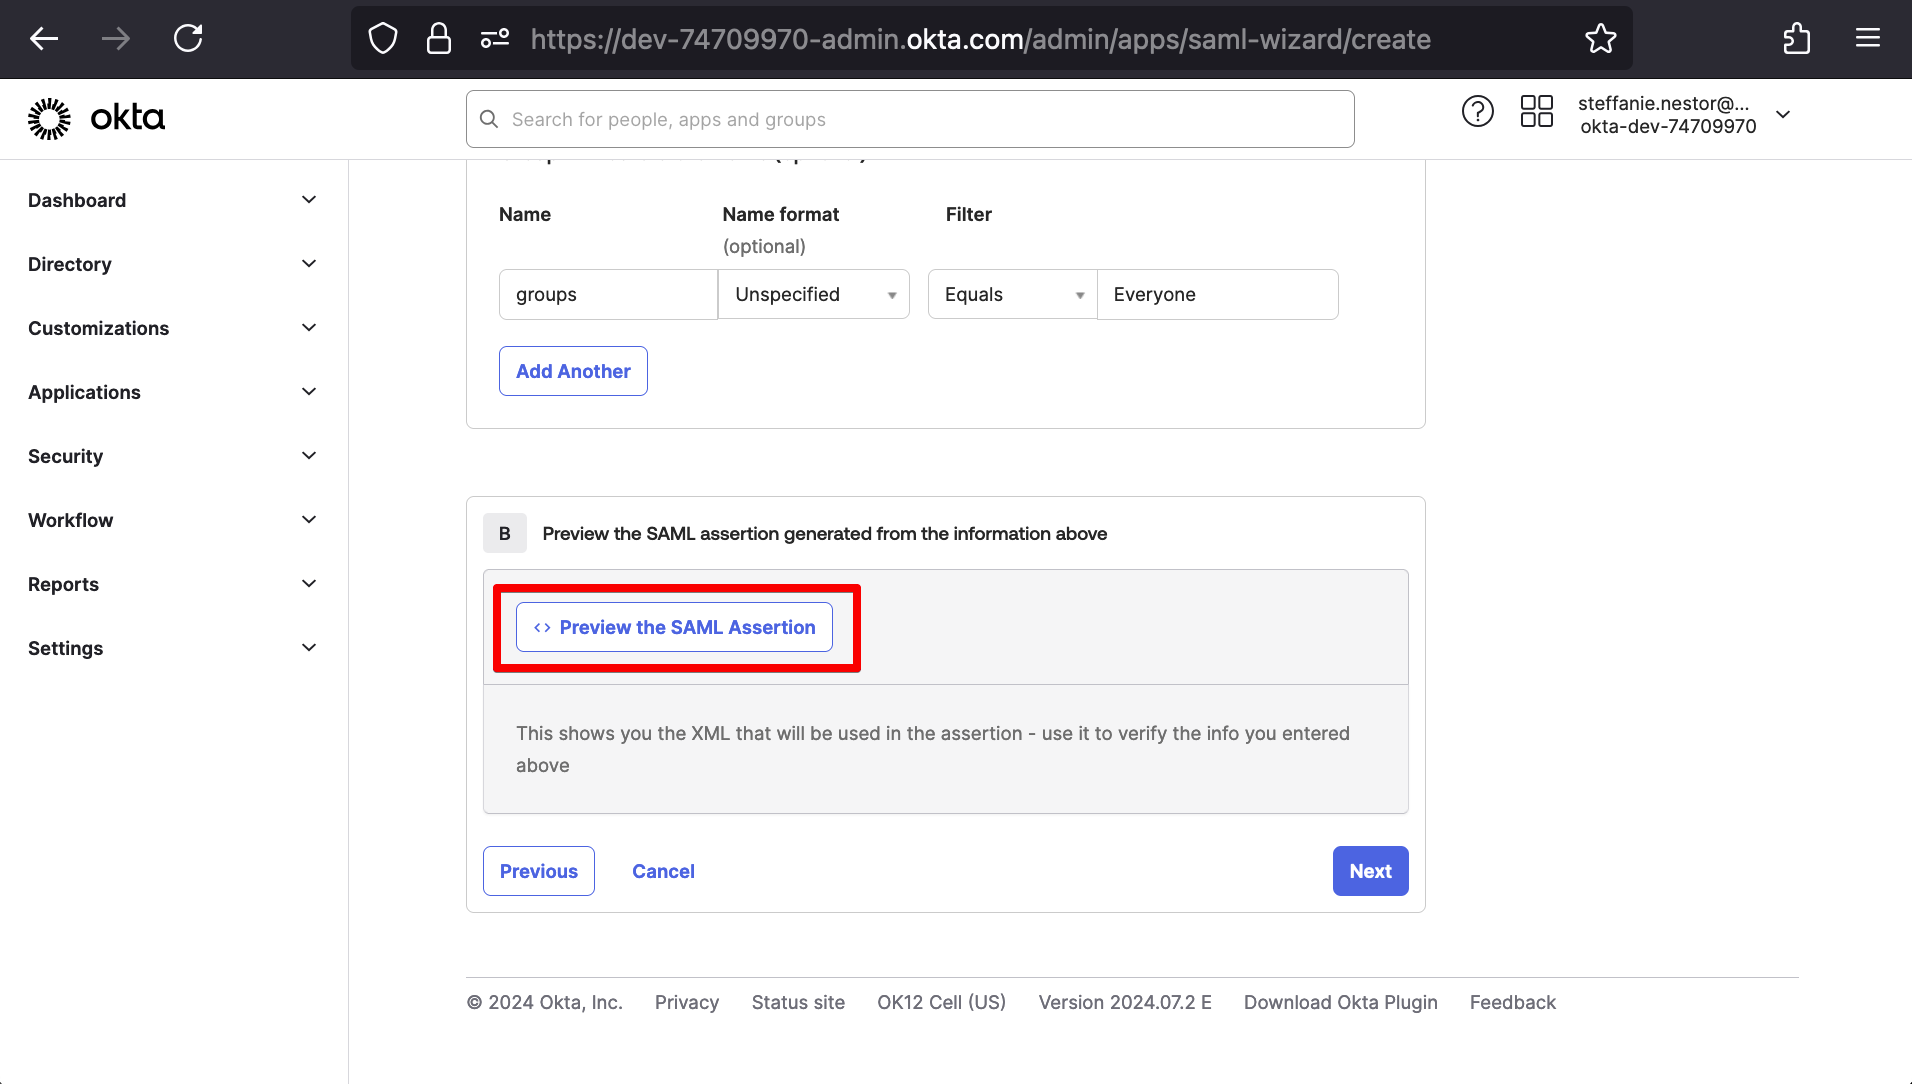
Under (B) Preview the SAML assertion generated from the information above, we’ll then click Preview the SAML Assertion.
<?xml version="1.0" encoding="UTF-8"?>
<saml2:Assertion ID="id4050405470570331857248288" IssueInstant="2024-08-08T02:33:26.433Z" Version="2.0"
	xmlns:saml2="urn:oasis:names:tc:SAML:2.0:assertion">
	<saml2:Issuer Format="urn:oasis:names:tc:SAML:2.0:nameid-format:entity">http://www.okta.com/exkiu7l8zm0rwNwtQ5d7</saml2:Issuer>
	<saml2:Subject>
    	<saml2:NameID Format="urn:oasis:names:tc:SAML:1.1:nameid-format:emailAddress">steffanie.nestor@elastic.co</saml2:NameID>
    	<saml2:SubjectConfirmation Method="urn:oasis:names:tc:SAML:2.0:cm:bearer">
        	<saml2:SubjectConfirmationData NotOnOrAfter="2024-08-08T02:38:26.433Z" Recipient="https://test-e2ed5d.kb.us-central1.gcp.cloud.es.io:9243/api/security/saml/callback"/>
    	</saml2:SubjectConfirmation>
	</saml2:Subject>
	<saml2:Conditions NotBefore="2024-08-08T02:28:26.433Z" NotOnOrAfter="2024-08-08T02:38:26.433Z">
    	<saml2:AudienceRestriction>
        	<saml2:Audience>https://test-e2ed5d.kb.us-central1.gcp.cloud.es.io:9243/</saml2:Audience>
    	</saml2:AudienceRestriction>
	</saml2:Conditions>
	<saml2:AuthnStatement AuthnInstant="2024-08-08T02:33:26.433Z" SessionIndex="id1723084406432.1415848066">
    	<saml2:AuthnContext>
        	<saml2:AuthnContextClassRef>urn:oasis:names:tc:SAML:2.0:ac:classes:PasswordProtectedTransport</saml2:AuthnContextClassRef>
    	</saml2:AuthnContext>
	</saml2:AuthnStatement>
	<saml2:AttributeStatement>
    	<saml2:Attribute Name="groups" NameFormat="urn:oasis:names:tc:SAML:2.0:attrname-format:unspecified">
        	<saml2:AttributeValue
            	xmlns:xs="http://www.w3.org/2001/XMLSchema"
            	xmlns:xsi="http://www.w3.org/2001/XMLSchema-instance" xsi:type="xs:string">Everyone
        	</saml2:AttributeValue>
    	</saml2:Attribute>
	</saml2:AttributeStatement>
</saml2:Assertion>After clicking Next, we’ll be taken to a feedback form, and then we’ll finally have a created Okta application. Now let’s add this Okta application to an allotted Okta Group. For our demonstration, we’ll add it to the group “Everyone” by navigating Directory > Groups > Everyone > Assign applications and then enabling our application by clicking Assign.
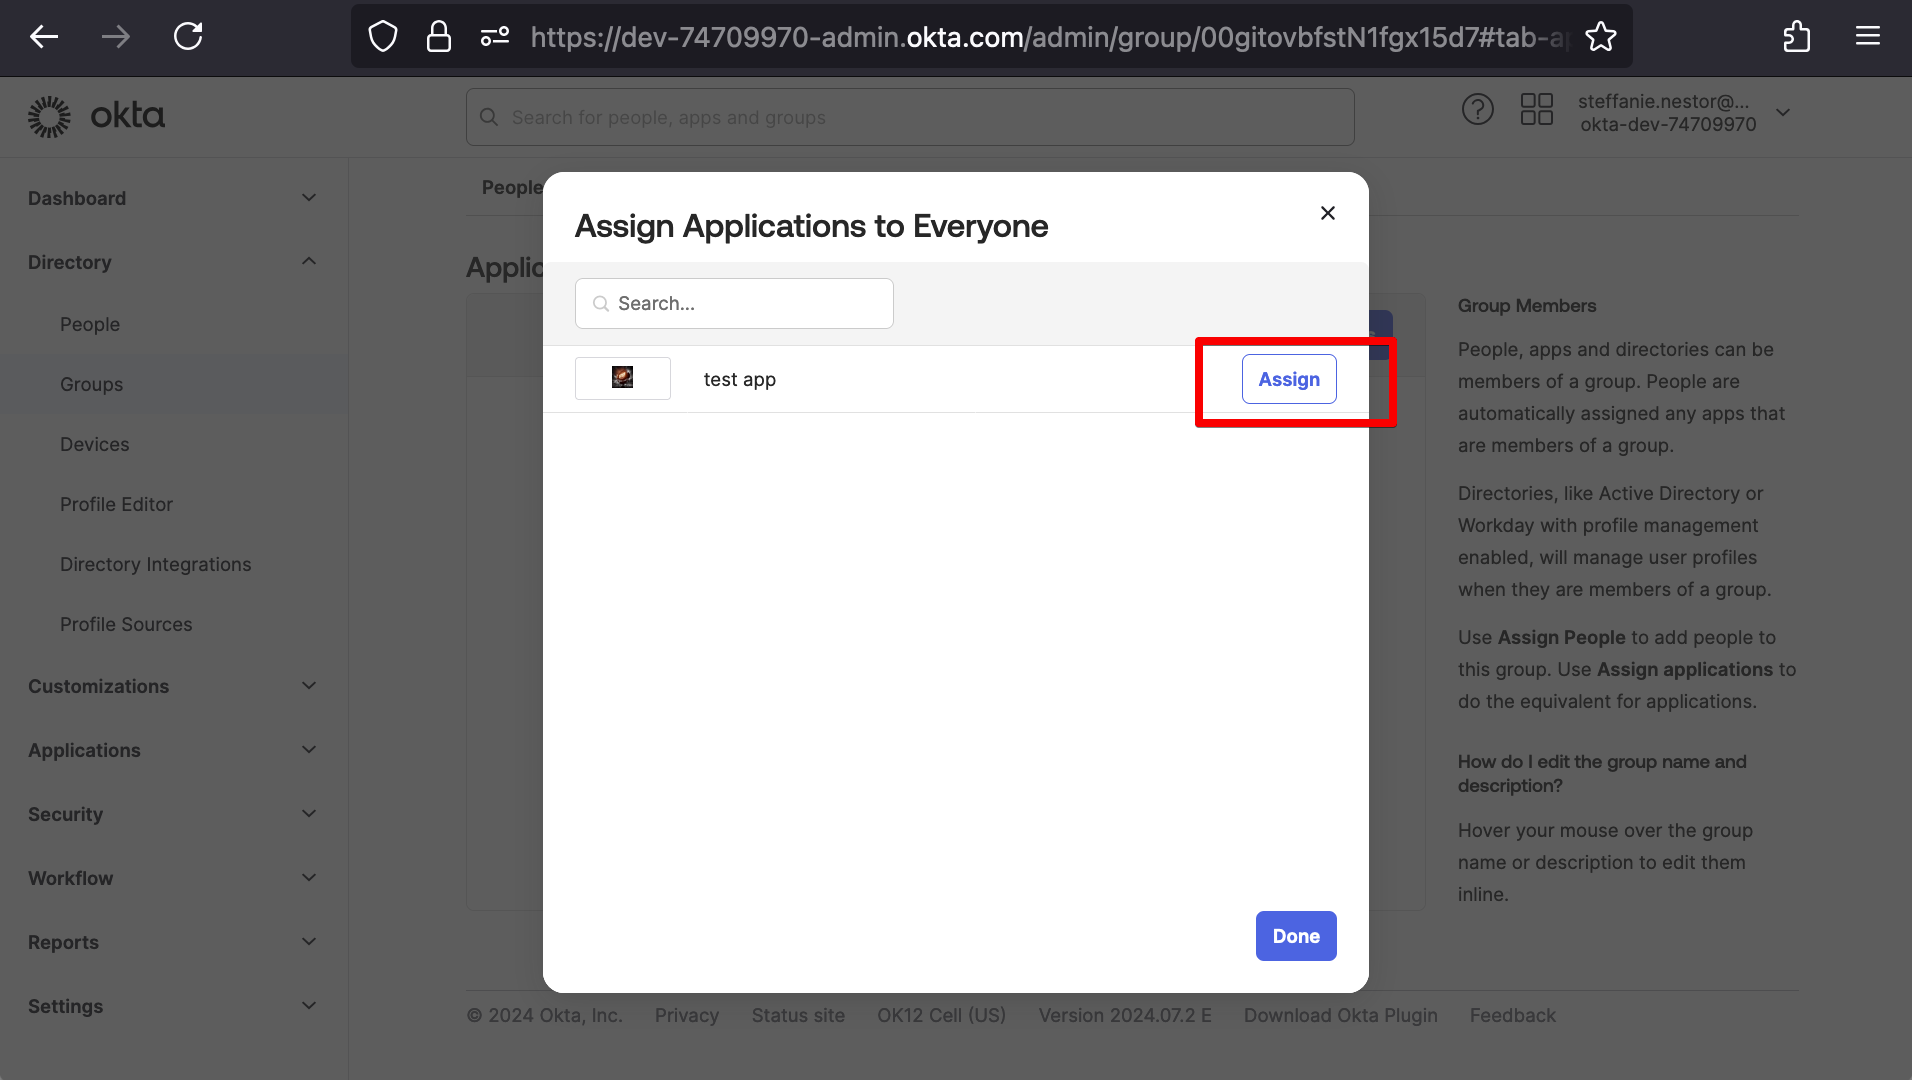
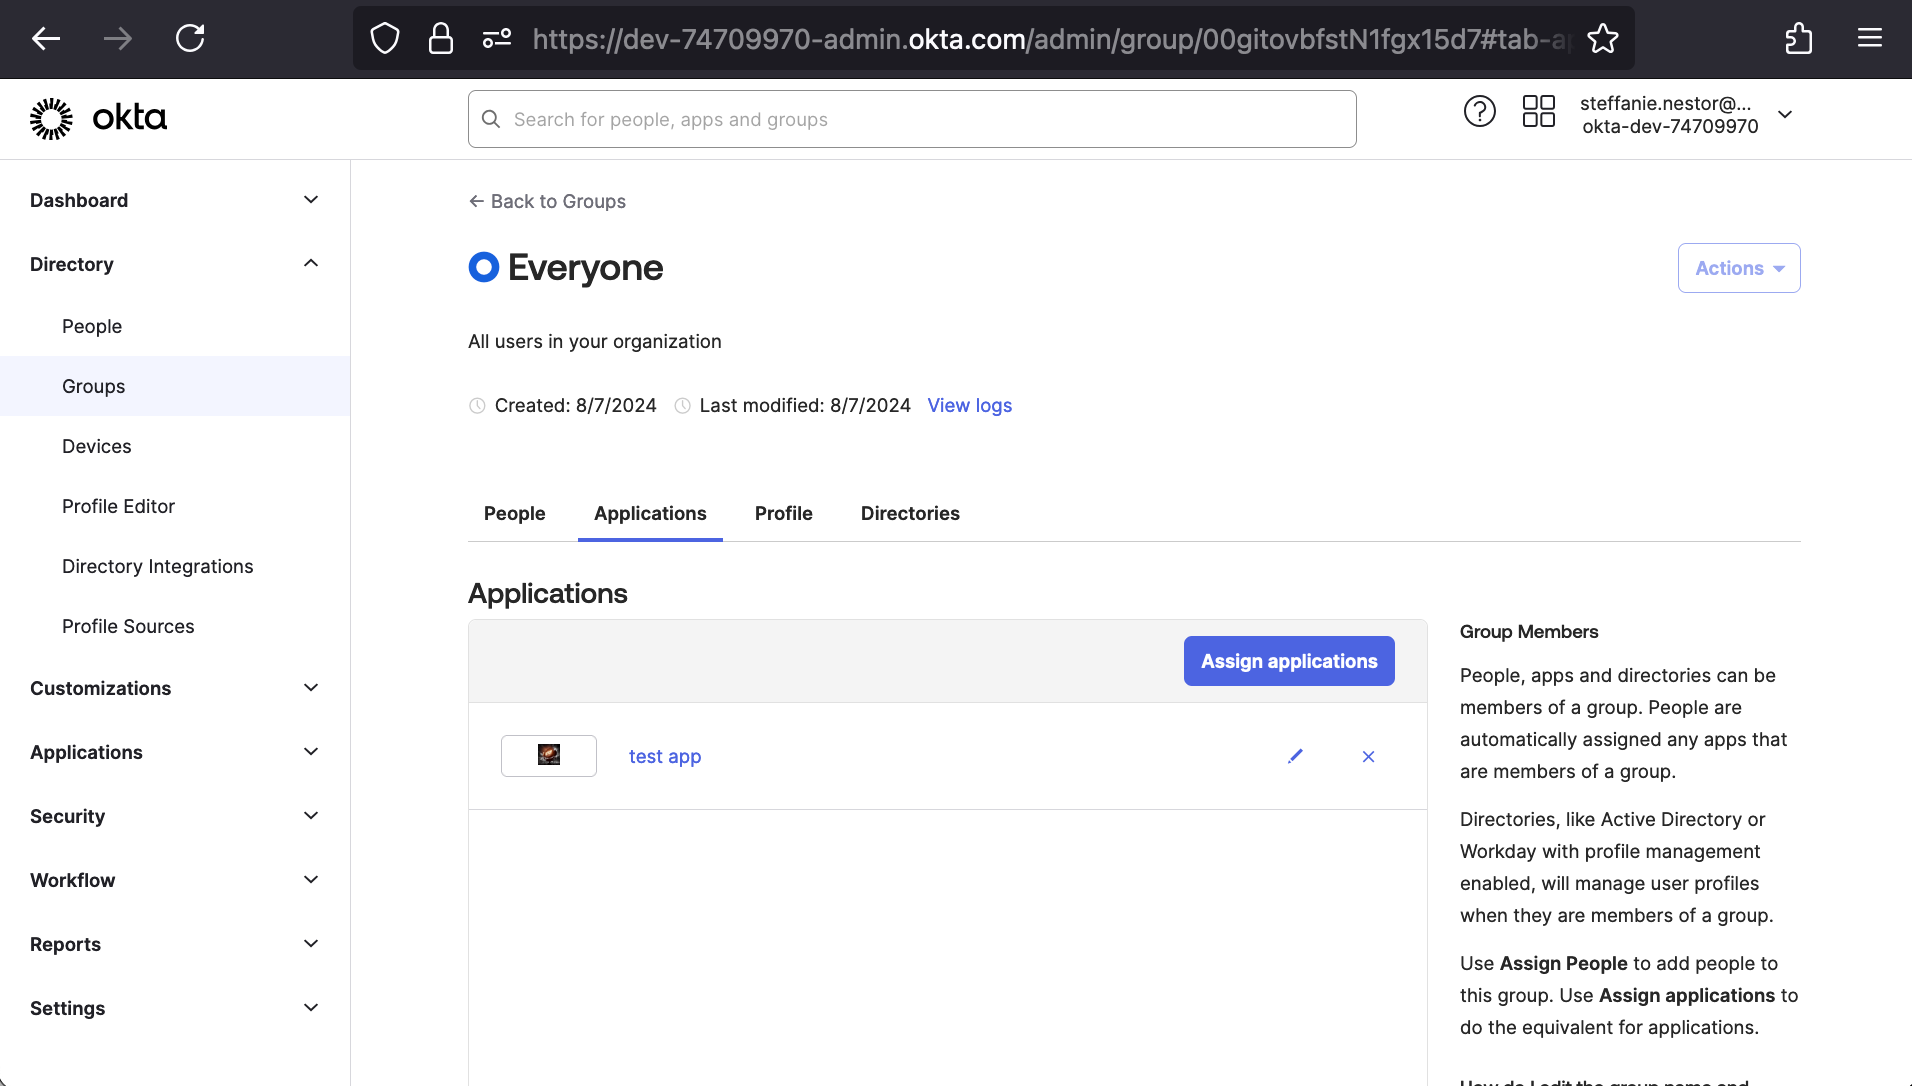
We’ll finish by clicking Done, at which point the application will show under our Okta Group’s application list.
Connect Okta to Elastic
Now that we have a working Okta application, we can copy the Okta-generated values back into our Elasticsearch SAML settings. Our Okta application’s Metadata URL will replace our placeholder for “idp.metadata.path” and its “Issuer” (under More details) will replace our placeholder for “idp.entity_id”.
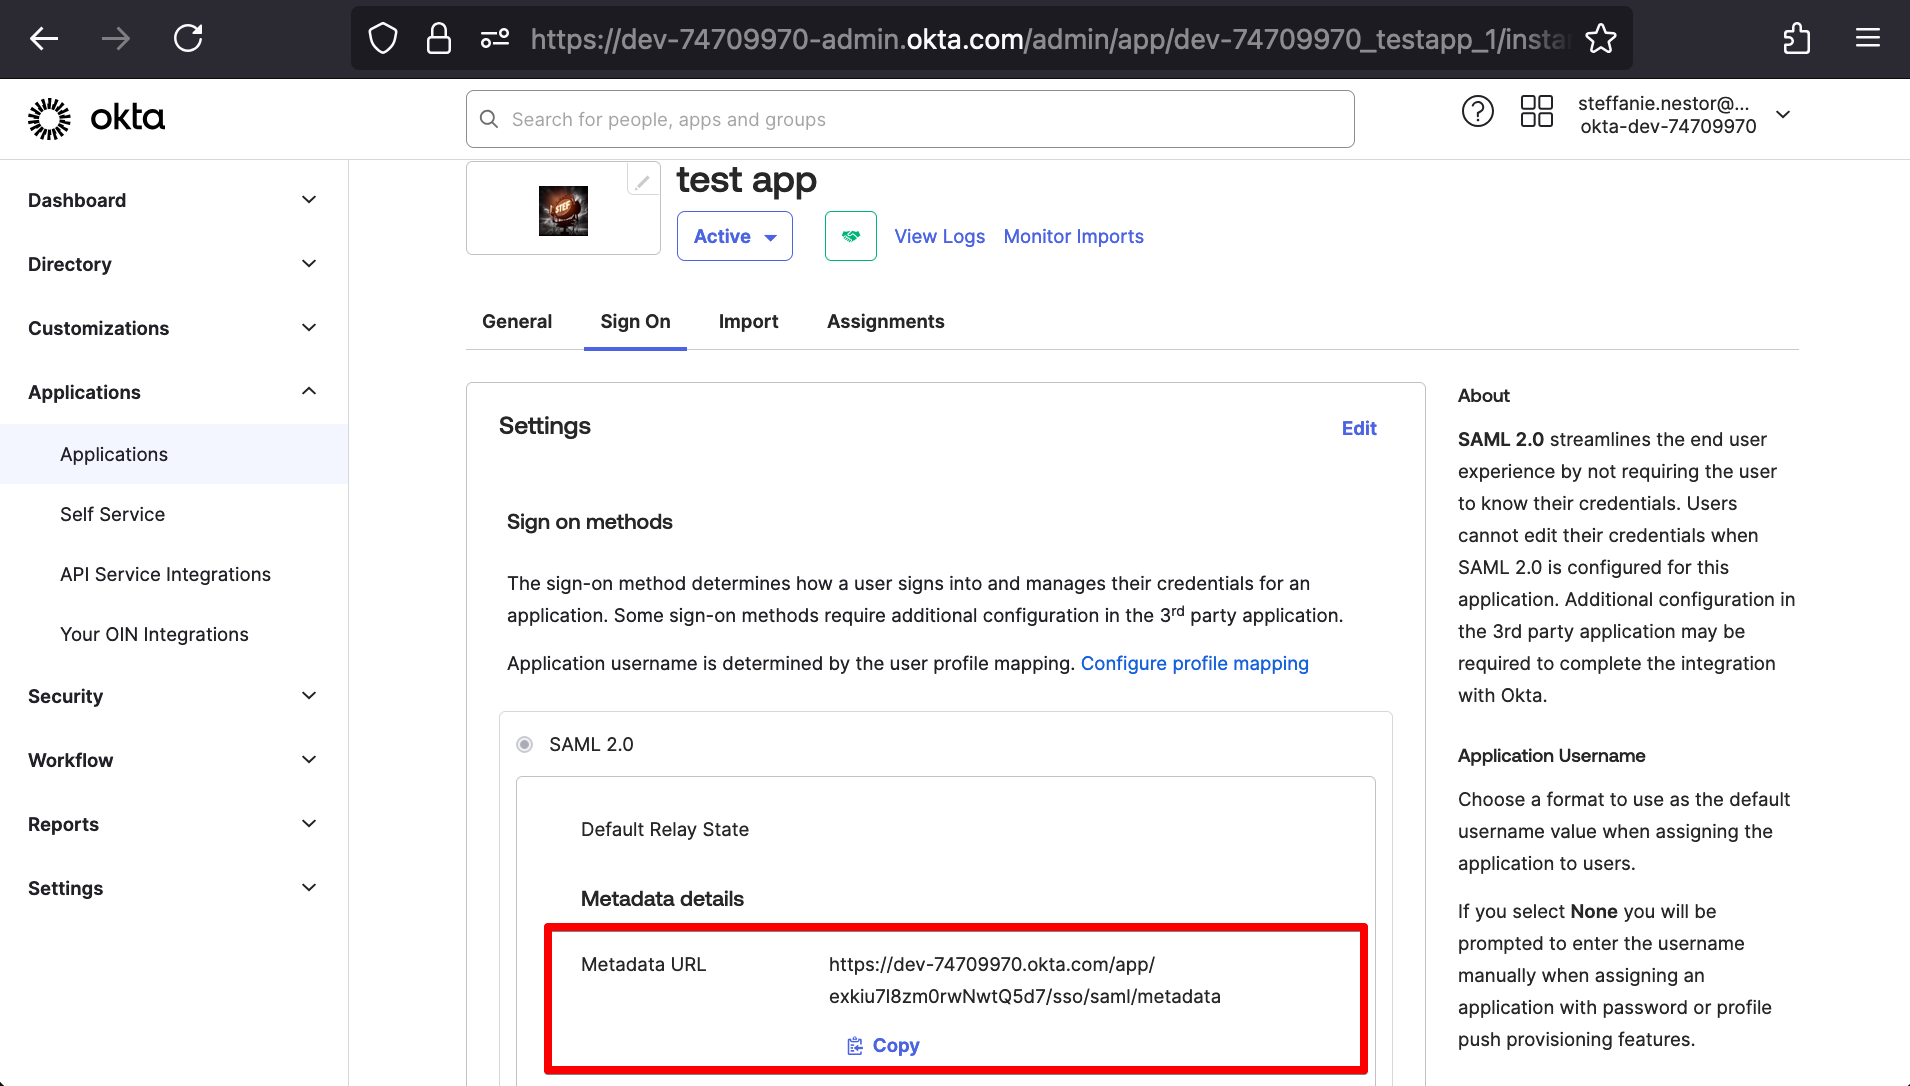
Based on our earlier Okta-side configuration, we’ll also be able to set “attributes.principal” to “nameid” and “attributes.groups” to “groups.”
xpack.security.authc.realms.saml.saml1:
  order: 2
  attributes.principal: "nameid"
  attributes.groups: "groups"
  idp.metadata.path: "https://dev-74709970.okta.com/app/exkiu7l8zm0rwNwtQ5d7/sso/saml/metadata"
  idp.entity_id: "http://www.okta.com/exkiu7l8zm0rwNwtQ5d7"
  sp.entity_id: "https://test-e2ed5d.kb.us-central1.gcp.cloud.es.io:9243/"
  sp.acs: "https://test-e2ed5d.kb.us-central1.gcp.cloud.es.io:9243/api/security/saml/callback"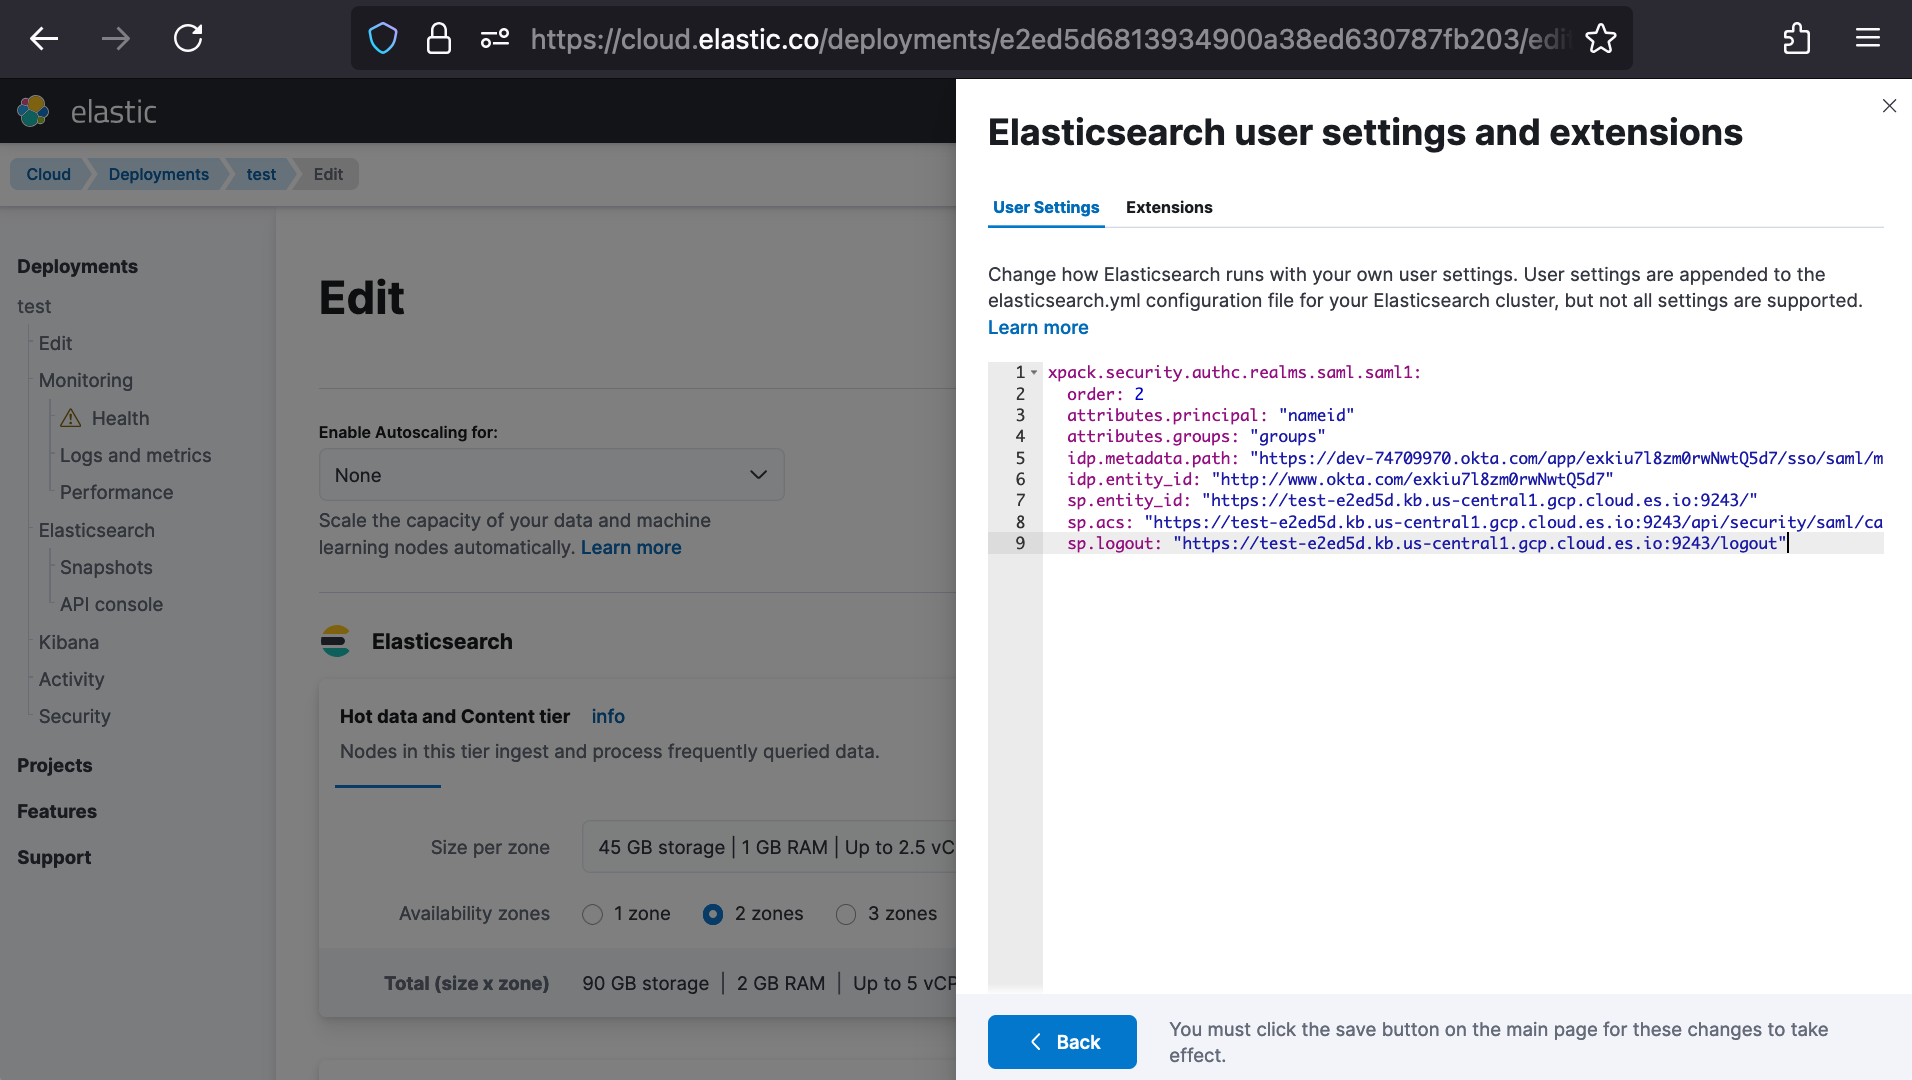
sp.logout: "https://test-e2ed5d.kb.us-central1.gcp.cloud.es.io:9243/logout"Now that we have all Elasticsearch SAML setting values filled in, we’re ready to add the SAML settings to both the Elasticsearch and Kibana user settings within our Elastic Cloud Deployment. Under our Deployment, we’ll navigate to Edit to Customize our Deployment. For Elasticsearch, we’ll open Manage user settings and extensions > User Settings and paste-in our Elasticsearch SAML settings.
After clicking Back, we’ll scroll down to Kibana and open Edit user settings to paste in its SAML settings.
xpack.security.authc.providers:
  saml.saml1:
	order: 0
	realm: "saml1"
	description: "Log in with Okta"
	icon: "https://www.okta.com/themes/custom/okta_www_theme/images/logo.svg"
  basic.basic1:
	order: 1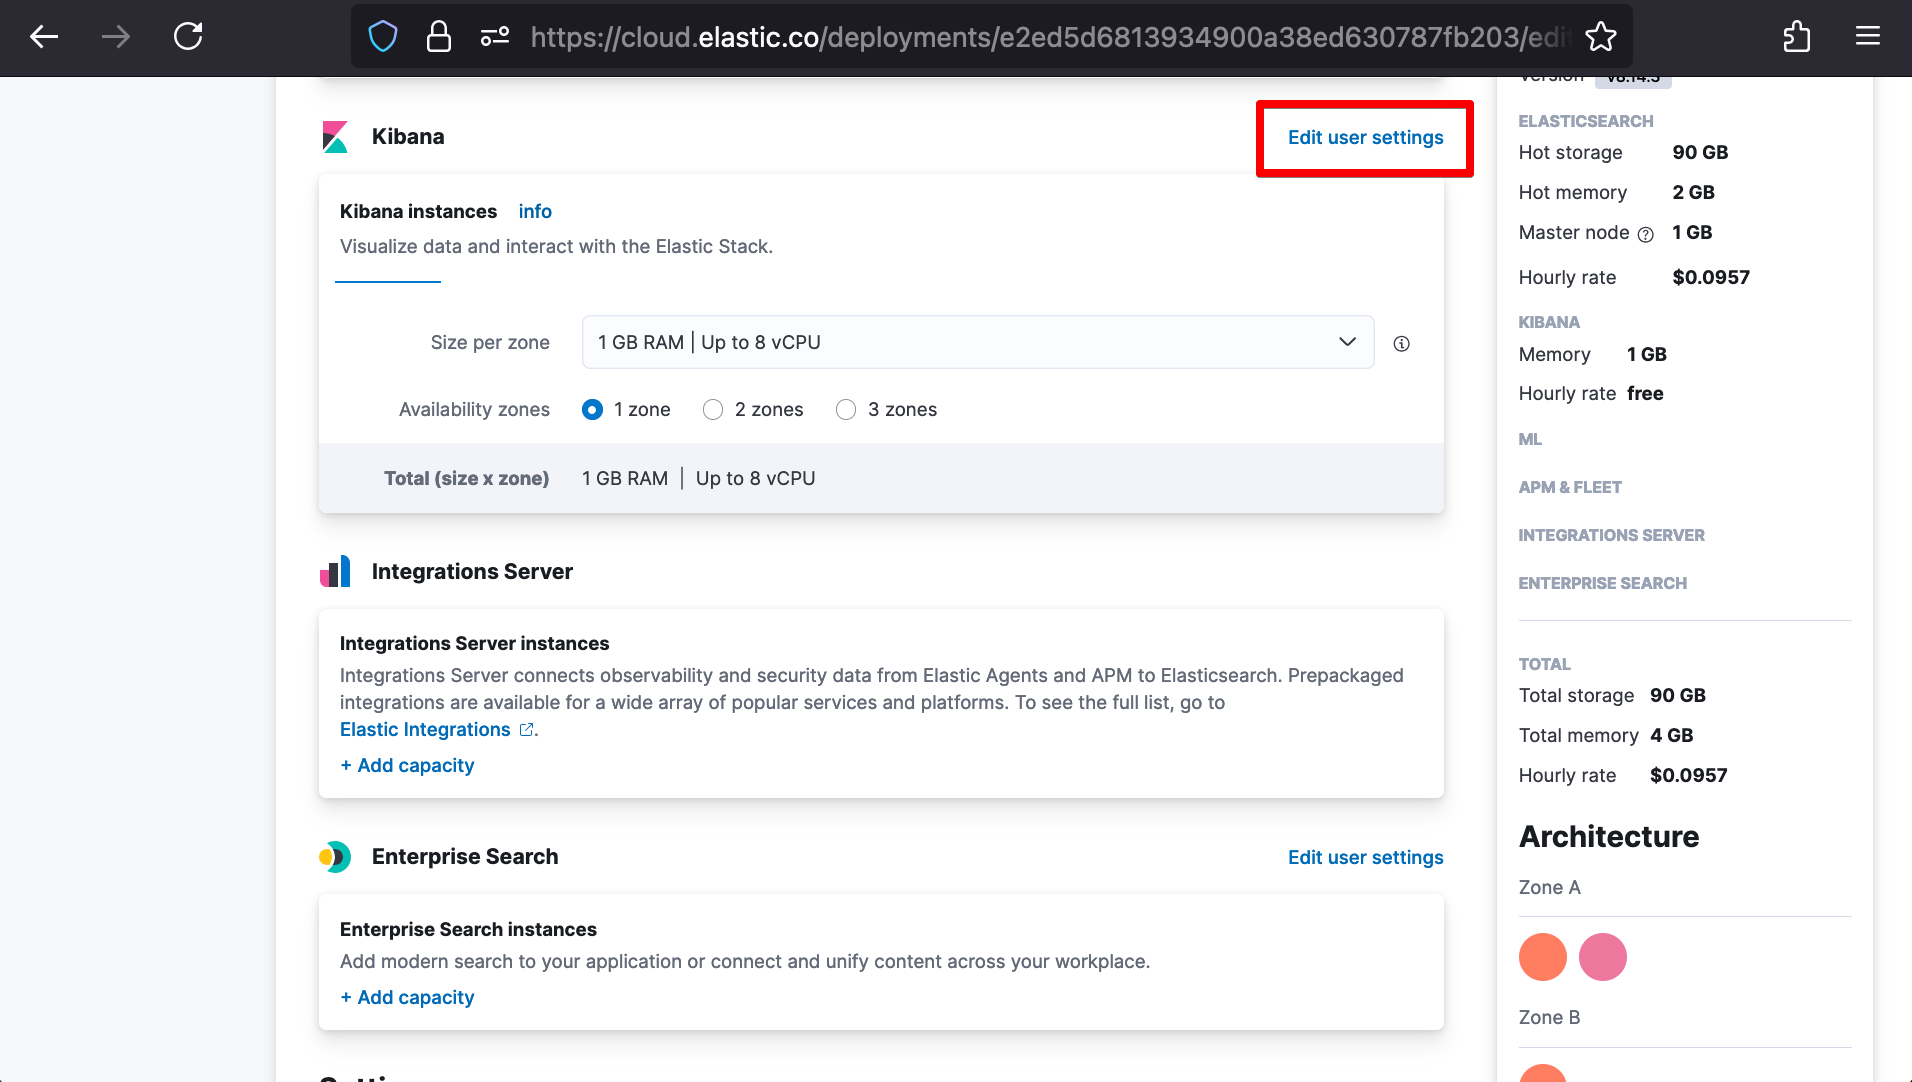
After clicking Back, we’ll scroll to the bottom and click Save and then Confirm.
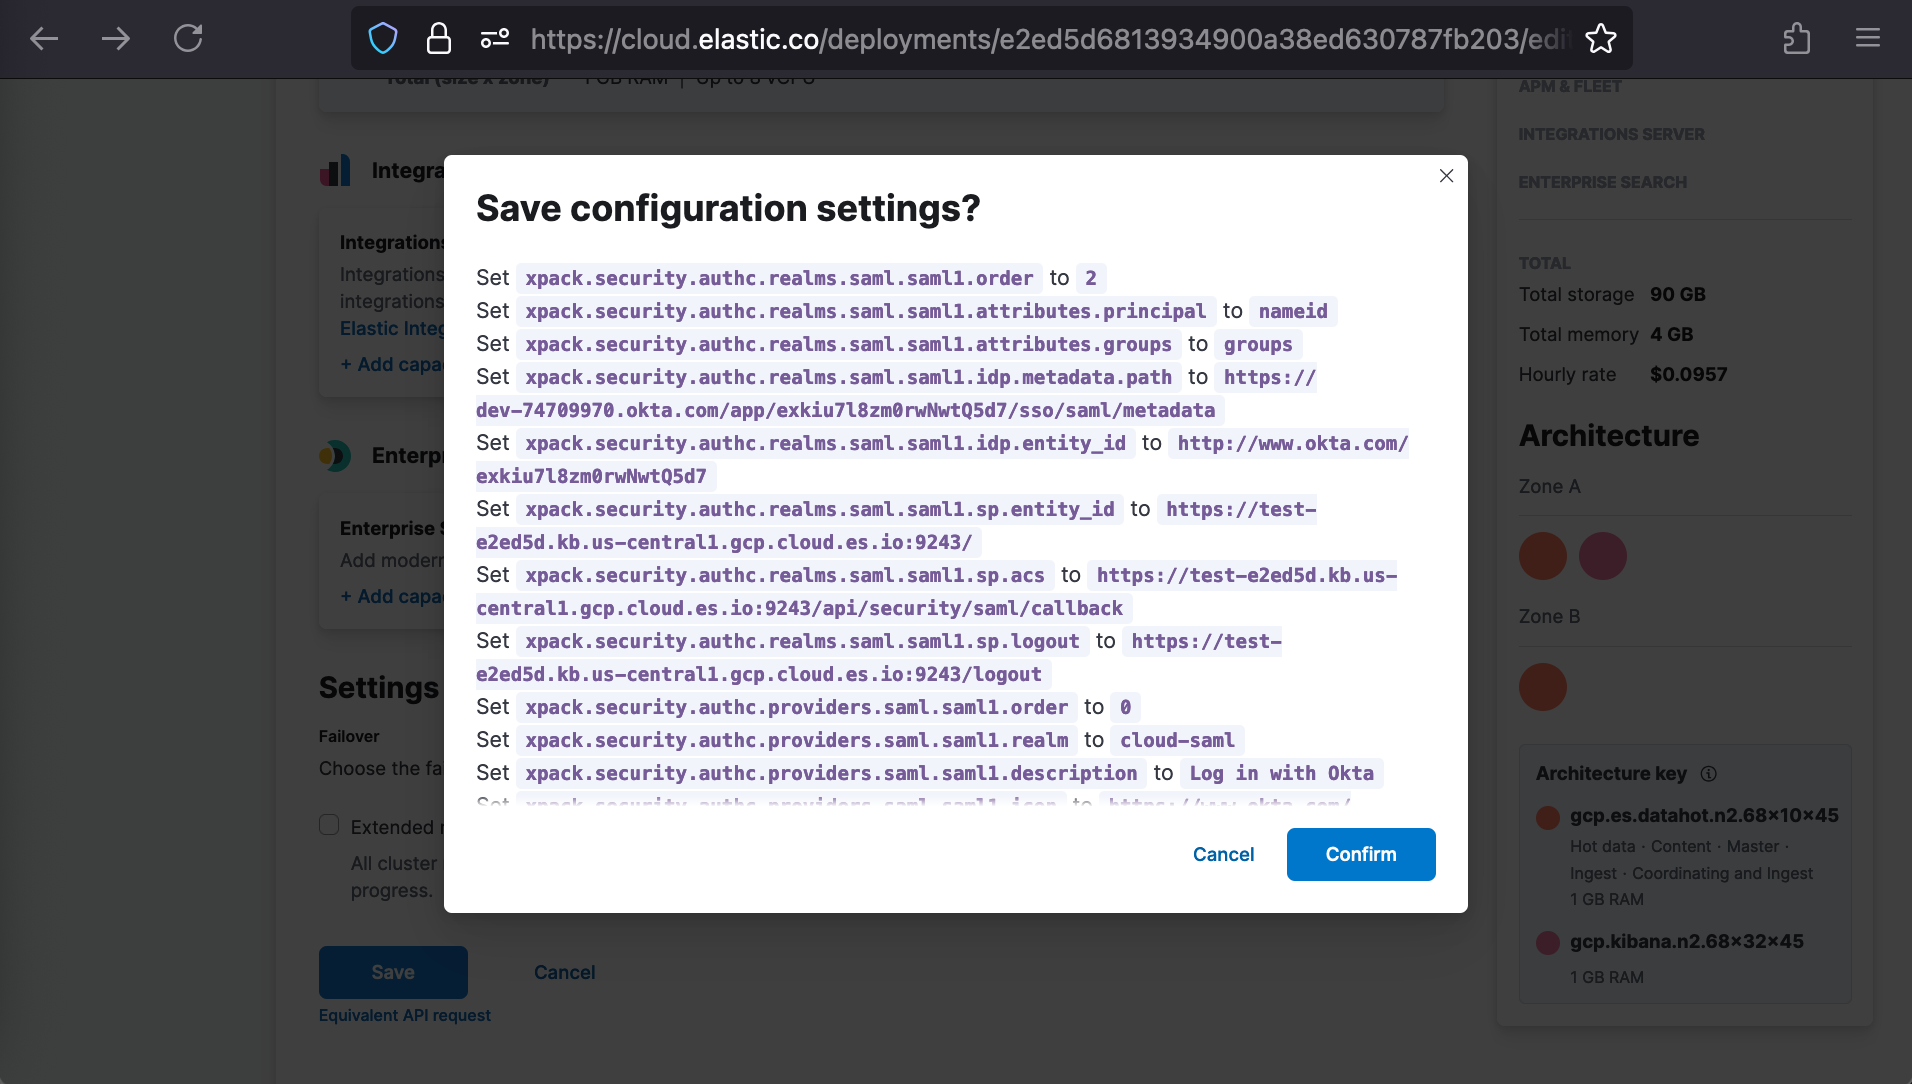
This will induce an Elastic Cloud Deployment plan on our behalf and redirect us to the Deployment Activity page to monitor its progress.
Map Okta Group to Elastic Role
While this plan progresses, we can continue to Configuring our Role Mappings. For our Elasticsearch SAML realm “saml1,” this will take the related Okta Groups and, via Elasticsearch’s Role Mappings, translate them into Elasticsearch’s Roles to enable user permission authorizations. For our demonstration, we’ve allowed “Everyone” (which was all Administrators) access to our Elastic Cloud Deployment, so for us it makes sense to also grant them administrator-level permissions in Kibana. From our deployment’s Elasticsearch API Console, we’ll run:
PUT /_security/role_mapping/saml-owner-superuser
{
  "roles": [ "superuser" ],
  "enabled": true,
  "rules": { "all": [
    	{ "field": { "realm.name": "saml1" } },
     { "field": { "groups": "Everyone" } }
  ] }
}
Building off of our earlier example, let’s say we had created multiple Okta groups like “Admins”, “Support”, “Managers”, “Sales”, “Solution_Architects”, and “Engineers”. If only technical coworkers were supposed to access Kibana, we could have set Group Attribute Statements (Optional) to a comma-delimited list “Admins,Support,Solution_Architects,Engineers”. In this circumstance, it may make sense to have multiple levels of role mapping permissions.
PUT /_security/role_mapping/saml-owner-superuser
{
  "roles": [ "superuser" ],
  "enabled": true,
  "rules": { "all": [
    	{ "field": { "realm.name": "saml1" } },
 	{ "field": { "groups": "Admins" } }
  ] }
}

PUT /_security/role_mapping/saml-owner-editor
{
  "roles": [ "writers" ],
  "enabled": true,
  "rules": { "all": [
    	{ "field": { "realm.name": "saml1" } },
 	{ "field": { "groups": "Engineers" } }
  ] }
}

PUT /_security/role_mapping/saml-owner-superuser
{
  "roles": [ "viewer" ],
  "enabled": true,
  "rules": { "all": [
    	{ "field": { "realm.name": "saml1" } },
 	{ "field": { "groups": [ "Support", "Solution_Architects" ] } }
  ] }
}In this situation, “Admins” would have built-in “superuser” role access in Kibana; “Engineers” would have write access via custom role “writers”; and remaining technical workers would have view-only access via built-in role “viewer.” Non-technical users would not have any access to the cluster.
Test SSO integration
Once Deployment Activity shows our plan is completed, we’ll open our earlier copied Kibana URL in a new browser tab. From here, we’ll click Log in with Okta.
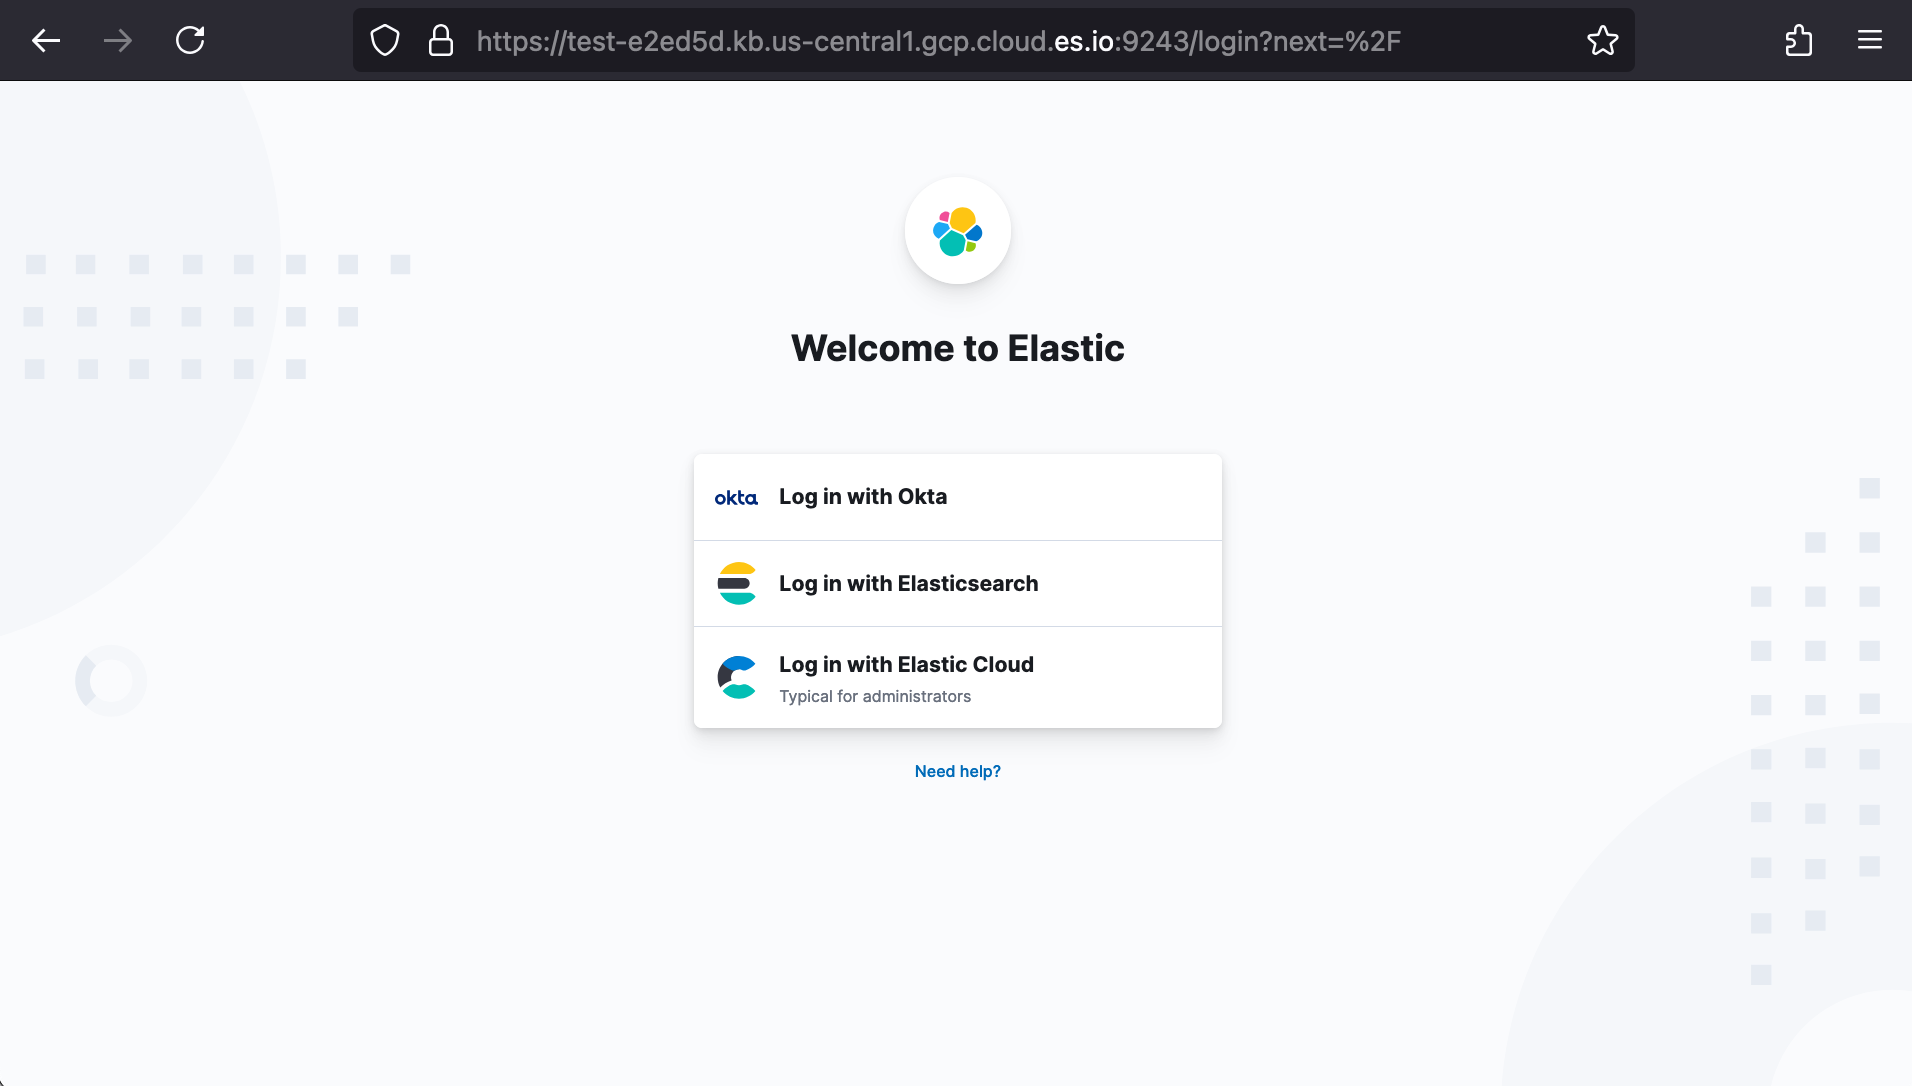
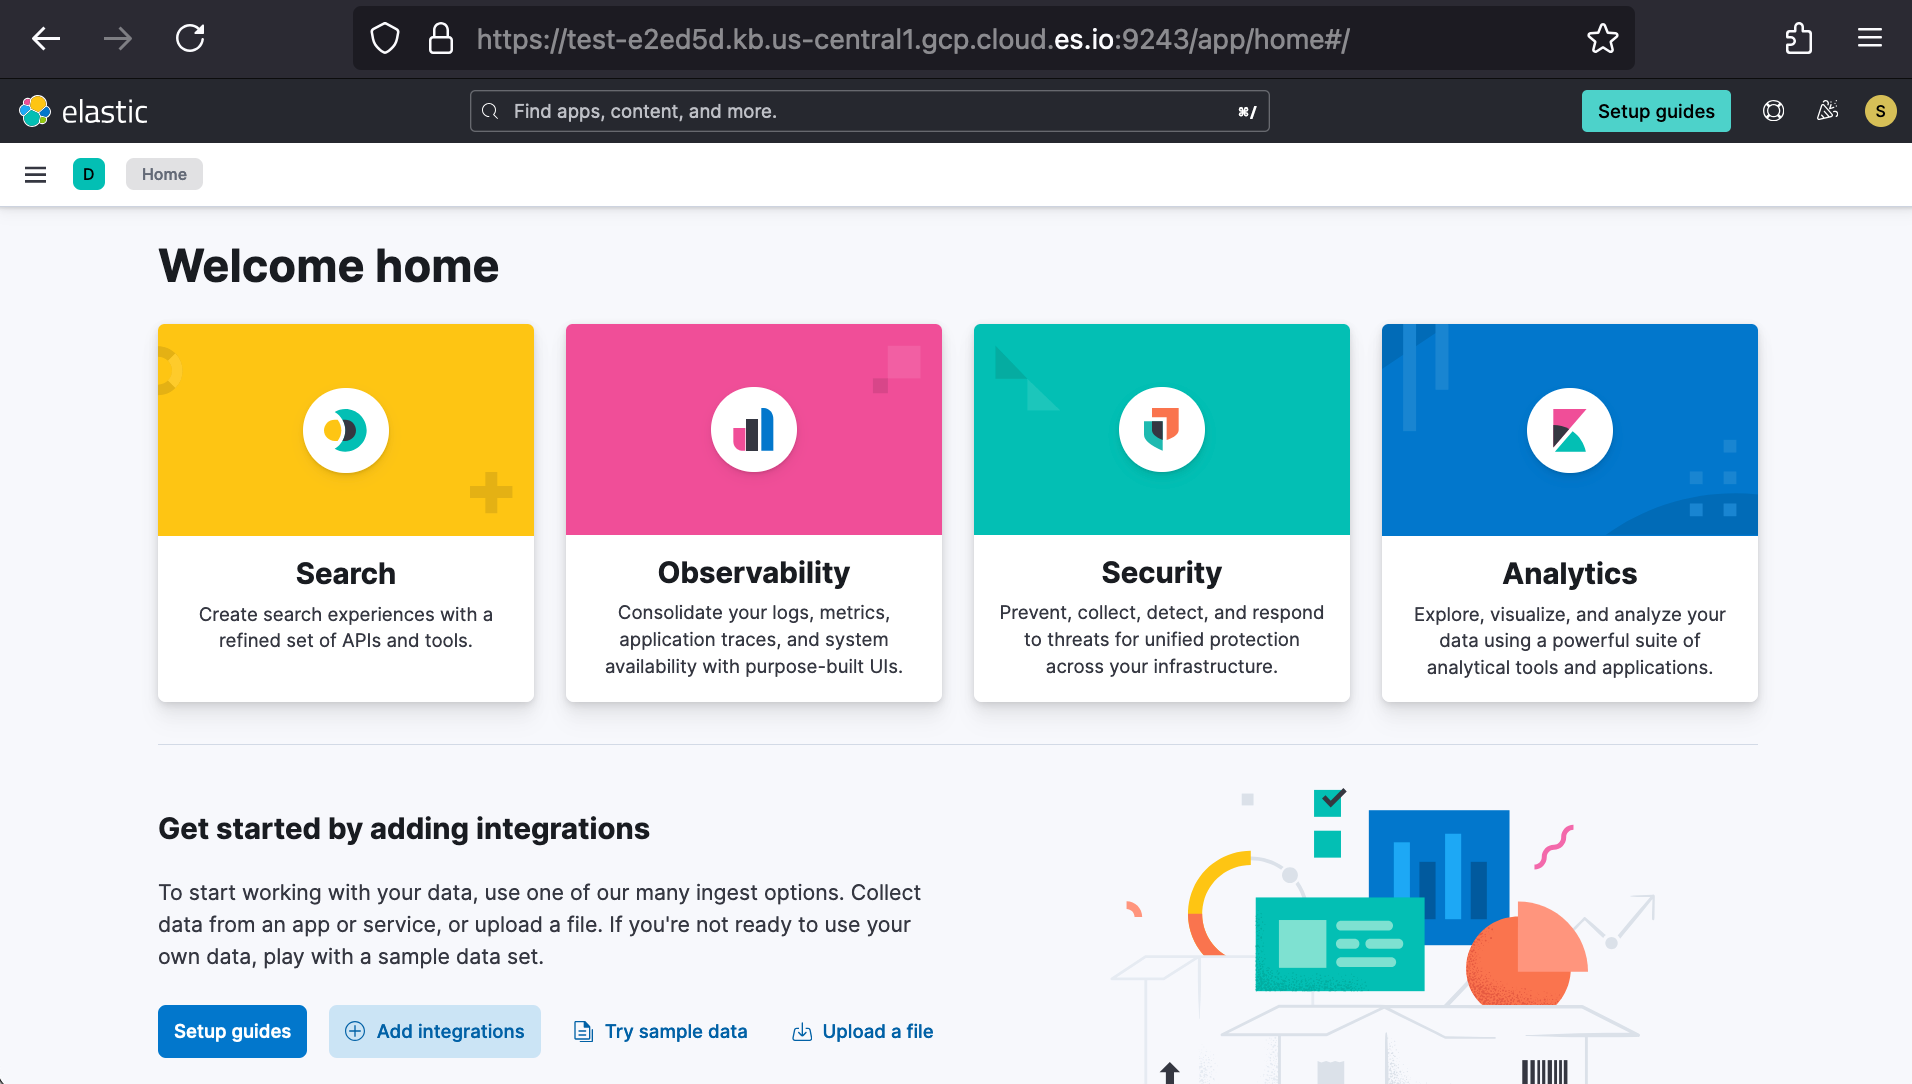
This button will redirect us through an Okta authentication session and redirect back to Kibana.
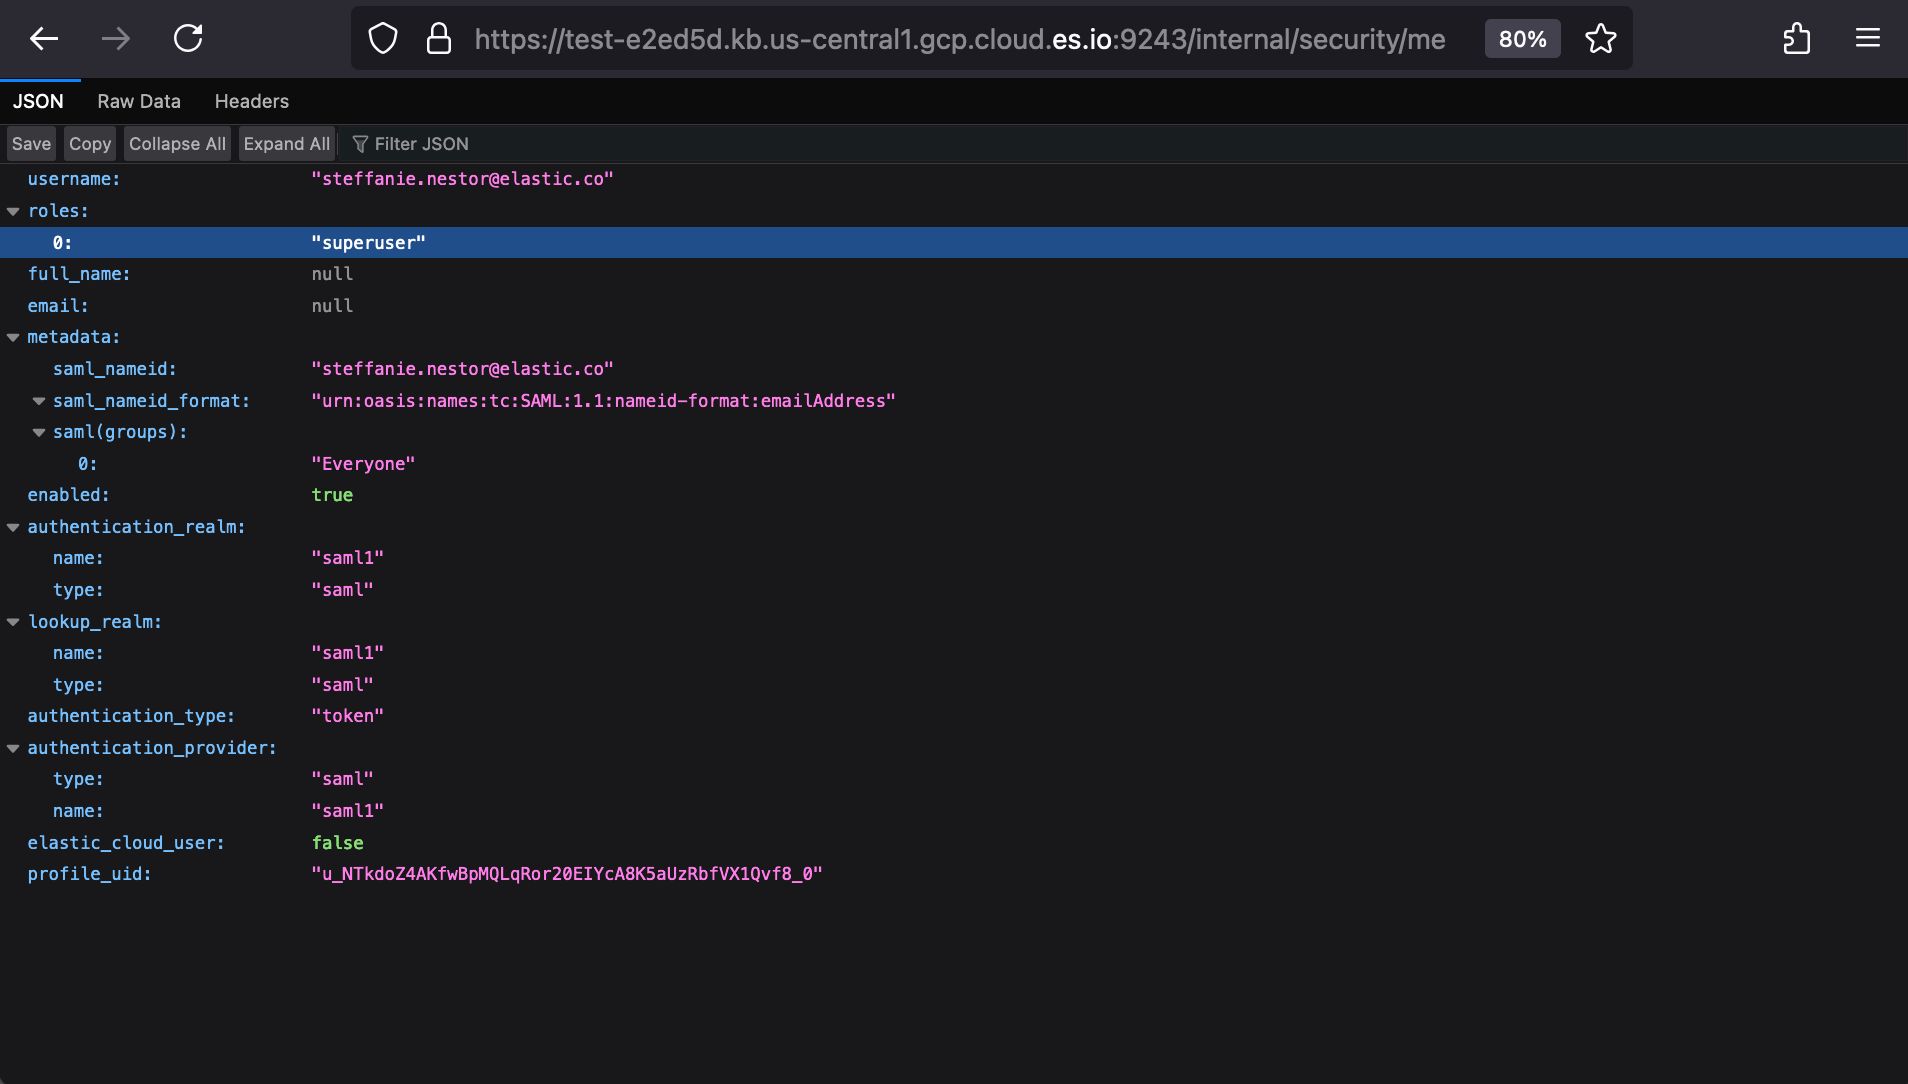
Once logged in, we can navigate to our KIBANA_URL’s endpoint “/internal/security/me” to confirm Okta-shared metadata and resulting Elasticsearch Roles. For our “Everyone” and “Admins” examples above, this would map us to the “superuser” role.
The same test can be run from Dev Tools with Elasticsearch’s Authenticate API.
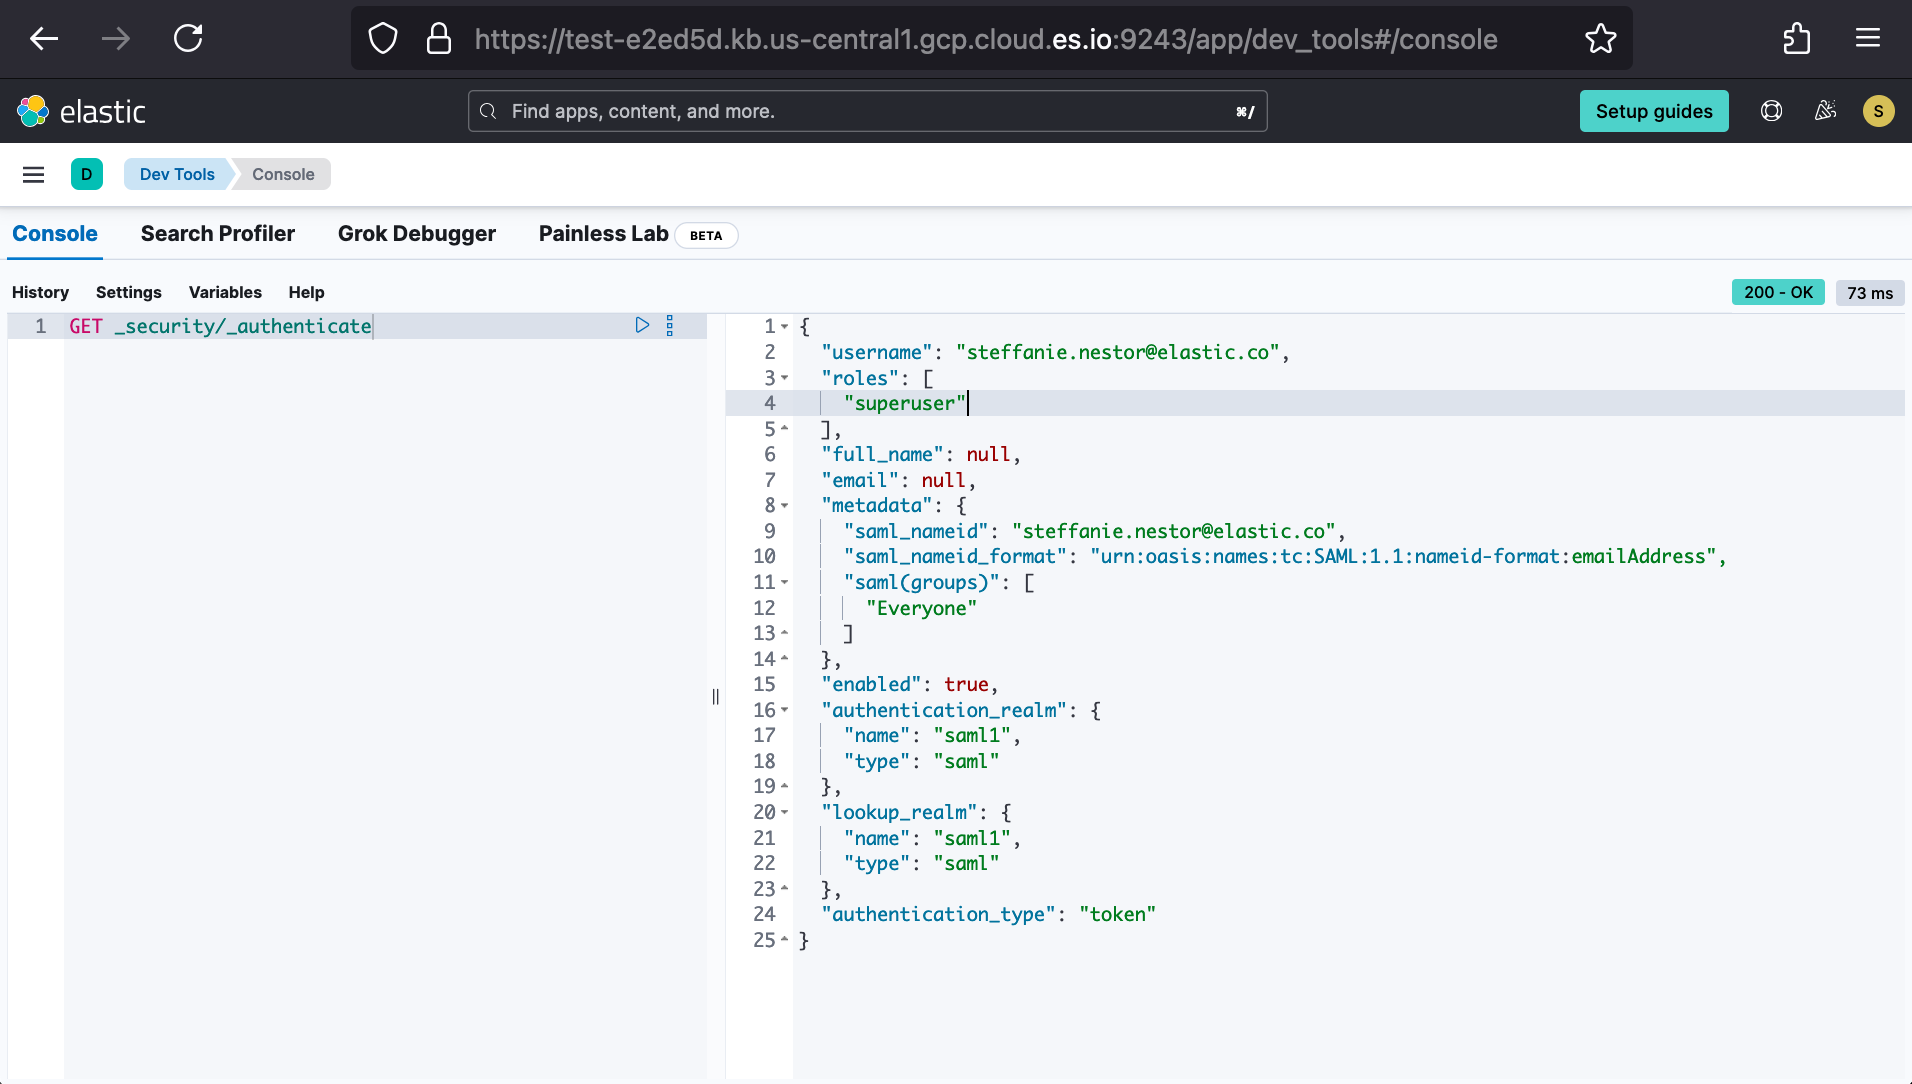
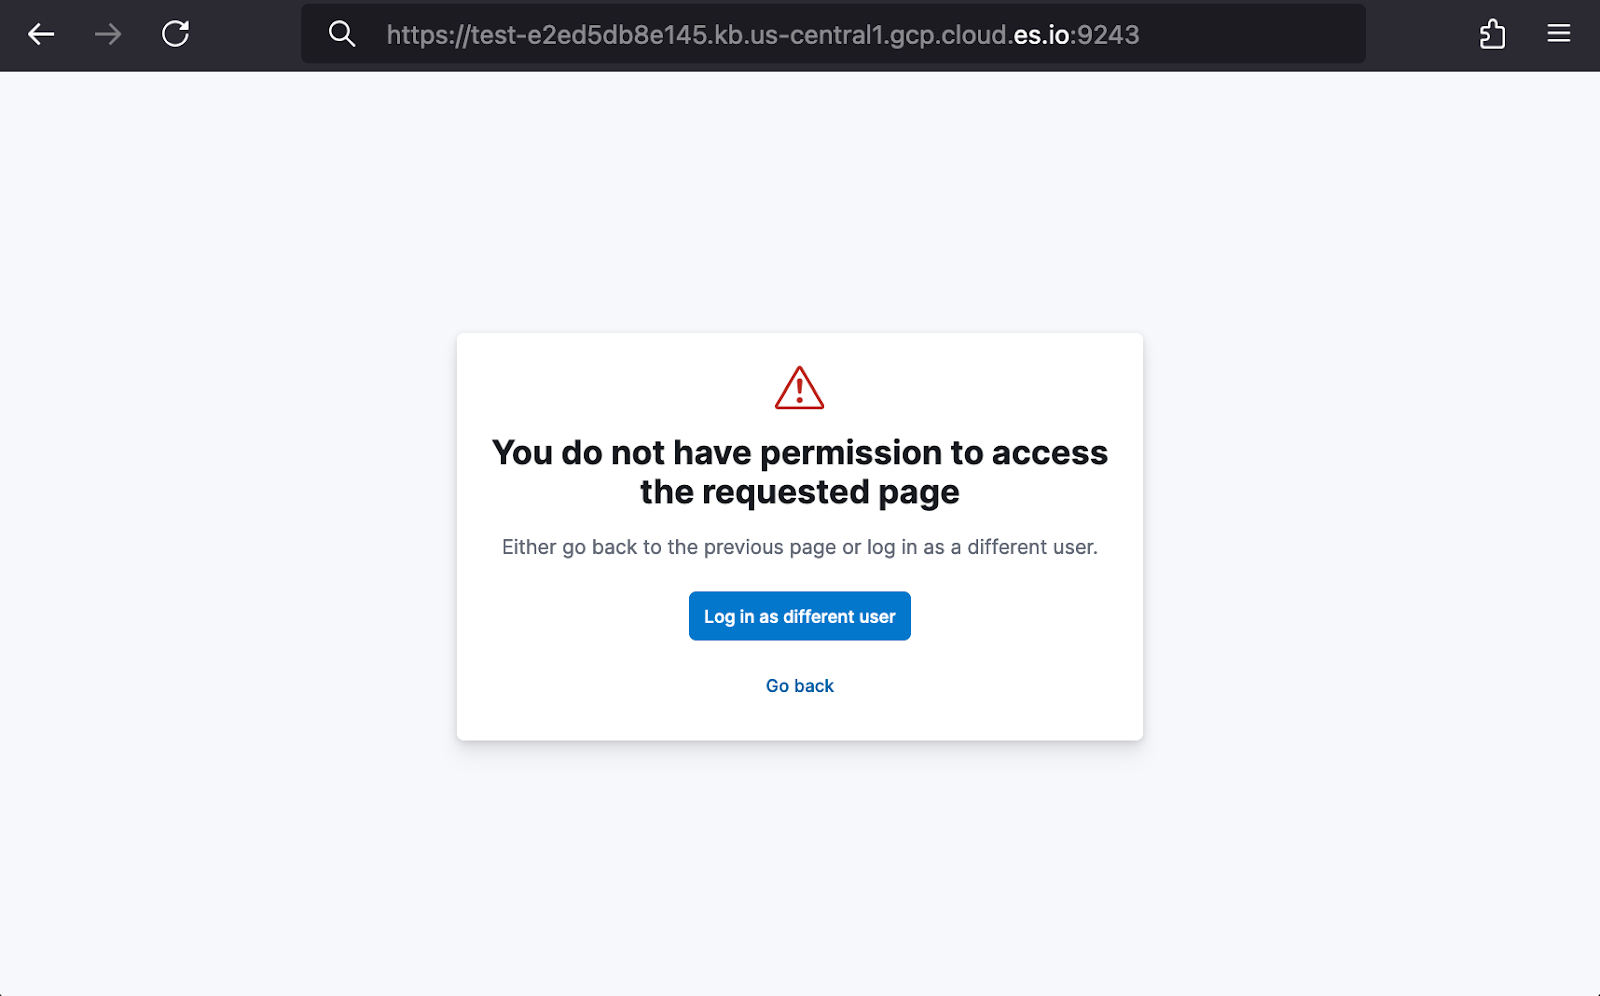
For our extended example, this would respectively show the “Engineers” as “writers” and “Support” or “Solution_Architects” as “viewer”. For non-technical coworkers who are not eligible for cluster access, they would instead receive a “You do not have permissions to access the requested page” error.
This confirms our Okta-to-Kibana SSO SAML integration has been successfully set up!
Additional information
If you’d like to see a video walk through of this setup, check out Set Up Okta SAML Login to Kibana | Elastic Cloud | Support Troubleshooting on Youtube. For troubleshooting, see also Common SAML issues. If you’re not an existing Elastic Cloud customer and would like to try out the steps in this blog, you can sign up for a free 14-day trial.
The release and timing of any features or functionality described in this post remain at Elastic's sole discretion. Any features or functionality not currently available may not be delivered on time or at all.
Share
- Share on Twitter
Share on Twitter
- Share on LinkedIn
Share on LinkedIn
- Share on Facebook
Share on Facebook
- Share by Email
Share by Email
- Print this page
Print