- Elasticsearch Guide: other versions:
- Getting Started
- Set up Elasticsearch
- Installing Elasticsearch
- Configuring Elasticsearch
- Important Elasticsearch configuration
- Important System Configuration
- Bootstrap Checks
- Heap size check
- File descriptor check
- Memory lock check
- Maximum number of threads check
- Max file size check
- Maximum size virtual memory check
- Maximum map count check
- Client JVM check
- Use serial collector check
- System call filter check
- OnError and OnOutOfMemoryError checks
- Early-access check
- G1GC check
- All permission check
- Starting Elasticsearch
- Stopping Elasticsearch
- Adding nodes to your cluster
- Installing X-Pack
- Set up X-Pack
- Configuring X-Pack Java Clients
- X-Pack Settings
- Bootstrap Checks for X-Pack
- Upgrade Elasticsearch
- API Conventions
- Document APIs
- Search APIs
- Aggregations
- Metrics Aggregations
- Avg Aggregation
- Weighted Avg Aggregation
- Cardinality Aggregation
- Extended Stats Aggregation
- Geo Bounds Aggregation
- Geo Centroid Aggregation
- Max Aggregation
- Min Aggregation
- Percentiles Aggregation
- Percentile Ranks Aggregation
- Scripted Metric Aggregation
- Stats Aggregation
- Sum Aggregation
- Top Hits Aggregation
- Value Count Aggregation
- Bucket Aggregations
- Adjacency Matrix Aggregation
- Auto-interval Date Histogram Aggregation
- Intervals
- Children Aggregation
- Composite Aggregation
- Date Histogram Aggregation
- Date Range Aggregation
- Diversified Sampler Aggregation
- Filter Aggregation
- Filters Aggregation
- Geo Distance Aggregation
- GeoHash grid Aggregation
- Global Aggregation
- Histogram Aggregation
- IP Range Aggregation
- Missing Aggregation
- Nested Aggregation
- Range Aggregation
- Reverse nested Aggregation
- Sampler Aggregation
- Significant Terms Aggregation
- Significant Text Aggregation
- Terms Aggregation
- Pipeline Aggregations
- Avg Bucket Aggregation
- Derivative Aggregation
- Max Bucket Aggregation
- Min Bucket Aggregation
- Sum Bucket Aggregation
- Stats Bucket Aggregation
- Extended Stats Bucket Aggregation
- Percentiles Bucket Aggregation
- Moving Average Aggregation
- Moving Function Aggregation
- Cumulative Sum Aggregation
- Bucket Script Aggregation
- Bucket Selector Aggregation
- Bucket Sort Aggregation
- Serial Differencing Aggregation
- Matrix Aggregations
- Caching heavy aggregations
- Returning only aggregation results
- Aggregation Metadata
- Returning the type of the aggregation
- Metrics Aggregations
- Indices APIs
- Create Index
- Delete Index
- Get Index
- Indices Exists
- Open / Close Index API
- Shrink Index
- Split Index
- Rollover Index
- Put Mapping
- Get Mapping
- Get Field Mapping
- Types Exists
- Index Aliases
- Update Indices Settings
- Get Settings
- Analyze
- Index Templates
- Indices Stats
- Indices Segments
- Indices Recovery
- Indices Shard Stores
- Clear Cache
- Flush
- Refresh
- Force Merge
- cat APIs
- Cluster APIs
- Query DSL
- Mapping
- Analysis
- Anatomy of an analyzer
- Testing analyzers
- Analyzers
- Normalizers
- Tokenizers
- Standard Tokenizer
- Letter Tokenizer
- Lowercase Tokenizer
- Whitespace Tokenizer
- UAX URL Email Tokenizer
- Classic Tokenizer
- Thai Tokenizer
- NGram Tokenizer
- Edge NGram Tokenizer
- Keyword Tokenizer
- Pattern Tokenizer
- Char Group Tokenizer
- Simple Pattern Tokenizer
- Simple Pattern Split Tokenizer
- Path Hierarchy Tokenizer
- Path Hierarchy Tokenizer Examples
- Token Filters
- Standard Token Filter
- ASCII Folding Token Filter
- Flatten Graph Token Filter
- Length Token Filter
- Lowercase Token Filter
- Uppercase Token Filter
- NGram Token Filter
- Edge NGram Token Filter
- Porter Stem Token Filter
- Shingle Token Filter
- Stop Token Filter
- Word Delimiter Token Filter
- Word Delimiter Graph Token Filter
- Multiplexer Token Filter
- Conditional Token Filter
- Predicate Token Filter Script
- Stemmer Token Filter
- Stemmer Override Token Filter
- Keyword Marker Token Filter
- Keyword Repeat Token Filter
- KStem Token Filter
- Snowball Token Filter
- Phonetic Token Filter
- Synonym Token Filter
- Synonym Graph Token Filter
- Compound Word Token Filters
- Reverse Token Filter
- Elision Token Filter
- Truncate Token Filter
- Unique Token Filter
- Pattern Capture Token Filter
- Pattern Replace Token Filter
- Trim Token Filter
- Limit Token Count Token Filter
- Hunspell Token Filter
- Common Grams Token Filter
- Normalization Token Filter
- CJK Width Token Filter
- CJK Bigram Token Filter
- Delimited Payload Token Filter
- Keep Words Token Filter
- Keep Types Token Filter
- Exclude mode settings example
- Classic Token Filter
- Apostrophe Token Filter
- Decimal Digit Token Filter
- Fingerprint Token Filter
- Minhash Token Filter
- Remove Duplicates Token Filter
- Character Filters
- Modules
- Index Modules
- Ingest Node
- Pipeline Definition
- Ingest APIs
- Accessing Data in Pipelines
- Conditional Execution in Pipelines
- Handling Failures in Pipelines
- Processors
- Append Processor
- Bytes Processor
- Convert Processor
- Date Processor
- Date Index Name Processor
- Dissect Processor
- Drop Processor
- Dot Expander Processor
- Fail Processor
- Foreach Processor
- Grok Processor
- Gsub Processor
- Join Processor
- JSON Processor
- KV Processor
- Lowercase Processor
- Pipeline Processor
- Remove Processor
- Rename Processor
- Script Processor
- Set Processor
- Set Security User Processor
- Split Processor
- Sort Processor
- Trim Processor
- Uppercase Processor
- URL Decode Processor
- SQL Access
- Monitor a cluster
- Rolling up historical data
- Set up a cluster for high availability
- Secure a cluster
- Overview
- Configuring security
- Encrypting communications in Elasticsearch
- Encrypting communications in an Elasticsearch Docker Container
- Enabling cipher suites for stronger encryption
- Separating node-to-node and client traffic
- Configuring an Active Directory realm
- Configuring a file realm
- Configuring an LDAP realm
- Configuring a native realm
- Configuring a PKI realm
- Configuring a SAML realm
- Configuring a Kerberos realm
- FIPS 140-2
- Security settings
- Security files
- Auditing settings
- How security works
- User authentication
- Built-in users
- Internal users
- Realms
- Realm chains
- Active Directory user authentication
- File-based user authentication
- LDAP user authentication
- Native user authentication
- PKI user authentication
- SAML authentication
- Kerberos authentication
- Integrating with other authentication systems
- Enabling anonymous access
- Controlling the user cache
- Configuring SAML single-sign-on on the Elastic Stack
- User authorization
- Auditing security events
- Encrypting communications
- Restricting connections with IP filtering
- Cross cluster search, tribe, clients, and integrations
- Tutorial: Getting started with security
- Tutorial: Encrypting communications
- Troubleshooting
- Can’t log in after upgrading to 6.5.4
- Some settings are not returned via the nodes settings API
- Authorization exceptions
- Users command fails due to extra arguments
- Users are frequently locked out of Active Directory
- Certificate verification fails for curl on Mac
- SSLHandshakeException causes connections to fail
- Common SSL/TLS exceptions
- Common Kerberos exceptions
- Common SAML issues
- Internal Server Error in Kibana
- Setup-passwords command fails due to connection failure
- Failures due to relocation of the configuration files
- Limitations
- Alerting on Cluster and Index Events
- Command line tools
- How To
- Testing
- Glossary of terms
- X-Pack APIs
- Info API
- Cross-cluster replication APIs
- Explore API
- Licensing APIs
- Migration APIs
- Machine learning APIs
- Add events to calendar
- Add jobs to calendar
- Close jobs
- Create calendar
- Create datafeeds
- Create filter
- Create jobs
- Delete calendar
- Delete datafeeds
- Delete events from calendar
- Delete filter
- Delete forecast
- Delete jobs
- Delete jobs from calendar
- Delete model snapshots
- Find file structure
- Flush jobs
- Forecast jobs
- Get calendars
- Get buckets
- Get overall buckets
- Get categories
- Get datafeeds
- Get datafeed statistics
- Get influencers
- Get jobs
- Get job statistics
- Get machine learning info
- Get model snapshots
- Get scheduled events
- Get filters
- Get records
- Open jobs
- Post data to jobs
- Preview datafeeds
- Revert model snapshots
- Start datafeeds
- Stop datafeeds
- Update datafeeds
- Update filter
- Update jobs
- Update model snapshots
- Rollup APIs
- Security APIs
- Authenticate
- Change passwords
- Clear cache
- Clear roles cache
- Create or update application privileges
- Create or update role mappings
- Create or update roles
- Create or update users
- Delete application privileges
- Delete role mappings
- Delete roles
- Delete users
- Disable users
- Enable users
- Get application privileges
- Get role mappings
- Get roles
- Get token
- Get users
- Has privileges
- Invalidate token
- SSL certificate
- Watcher APIs
- Definitions
- Release Highlights
- Breaking changes
- Release Notes
- Elasticsearch version 6.5.4
- Elasticsearch version 6.5.3
- Elasticsearch version 6.5.2
- Elasticsearch version 6.5.1
- Elasticsearch version 6.5.0
- Elasticsearch version 6.4.3
- Elasticsearch version 6.4.2
- Elasticsearch version 6.4.1
- Elasticsearch version 6.4.0
- Elasticsearch version 6.3.2
- Elasticsearch version 6.3.1
- Elasticsearch version 6.3.0
- Elasticsearch version 6.2.4
- Elasticsearch version 6.2.3
- Elasticsearch version 6.2.2
- Elasticsearch version 6.2.1
- Elasticsearch version 6.2.0
- Elasticsearch version 6.1.4
- Elasticsearch version 6.1.3
- Elasticsearch version 6.1.2
- Elasticsearch version 6.1.1
- Elasticsearch version 6.1.0
- Elasticsearch version 6.0.1
- Elasticsearch version 6.0.0
- Elasticsearch version 6.0.0-rc2
- Elasticsearch version 6.0.0-rc1
- Elasticsearch version 6.0.0-beta2
- Elasticsearch version 6.0.0-beta1
- Elasticsearch version 6.0.0-alpha2
- Elasticsearch version 6.0.0-alpha1
- Elasticsearch version 6.0.0-alpha1 (Changes previously released in 5.x)
Installation
editInstallation
editYou can skip installation completely by using our hosted Elasticsearch Service on Elastic Cloud, which is available on AWS and GCP. You can try out the hosted service for free.
Elasticsearch requires at least Java 8. Specifically as of this writing, it is recommended that you use the Oracle JDK version 1.8.0_131. Java installation varies from platform to platform so we won’t go into those details here. Oracle’s recommended installation documentation can be found on Oracle’s website. Suffice to say, before you install Elasticsearch, please check your Java version first by running (and then install/upgrade accordingly if needed):
java -version
echo $JAVA_HOME
Once we have Java set up, we can then download and run Elasticsearch. The binaries are available from www.elastic.co/downloads along with all the releases that have been made in the past. For each release, you have a choice among a zip or tar archive, a DEB or RPM package, or a Windows MSI installation package.
Installation example with tar
editFor simplicity, let’s use the tar file.
Let’s download the Elasticsearch 6.5.4 tar as follows:
curl -L -O https://artifacts.elastic.co/downloads/elasticsearch/elasticsearch-6.5.4.tar.gz
Then extract it as follows:
tar -xvf elasticsearch-6.5.4.tar.gz
It will then create a bunch of files and folders in your current directory. We then go into the bin directory as follows:
cd elasticsearch-6.5.4/bin
And now we are ready to start our node and single cluster:
./elasticsearch
Installation with Homebrew
editOn macOS, Elasticsearch can also be installed via Homebrew:
brew install elasticsearch
If installation succeeds, Homebrew will finish by saying that you can start Elasticsearch by entering
elasticsearch. Do that now. The expected response is described below, under Successfully running node.
Installation example with MSI Windows Installer
editFor Windows users, we recommend using the MSI Installer package. The package contains a graphical user interface (GUI) that guides you through the installation process.
First, download the Elasticsearch 6.5.4 MSI from https://artifacts.elastic.co/downloads/elasticsearch/elasticsearch-6.5.4.msi.
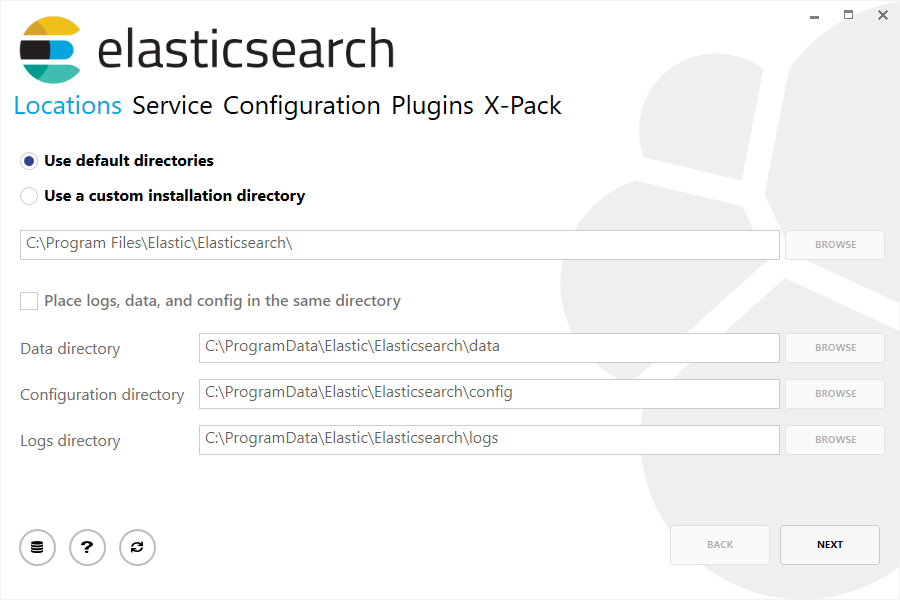
Then double-click the downloaded file to launch the GUI. Within the first screen, select the deployment directories:
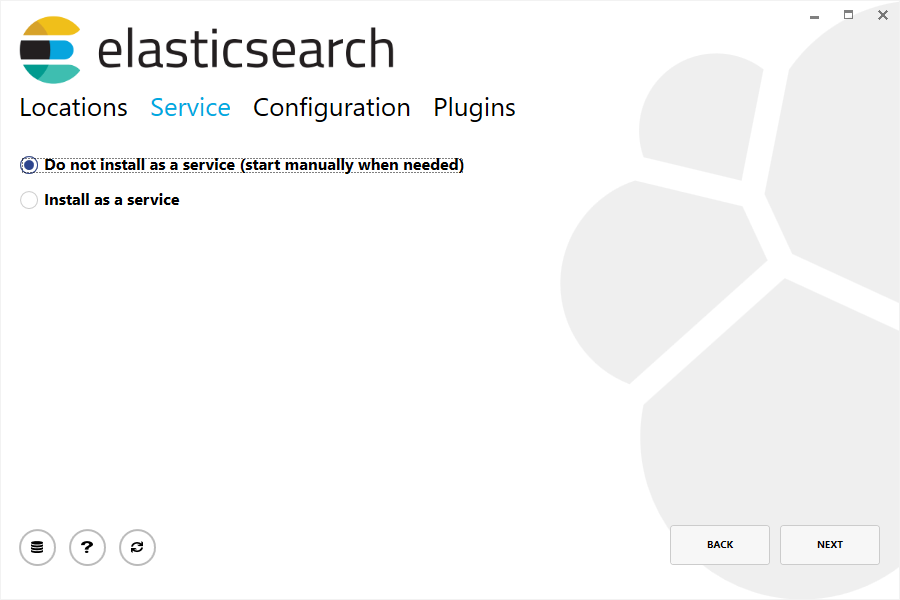
Then select whether to install as a service or start Elasticsearch manually as needed. To align with the tar example, choose not to install as a service:
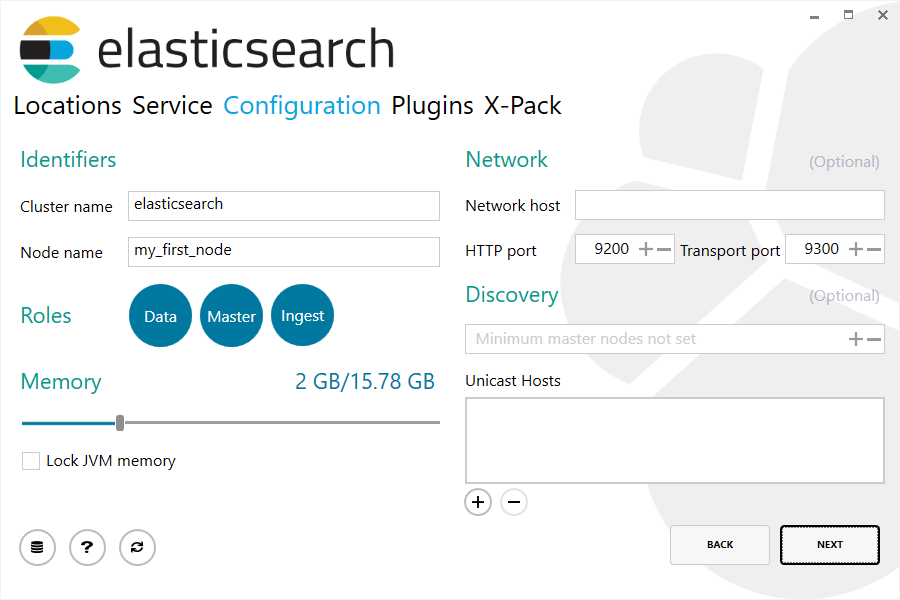
For configuration, simply leave the default values:
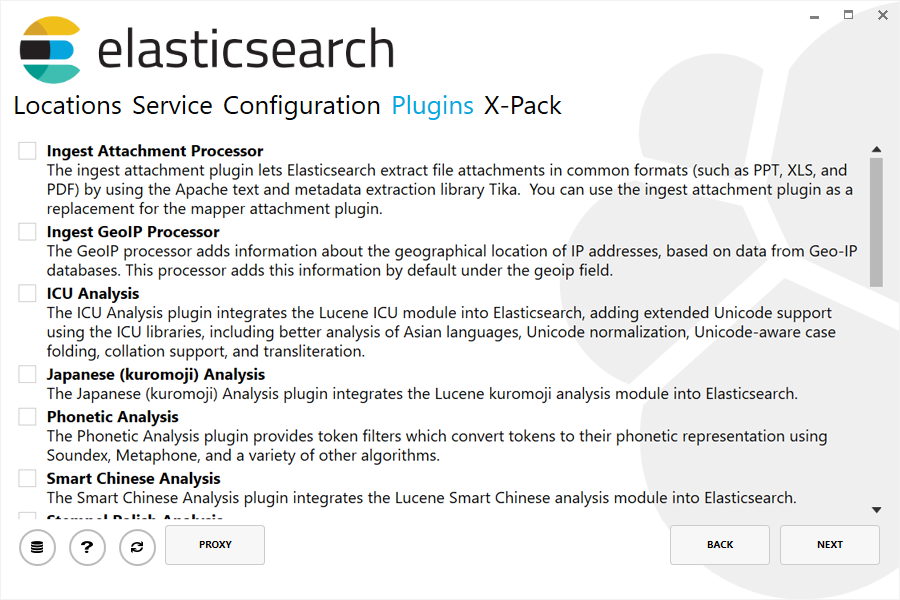
Again, to align with the tar example, uncheck all plugins to not install any plugins:
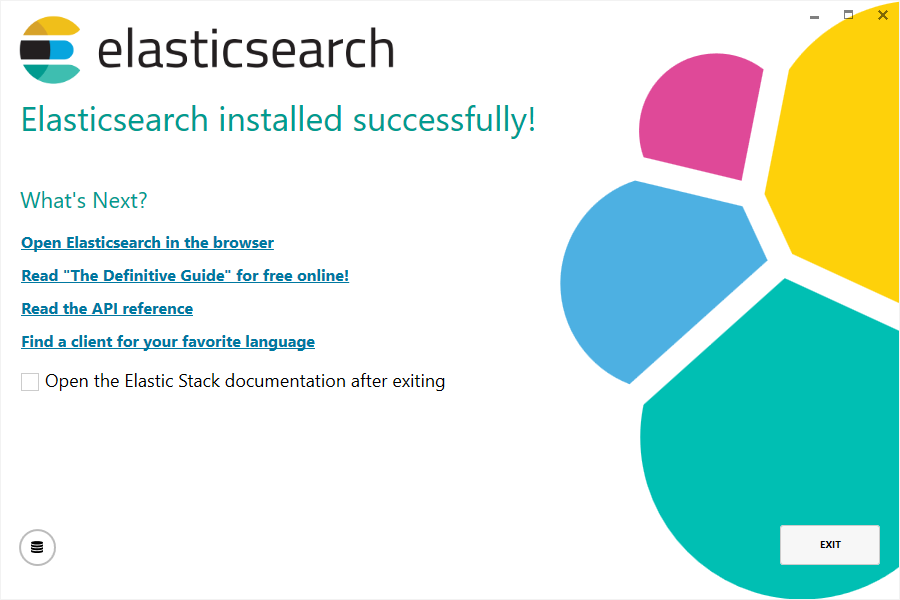
After clicking the install button, Elasticsearch will be installed:
By default, Elasticsearch will be installed at %PROGRAMFILES%\Elastic\Elasticsearch. Navigate here and go into the bin directory as follows:
with Command Prompt:
cd %PROGRAMFILES%\Elastic\Elasticsearch\bin
with PowerShell:
cd $env:PROGRAMFILES\Elastic\Elasticsearch\bin
And now we are ready to start our node and single cluster:
.\elasticsearch.exe
Successfully running node
editIf everything goes well with installation, you should see a bunch of messages that look like below:
[2016-09-16T14:17:51,251][INFO ][o.e.n.Node               ] [] initializing ...
[2016-09-16T14:17:51,329][INFO ][o.e.e.NodeEnvironment    ] [6-bjhwl] using [1] data paths, mounts [[/ (/dev/sda1)]], net usable_space [317.7gb], net total_space [453.6gb], spins? [no], types [ext4]
[2016-09-16T14:17:51,330][INFO ][o.e.e.NodeEnvironment    ] [6-bjhwl] heap size [1.9gb], compressed ordinary object pointers [true]
[2016-09-16T14:17:51,333][INFO ][o.e.n.Node               ] [6-bjhwl] node name [6-bjhwl] derived from node ID; set [node.name] to override
[2016-09-16T14:17:51,334][INFO ][o.e.n.Node               ] [6-bjhwl] version[6.5.4], pid[21261], build[f5daa16/2016-09-16T09:12:24.346Z], OS[Linux/4.4.0-36-generic/amd64], JVM[Oracle Corporation/Java HotSpot(TM) 64-Bit Server VM/1.8.0_60/25.60-b23]
[2016-09-16T14:17:51,967][INFO ][o.e.p.PluginsService     ] [6-bjhwl] loaded module [aggs-matrix-stats]
[2016-09-16T14:17:51,967][INFO ][o.e.p.PluginsService     ] [6-bjhwl] loaded module [ingest-common]
[2016-09-16T14:17:51,967][INFO ][o.e.p.PluginsService     ] [6-bjhwl] loaded module [lang-expression]
[2016-09-16T14:17:51,967][INFO ][o.e.p.PluginsService     ] [6-bjhwl] loaded module [lang-mustache]
[2016-09-16T14:17:51,967][INFO ][o.e.p.PluginsService     ] [6-bjhwl] loaded module [lang-painless]
[2016-09-16T14:17:51,967][INFO ][o.e.p.PluginsService     ] [6-bjhwl] loaded module [percolator]
[2016-09-16T14:17:51,968][INFO ][o.e.p.PluginsService     ] [6-bjhwl] loaded module [reindex]
[2016-09-16T14:17:51,968][INFO ][o.e.p.PluginsService     ] [6-bjhwl] loaded module [transport-netty3]
[2016-09-16T14:17:51,968][INFO ][o.e.p.PluginsService     ] [6-bjhwl] loaded module [transport-netty4]
[2016-09-16T14:17:51,968][INFO ][o.e.p.PluginsService     ] [6-bjhwl] loaded plugin [mapper-murmur3]
[2016-09-16T14:17:53,521][INFO ][o.e.n.Node               ] [6-bjhwl] initialized
[2016-09-16T14:17:53,521][INFO ][o.e.n.Node               ] [6-bjhwl] starting ...
[2016-09-16T14:17:53,671][INFO ][o.e.t.TransportService   ] [6-bjhwl] publish_address {192.168.8.112:9300}, bound_addresses {{192.168.8.112:9300}
[2016-09-16T14:17:53,676][WARN ][o.e.b.BootstrapCheck     ] [6-bjhwl] max virtual memory areas vm.max_map_count [65530] likely too low, increase to at least [262144]
[2016-09-16T14:17:56,718][INFO ][o.e.c.s.ClusterService   ] [6-bjhwl] new_master {6-bjhwl}{6-bjhwl4TkajjoD2oEipnQ}{8m3SNKoFR6yQl1I0JUfPig}{192.168.8.112}{192.168.8.112:9300}, reason: zen-disco-elected-as-master ([0] nodes joined)
[2016-09-16T14:17:56,731][INFO ][o.e.h.HttpServer         ] [6-bjhwl] publish_address {192.168.8.112:9200}, bound_addresses {[::1]:9200}, {192.168.8.112:9200}
[2016-09-16T14:17:56,732][INFO ][o.e.g.GatewayService     ] [6-bjhwl] recovered [0] indices into cluster_state
[2016-09-16T14:17:56,748][INFO ][o.e.n.Node               ] [6-bjhwl] started
Without going too much into detail, we can see that our node named "6-bjhwl" (which will be a different set of characters in your case) has started and elected itself as a master in a single cluster. Don’t worry yet at the moment what master means. The main thing that is important here is that we have started one node within one cluster.
As mentioned previously, we can override either the cluster or node name. This can be done from the command line when starting Elasticsearch as follows:
./elasticsearch -Ecluster.name=my_cluster_name -Enode.name=my_node_name
Also note the line marked http with information about the HTTP address (192.168.8.112) and port (9200) that our node is reachable from. By default, Elasticsearch uses port 9200 to provide access to its REST API. This port is configurable if necessary.
On this page