- Kibana Guide: other versions:
- Introduction
- Set Up Kibana
- Installing Kibana
- Starting and stopping Kibana
- Configuring Kibana
- Running Kibana on Docker
- Accessing Kibana
- Connect Kibana with Elasticsearch
- Using Kibana with Tribe nodes
- Using Kibana in a production environment
- Upgrading Kibana
- Installing X-Pack
- Configuring Monitoring
- Configuring Security
- X-Pack Settings
- Breaking Changes
- Getting Started
- Discover
- Visualize
- Dashboard
- Timelion
- Machine Learning
- APM
- Graphing Connections in Your Data
- Dev Tools
- Monitoring
- Management
- Reporting from Kibana
- REST API
- Kibana Plugins
- Contributing to Kibana
- Limitations
- Release Highlights
- Release Notes
- Kibana 6.3.2
- Kibana 6.3.1
- Kibana 6.3.0
- Kibana 6.2.4
- Kibana 6.2.3
- Kibana 6.2.2
- Kibana 6.2.1
- Kibana 6.2.0
- Kibana 6.1.4
- Kibana 6.1.3
- Kibana 6.1.2
- Kibana 6.1.1
- Kibana 6.1.0
- Kibana 6.0.1
- Kibana 6.0.0
- Kibana 6.0.0-rc2
- Kibana 6.0.0-rc1
- Kibana 6.0.0-beta2
- Kibana 6.0.0-beta1
- Kibana 6.0.0-alpha2
- Kibana 6.0.0-alpha1
Advanced configuration for Dashboard Only mode
editAdvanced configuration for Dashboard Only mode
editKibana comes preconfigured with a reserved role called kibana_dashboard_only_user
which will be sufficient
for most use cases. However, if your setup requires a custom Kibana index, you can manually create
Dashboard Mode roles.
To do so, go into Management > Advanced Settings and search for xpackDashboardMode:roles
. Then assign whatever
role names you wish to use to flag a user for Dashboard Only mode.
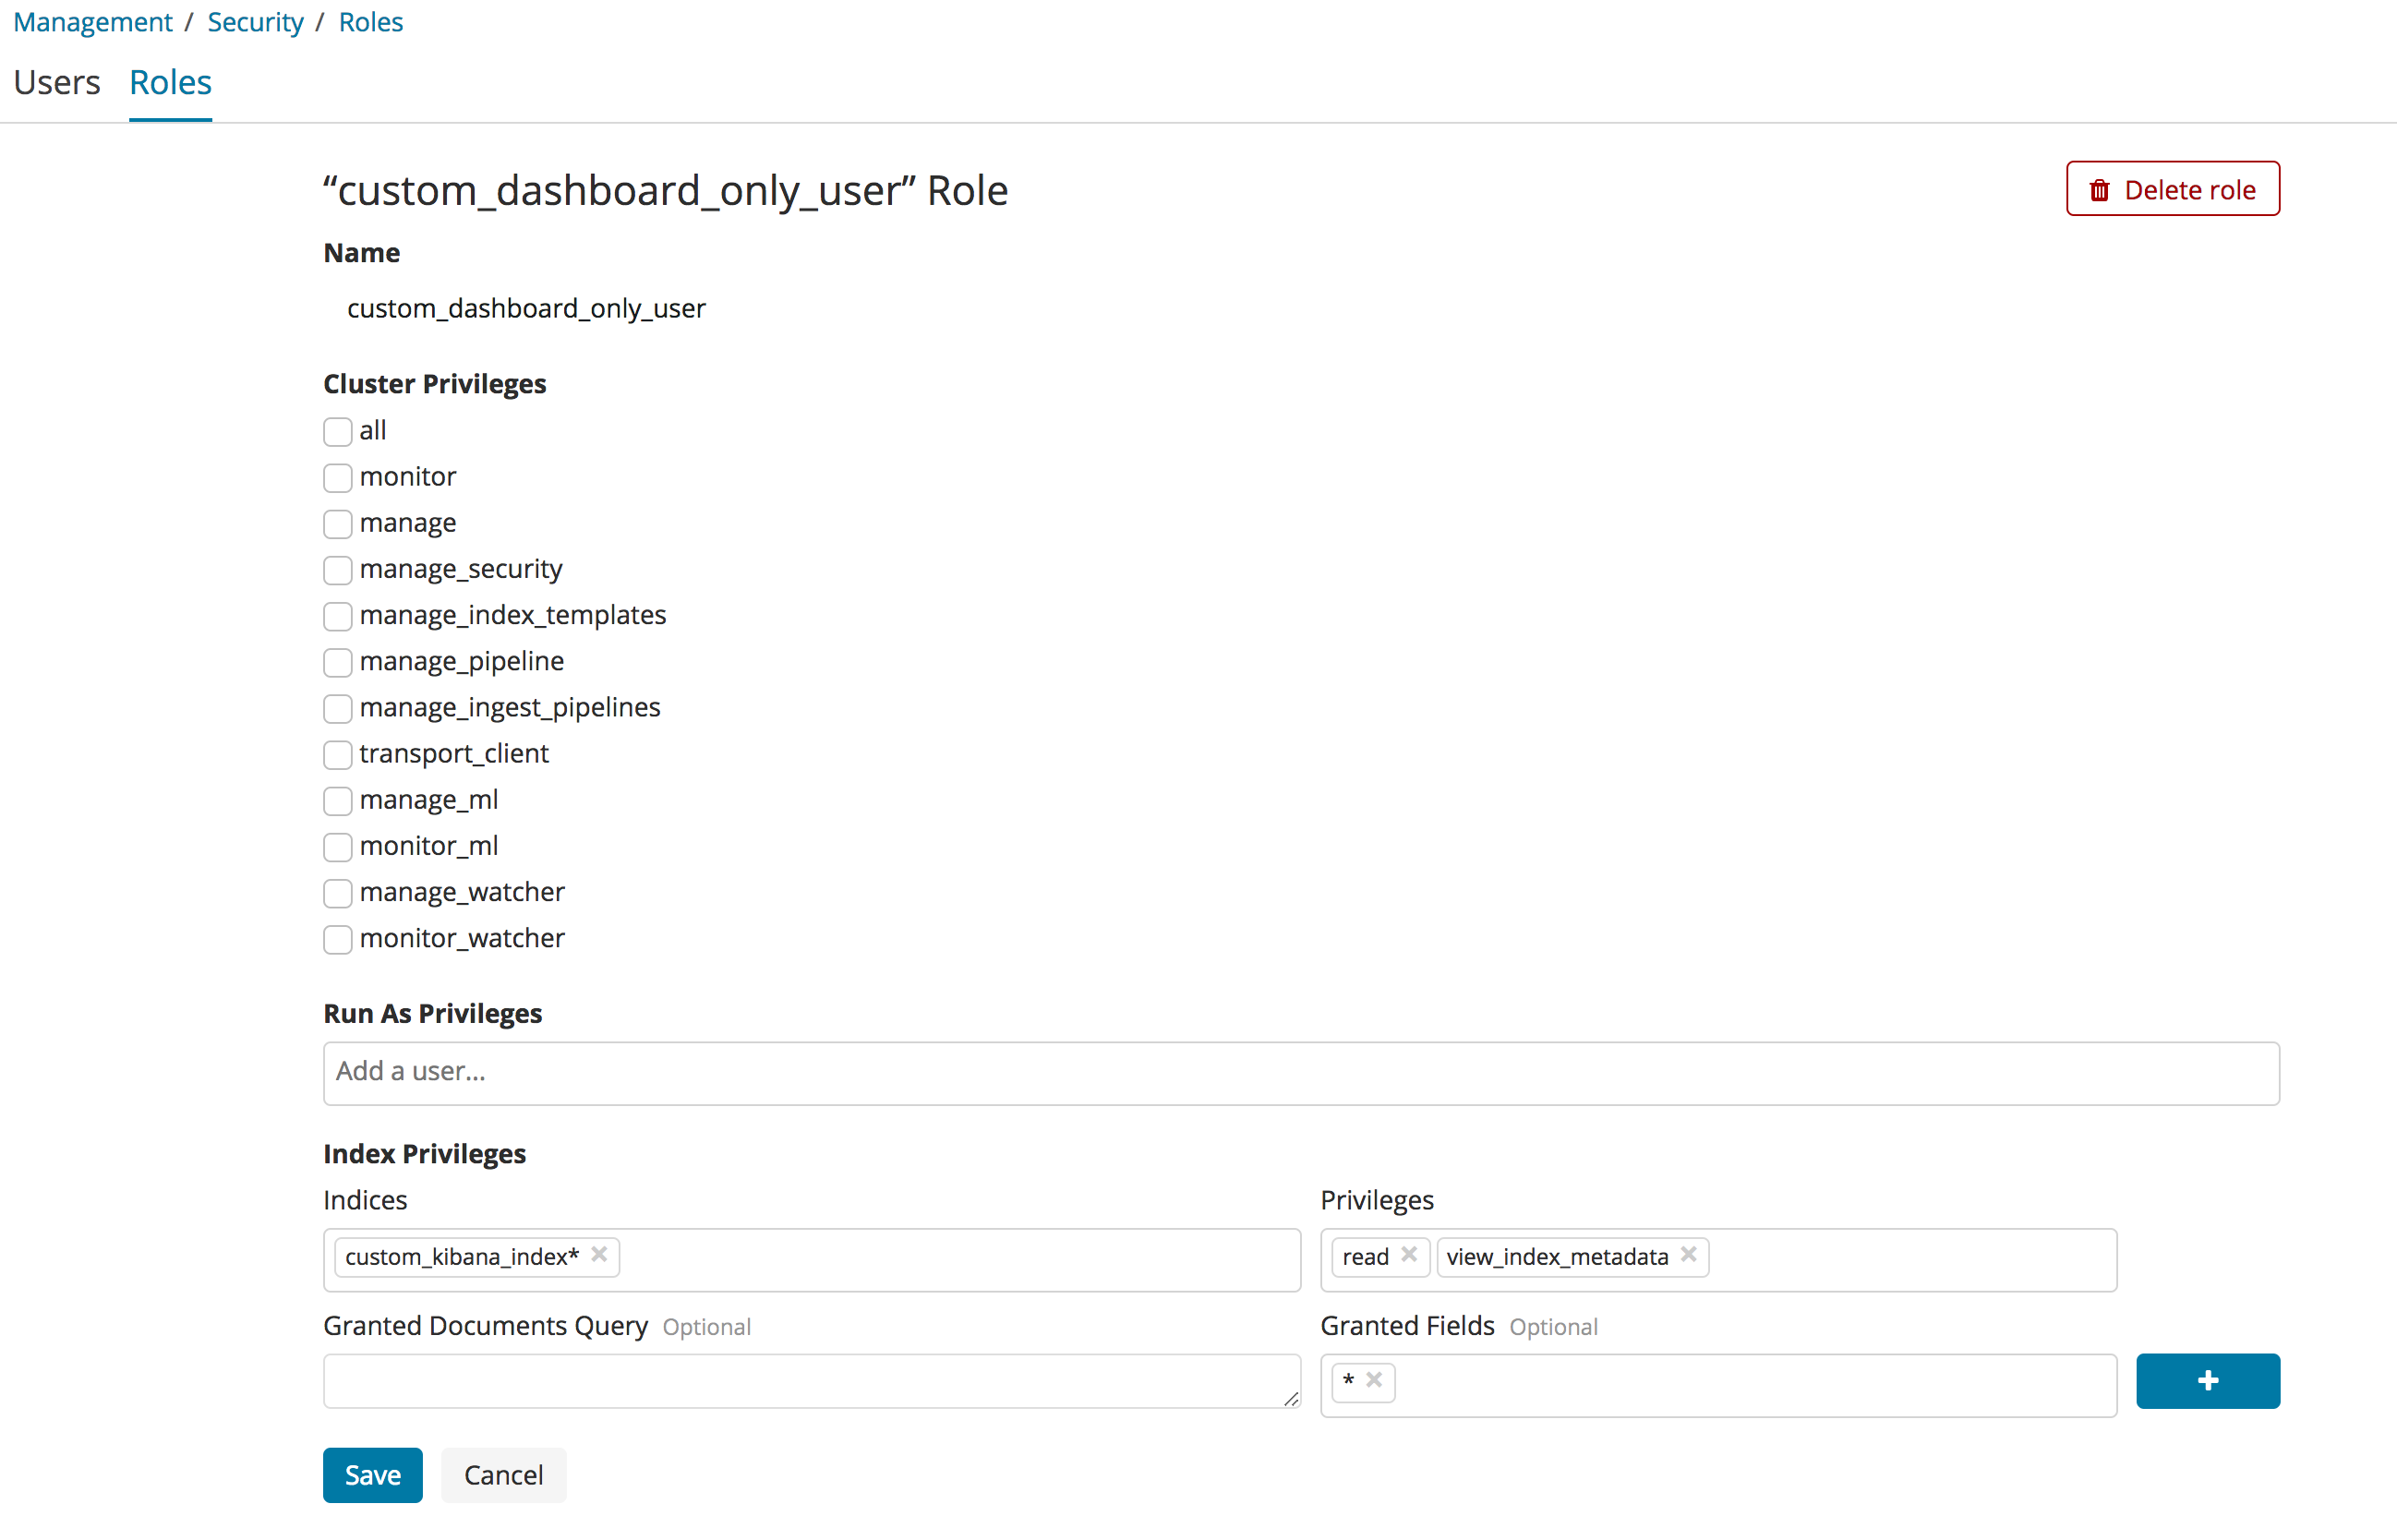
It isn’t necessary for Dashboard Only mode roles to have any additional permissions, but it’s a convenient location
to also place access rules to the custom Kibana index. If you wish to grant read only access to your custom Kibana
index, it must have view_index_metadata
permissions as well as read
permissions. These role settings are available
under Management > Security > Roles.