Elasticsearch: Search across databases and business systems
Overview
Introduction to Elasticsearch
Elasticsearch provides a range of search techniques, starting with BM25, the industry standard for textual search. It also offers semantic search powered by AI models, improving results based on context and intent.
In this guide, you’ll learn how to synchronize data from an external database to Elasticsearch and use semantic search to easily search your database.
Onboard your data
How to ingest and enrich data for search
Elasticsearch includes a wide range of data ingestion capabilities that help solve your business challenges. Check out this webinar to:
- Learn how to bring disparate data into a single place to create search experiences.
- Understand tools to use for your specific types of data, including the Open Crawler, catalog of connectors, data and ML inference pipelines, and more.
- See live demos using customer support datasets.
Create an Elastic Cloud project
Get started with a 14-day trial. Once you go to cloud.elastic.co and create an account, use the following steps to launch your first Elasticsearch Serverless project.
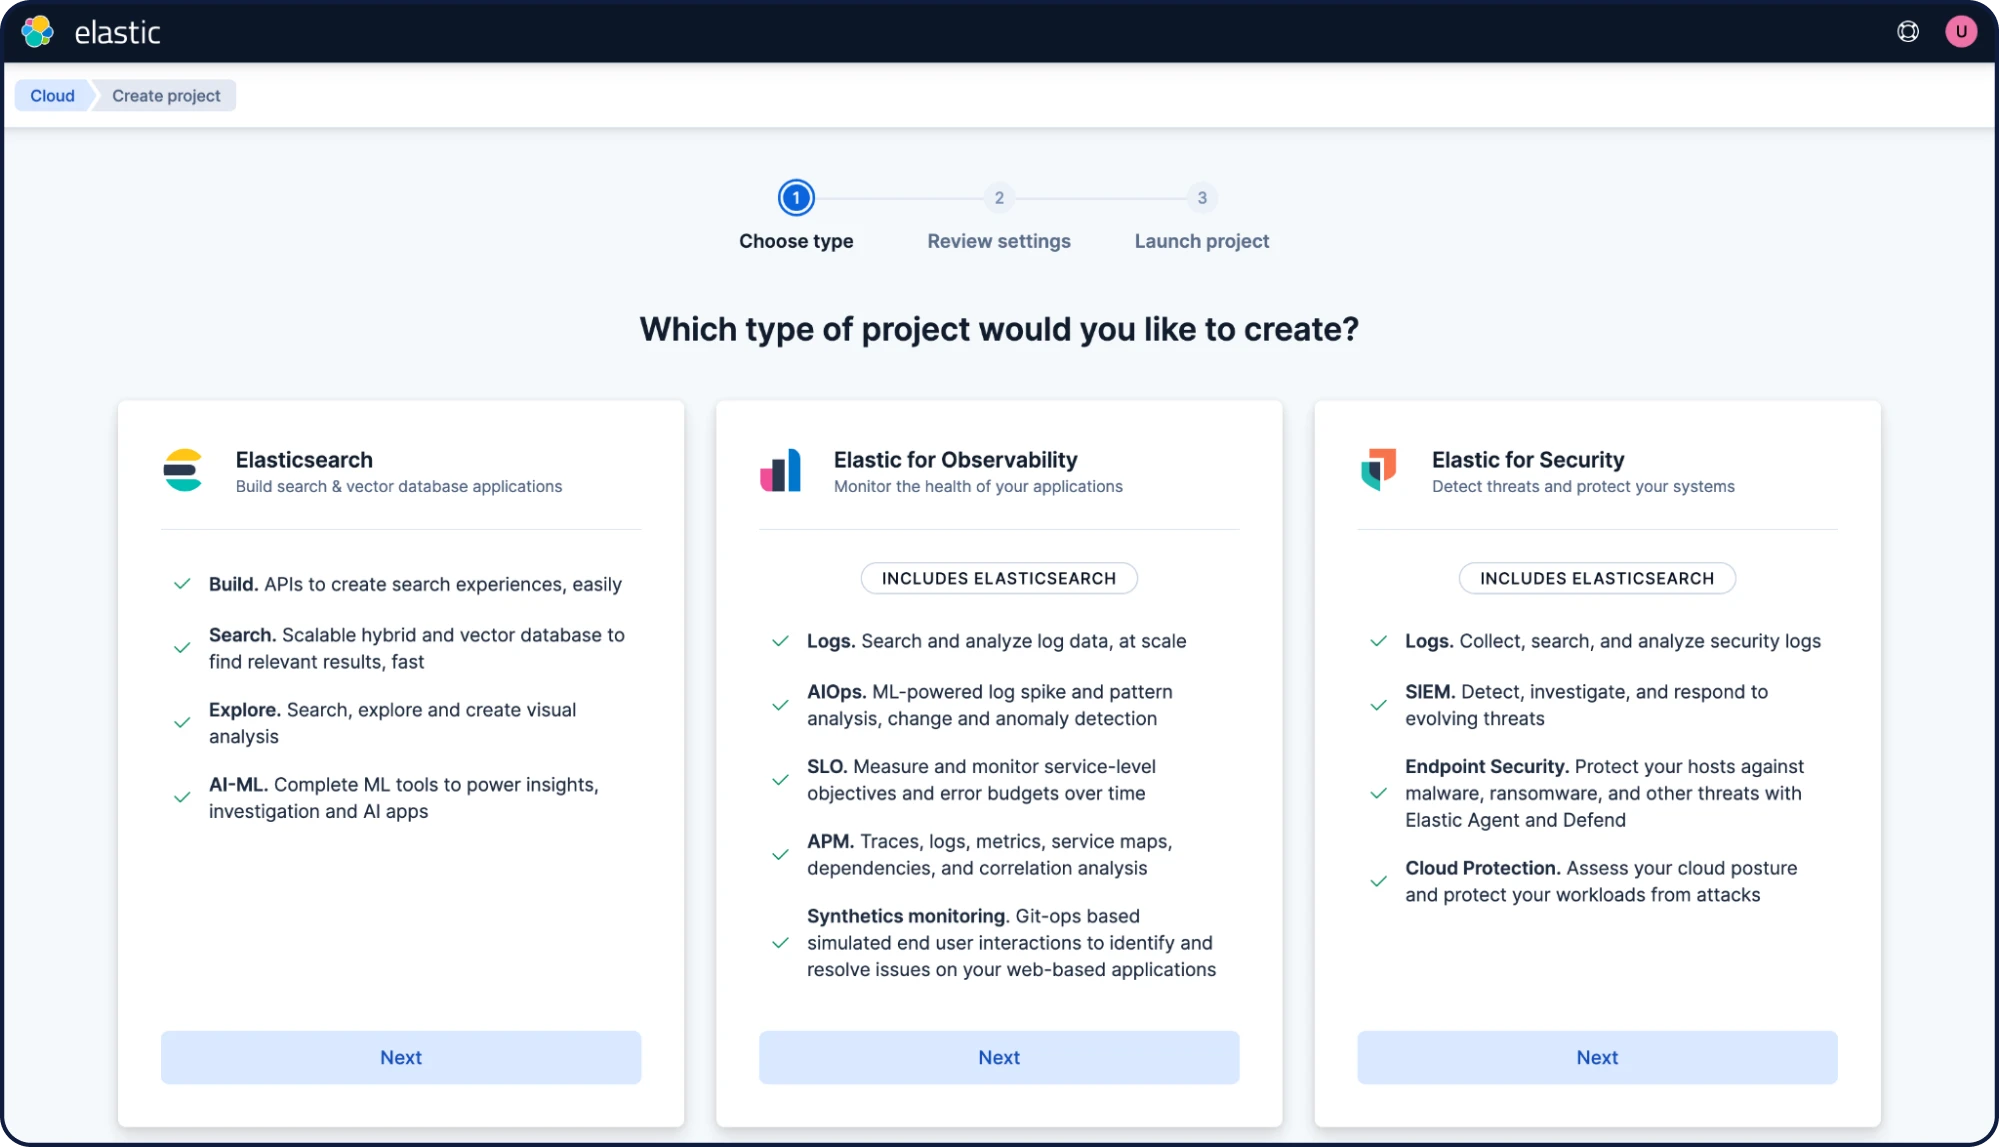
To start, select Elasticsearch.
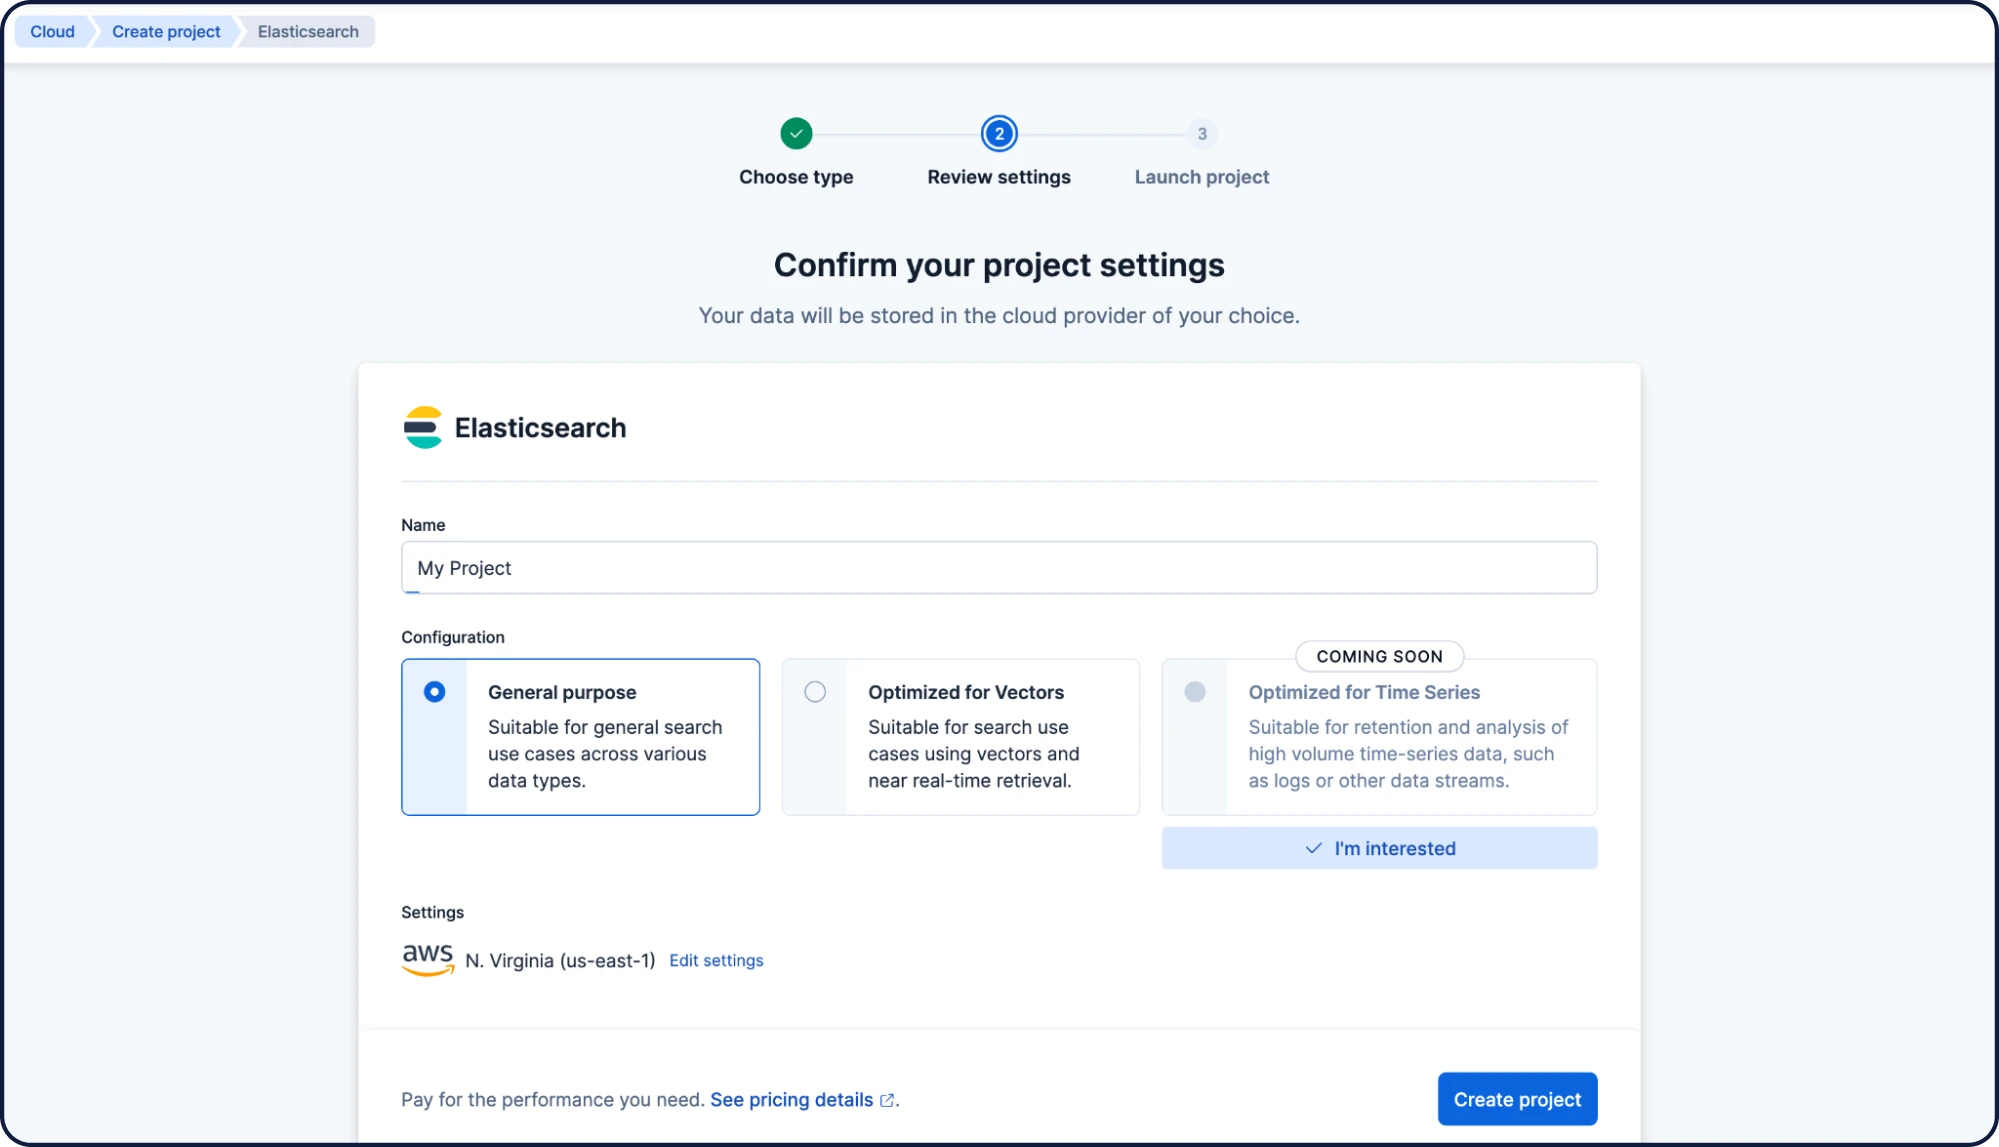
Create a project for a general purpose. Name it "My project" and click Create project.
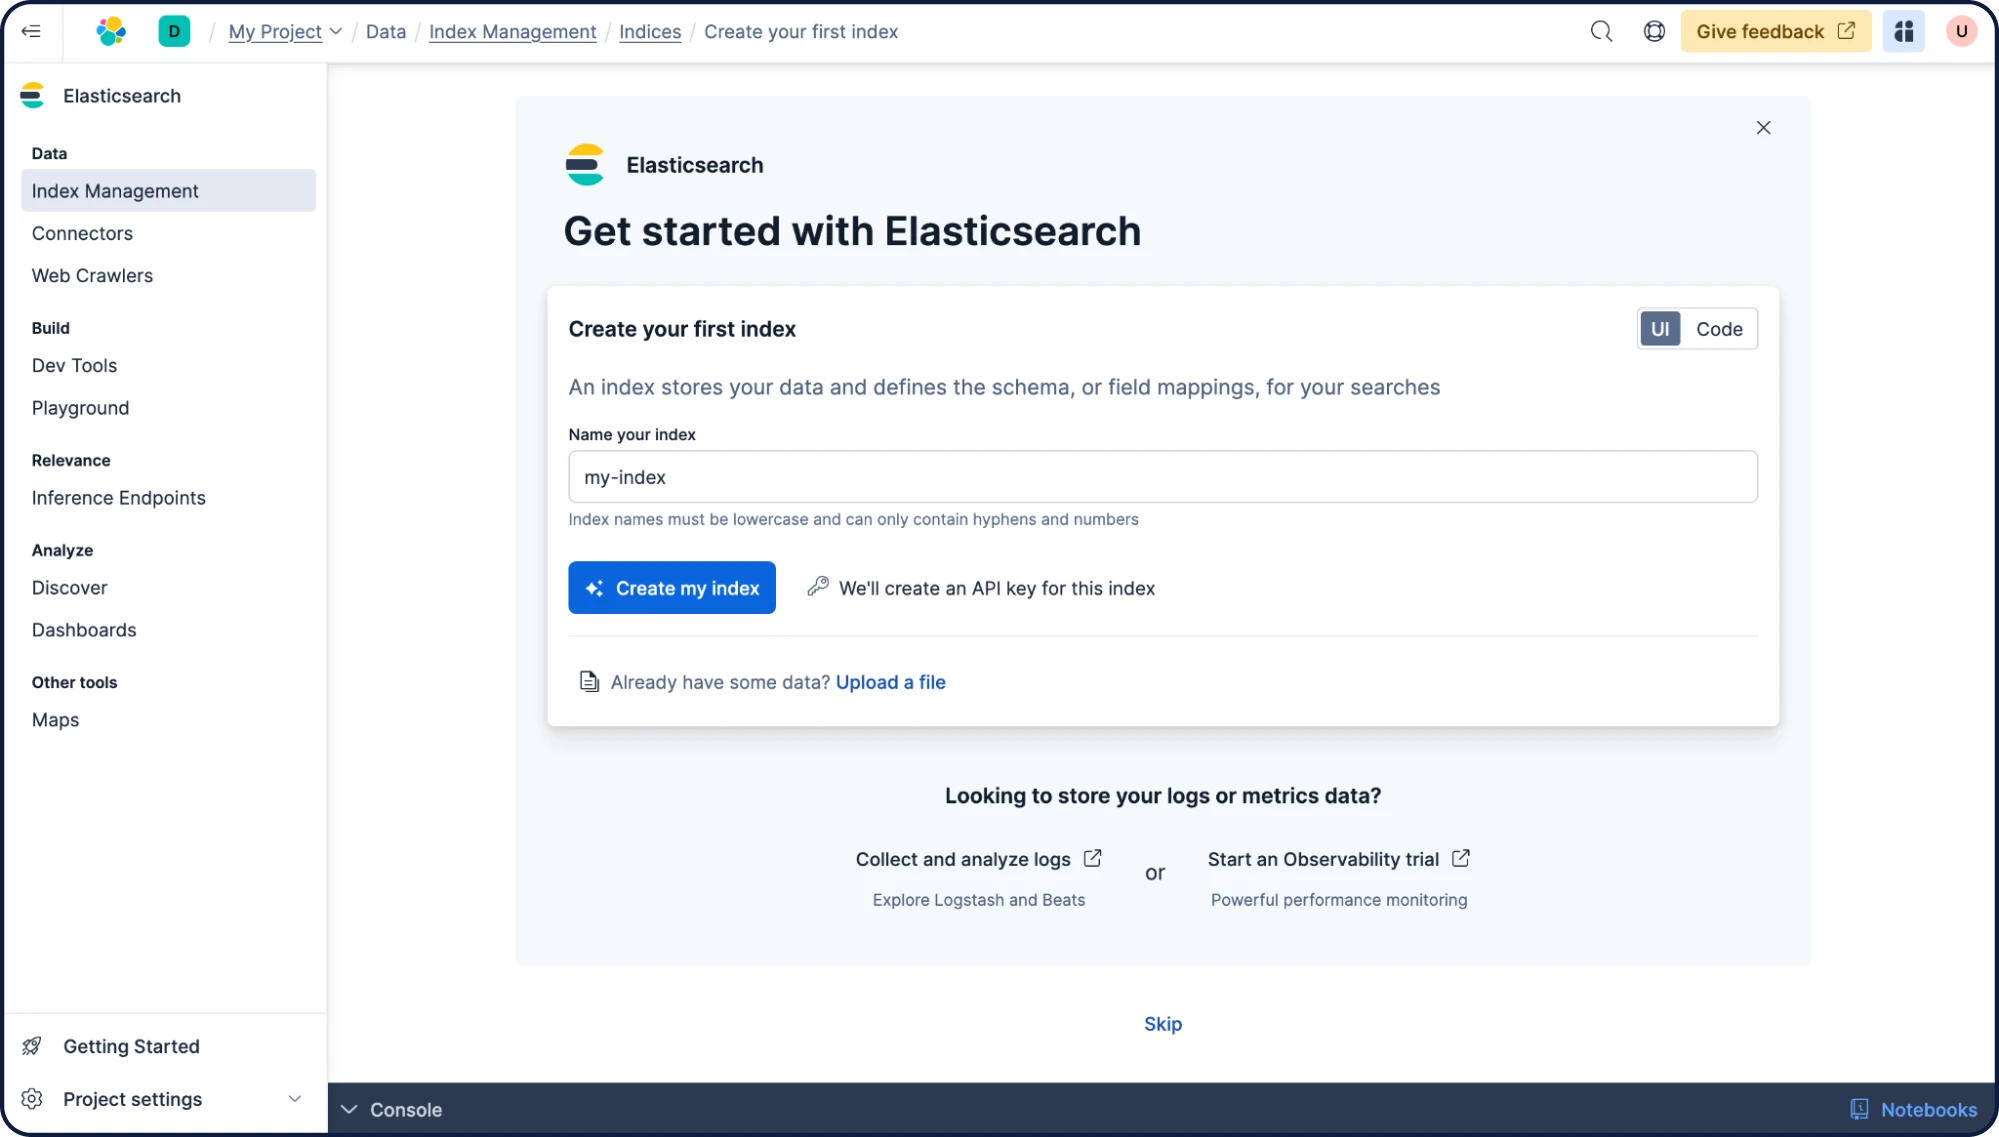
Your Elasticsearch Serverless project will now be created. Next, create your first Elasticsearch index and name it "my-index." Click Create my index.
Next, you can add third-party data sources to Elasticsearch. In this example, we have a MongoDB database with about 150,000 video game titles and the columns "id," "name," "description," and "date." We will sync this database over to Elasticsearch, and as an extra step, we will add semantic search capabilities to it.
Let's create a basic index mapping with the same field names and the extra "description_semantic" that will hold our vectors for semantic search. Open up the Dev Tools and paste the following command to update your index mappings:
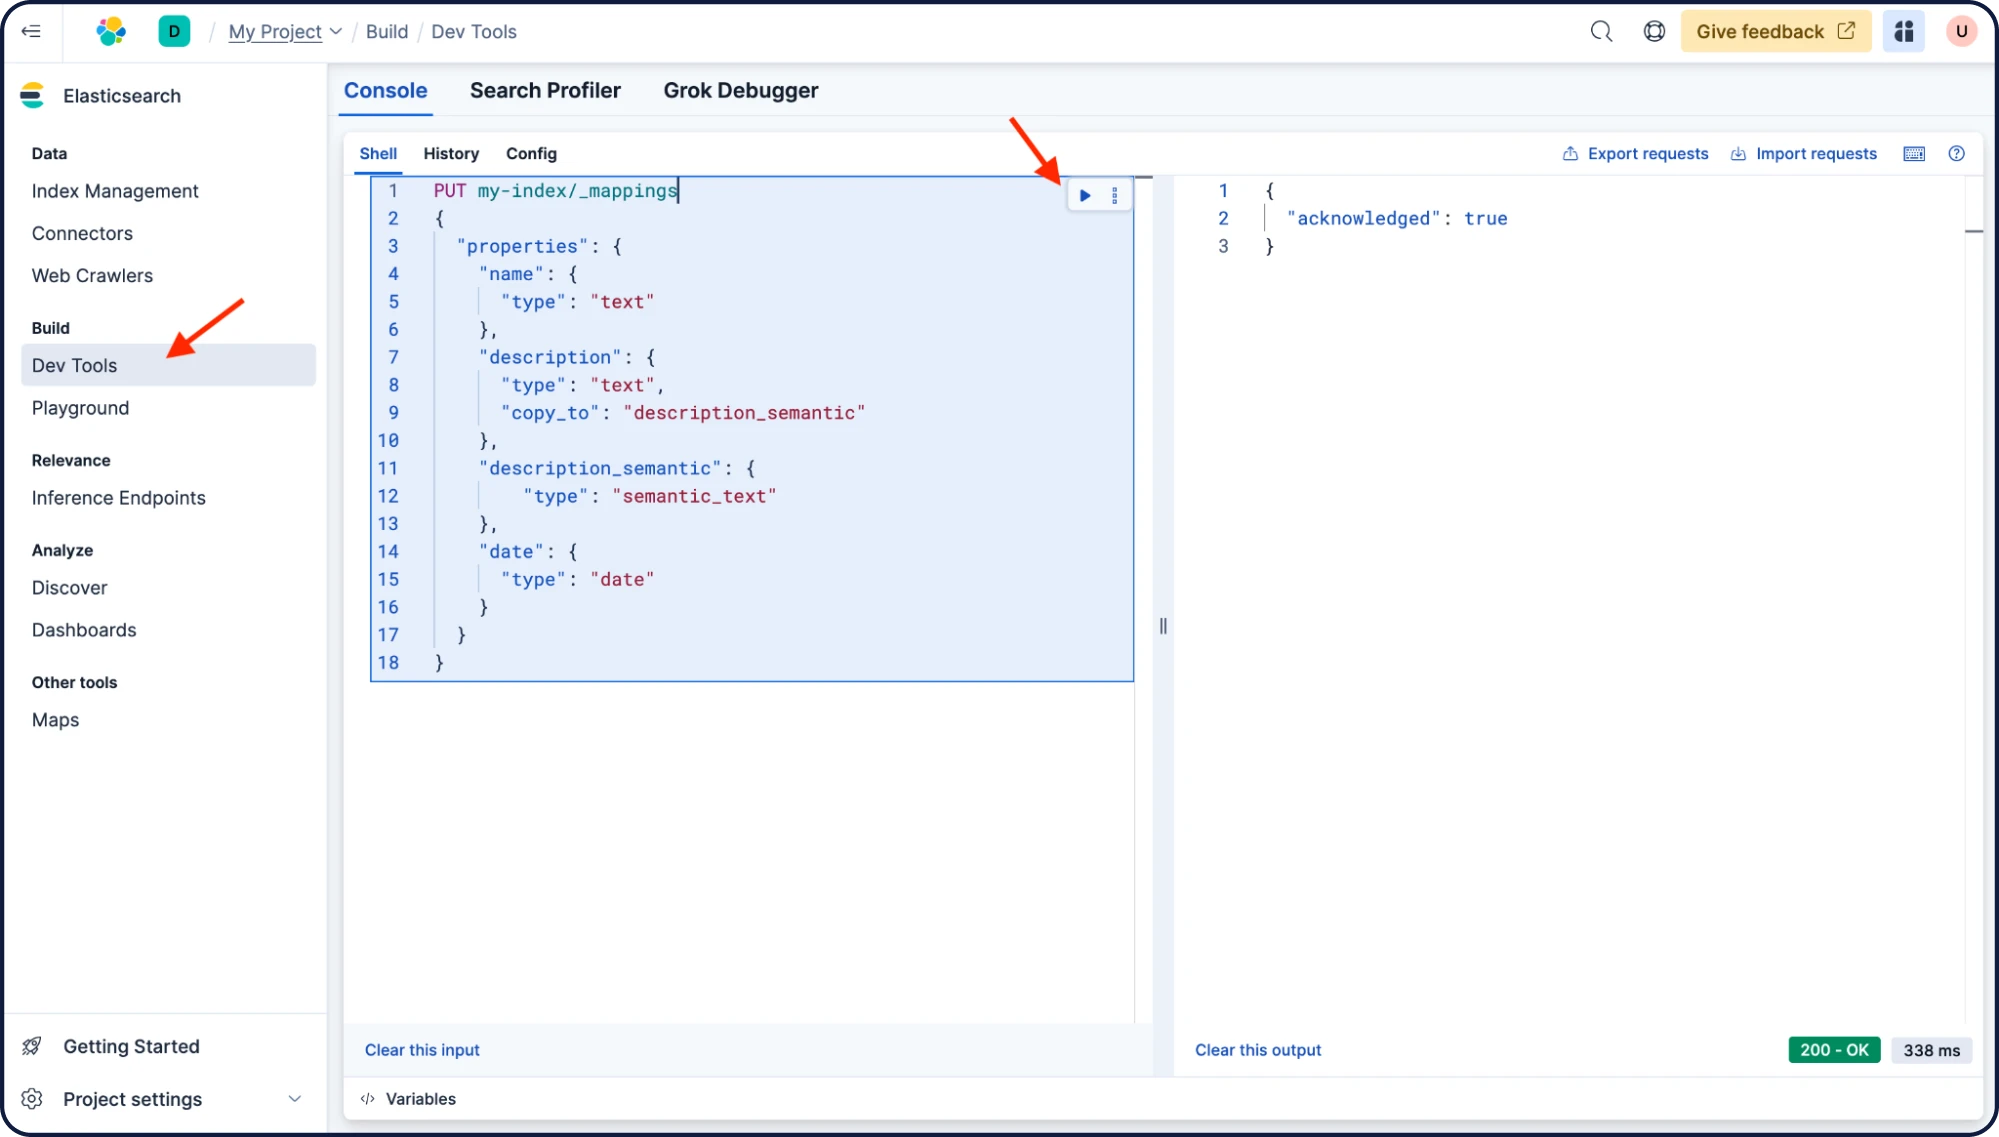
PUT my-index/_mappings
{
 "properties": {
   "name": {
     "type": "text"
   },
   "description": {
     "type": "text",
     "copy_to": "description_semantic"
   },
   "description_semantic": {
       "type": "semantic_text"
   },
   "date": {
     "type": "date"
   }
 }
}
Fetching data from an existing database
You are ready to connect to an existing database. Click on Connectors and + Self-managed connector.
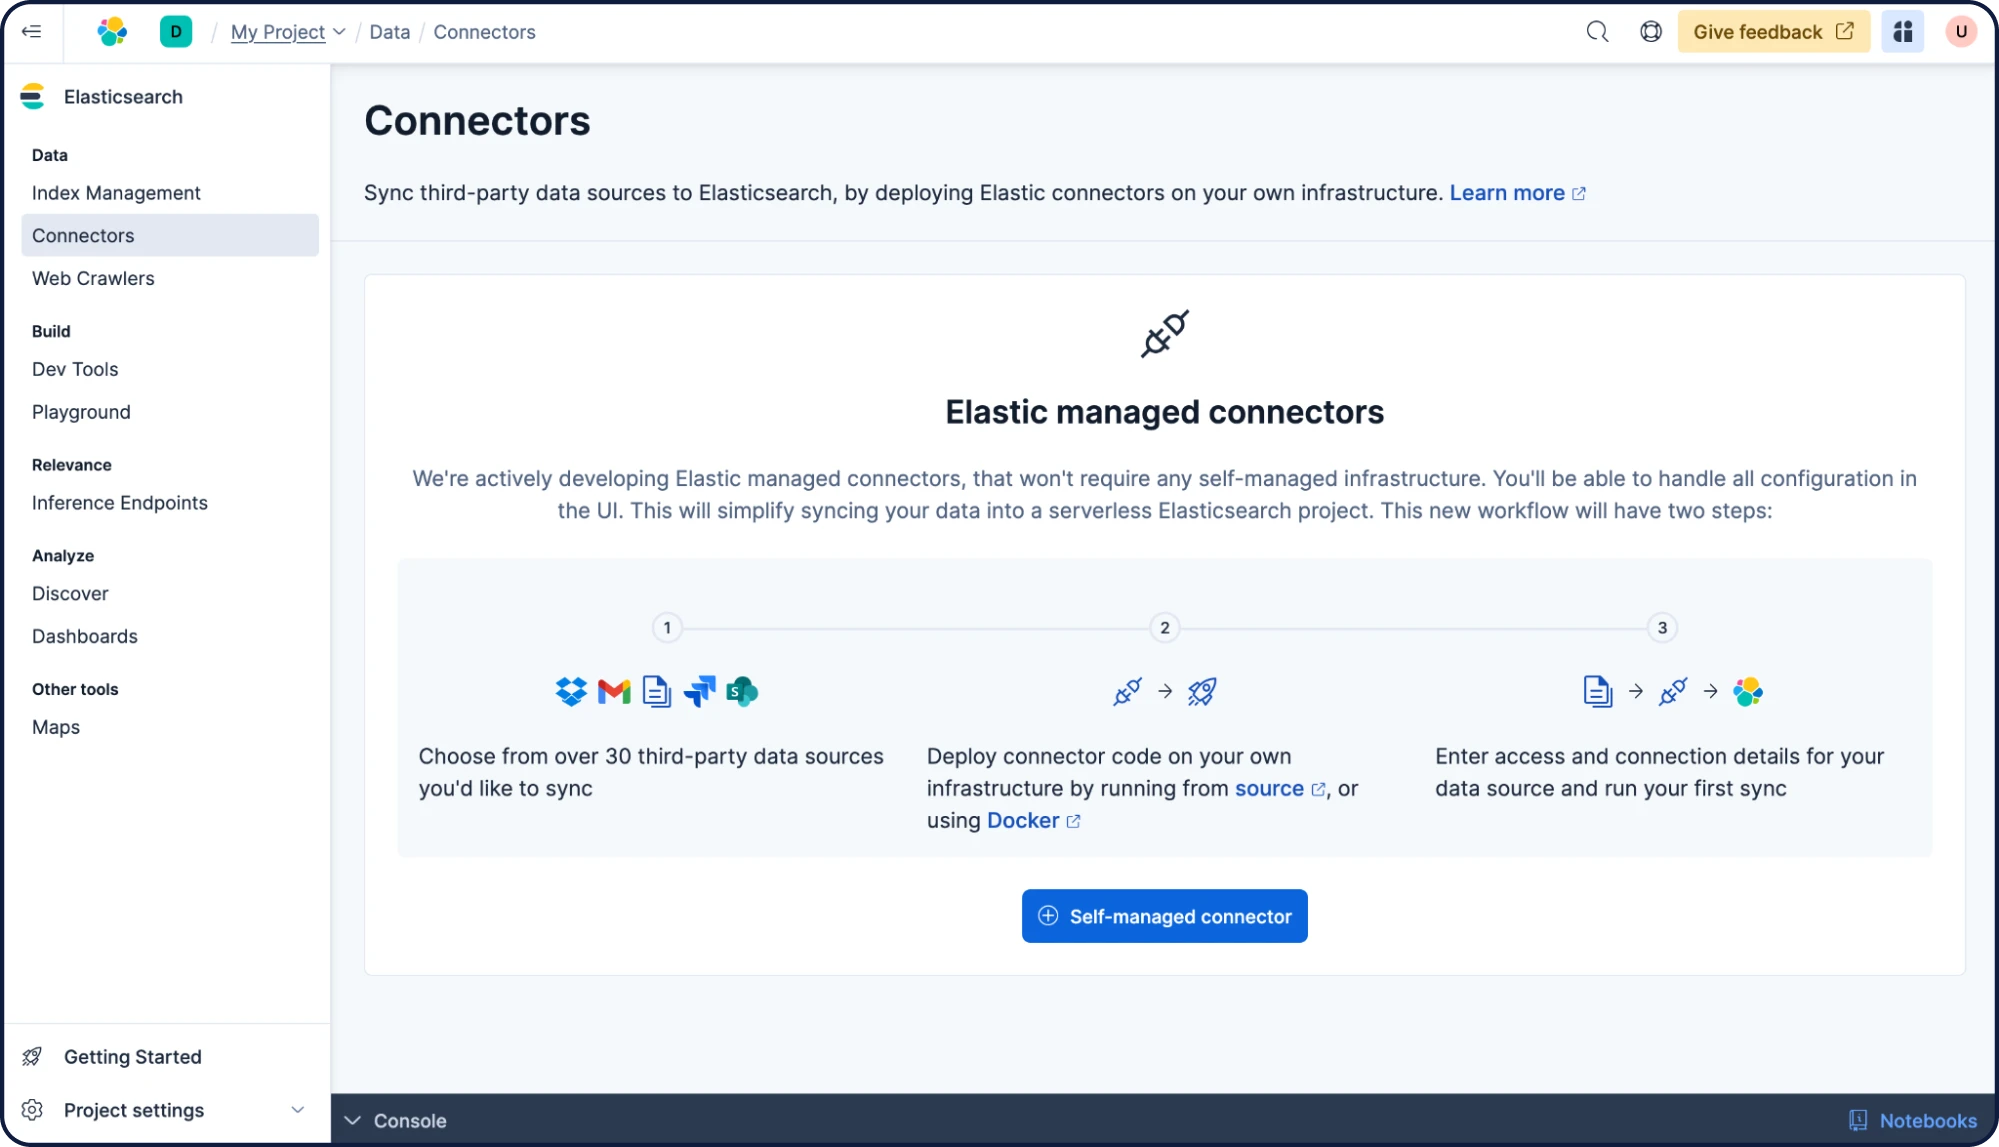
This guide will use a MongoDB database. Select MongoDB from the Connector type list.
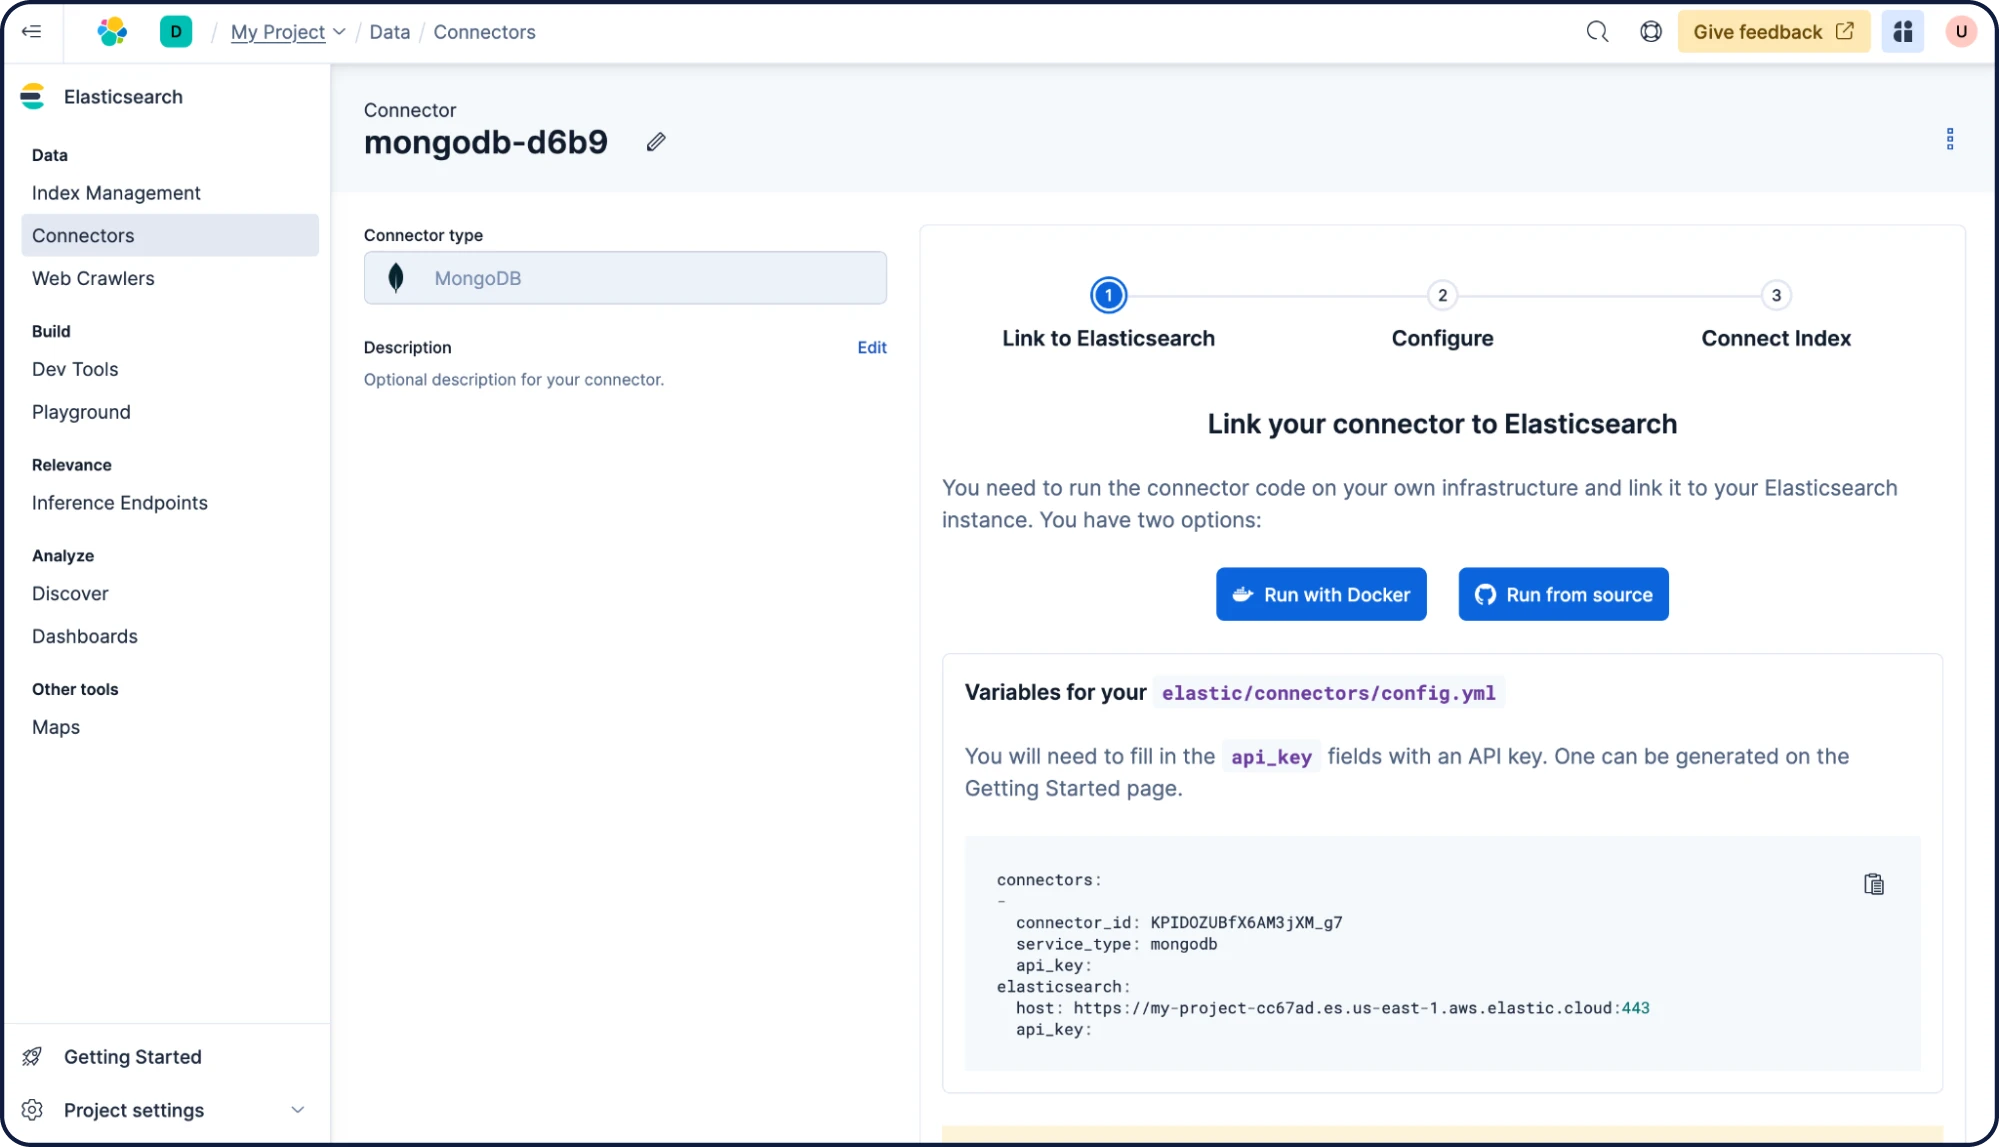
Follow the instructions to deploy a self-hosted connector using Docker. You will need to create a config.yml file. Keep in mind the api_key on both connector and elasticsearch is the same. For example:
connectors:
-
  connector_id: KPIDOZUBfX6AM3jXM_g7
  service_type: mongodb
  api_key: RGZMUU9KVUJmWDZBTTNqWFRQano6R3RRb01jR2kxRkNqWTA5eGtSa3NFZw==
elasticsearch:
  host: https://my-project-cc67ad.es.us-east-1.aws.elastic.cloud:443
  api_key: RGZMUU9KVUJmWDZBTTNqWFRQano6R3RRb01jR2kxRkNqWTA5eGtSa3NFZw==
Then, start the self-hosted connector using:
docker run -v "./connectors-config:/config" --tty --rm docker.elastic.co/enterprise-search/elastic-connectors:8.17.0 /app/bin/elastic-ingest -c /config/config.yml
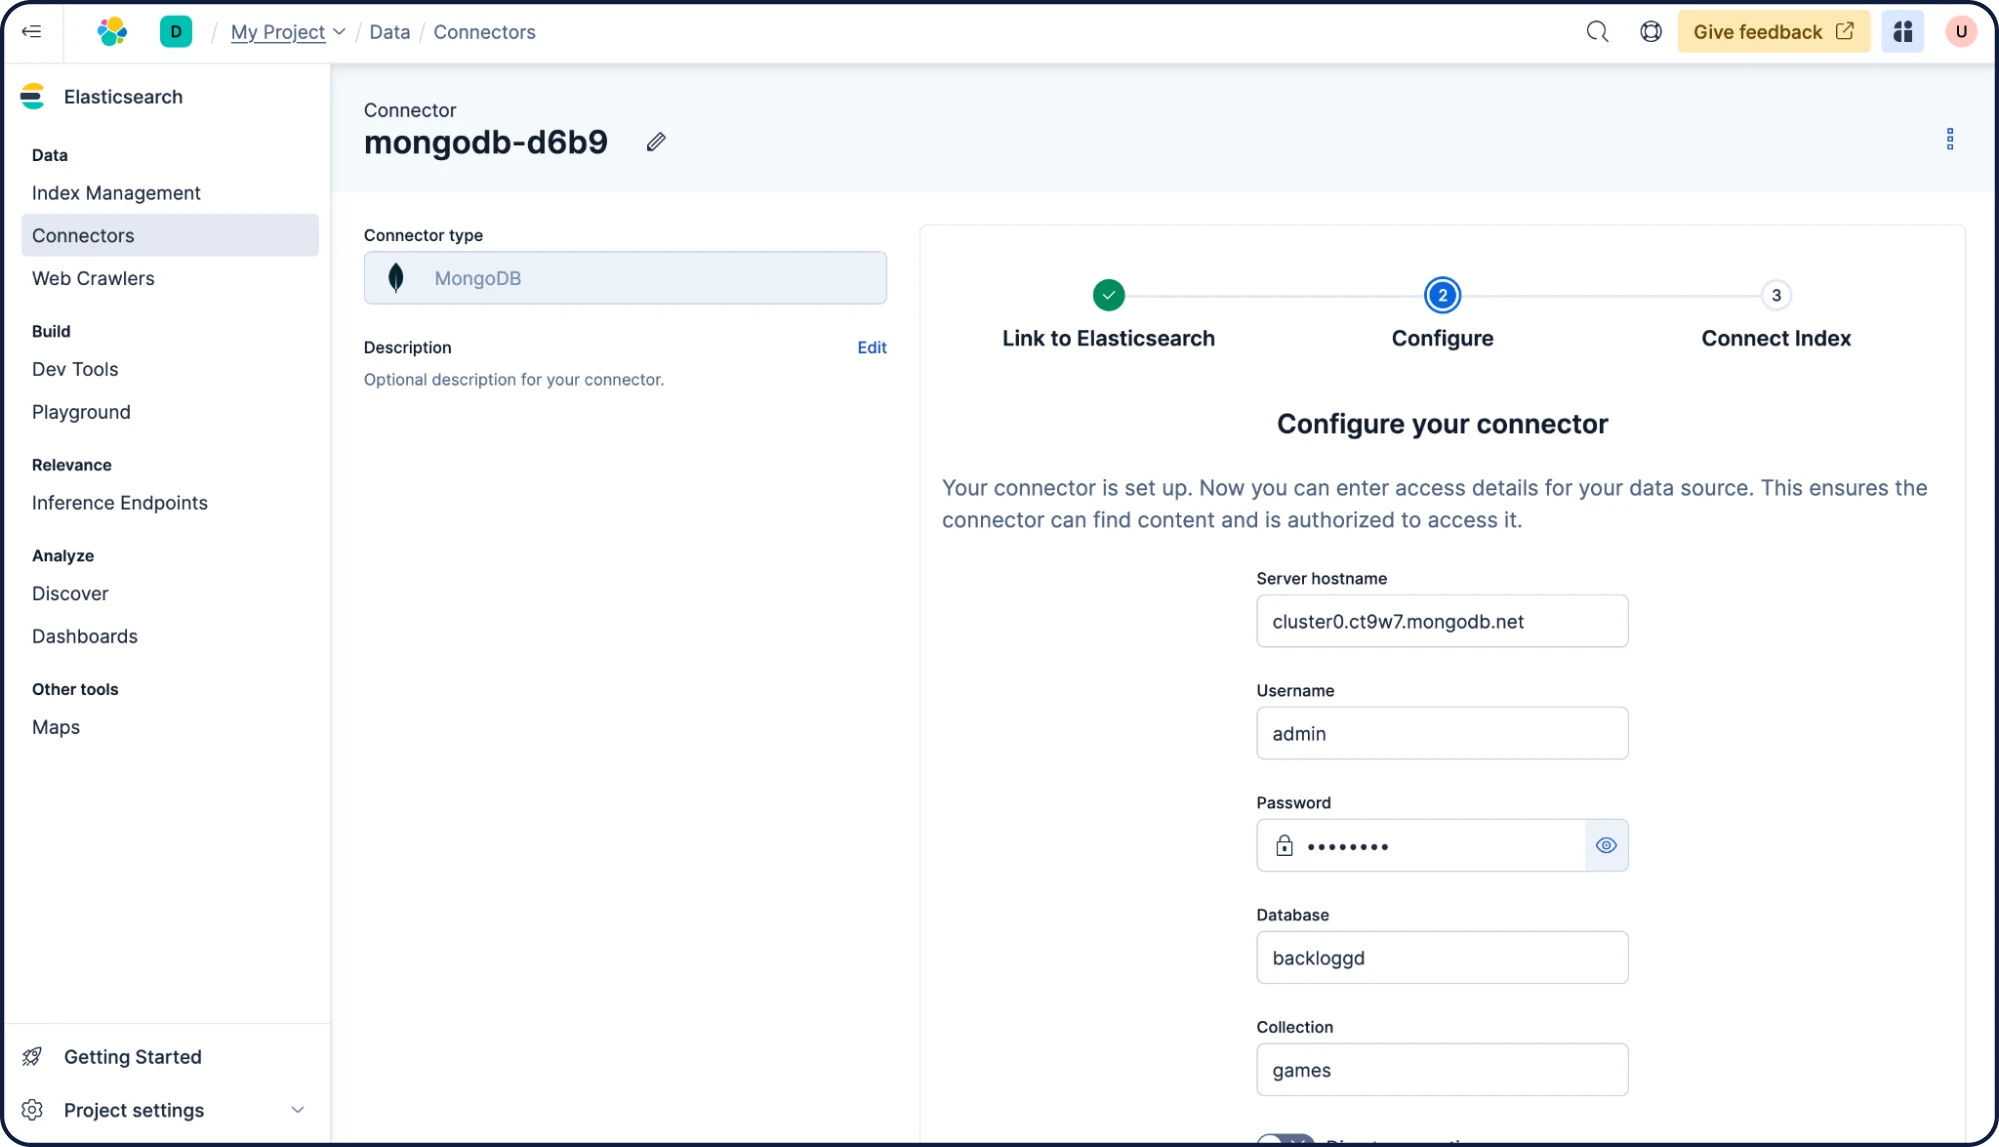
Next, add the configuration to your MongoDB database and click Next.
Select the index to which the data must be synchronized — in this case it’s “my-index,” the index we created before. Click Sync.

That's it! The connector will traverse the database and synchronize documents to "my-index." The main Connectors page will show the current status.

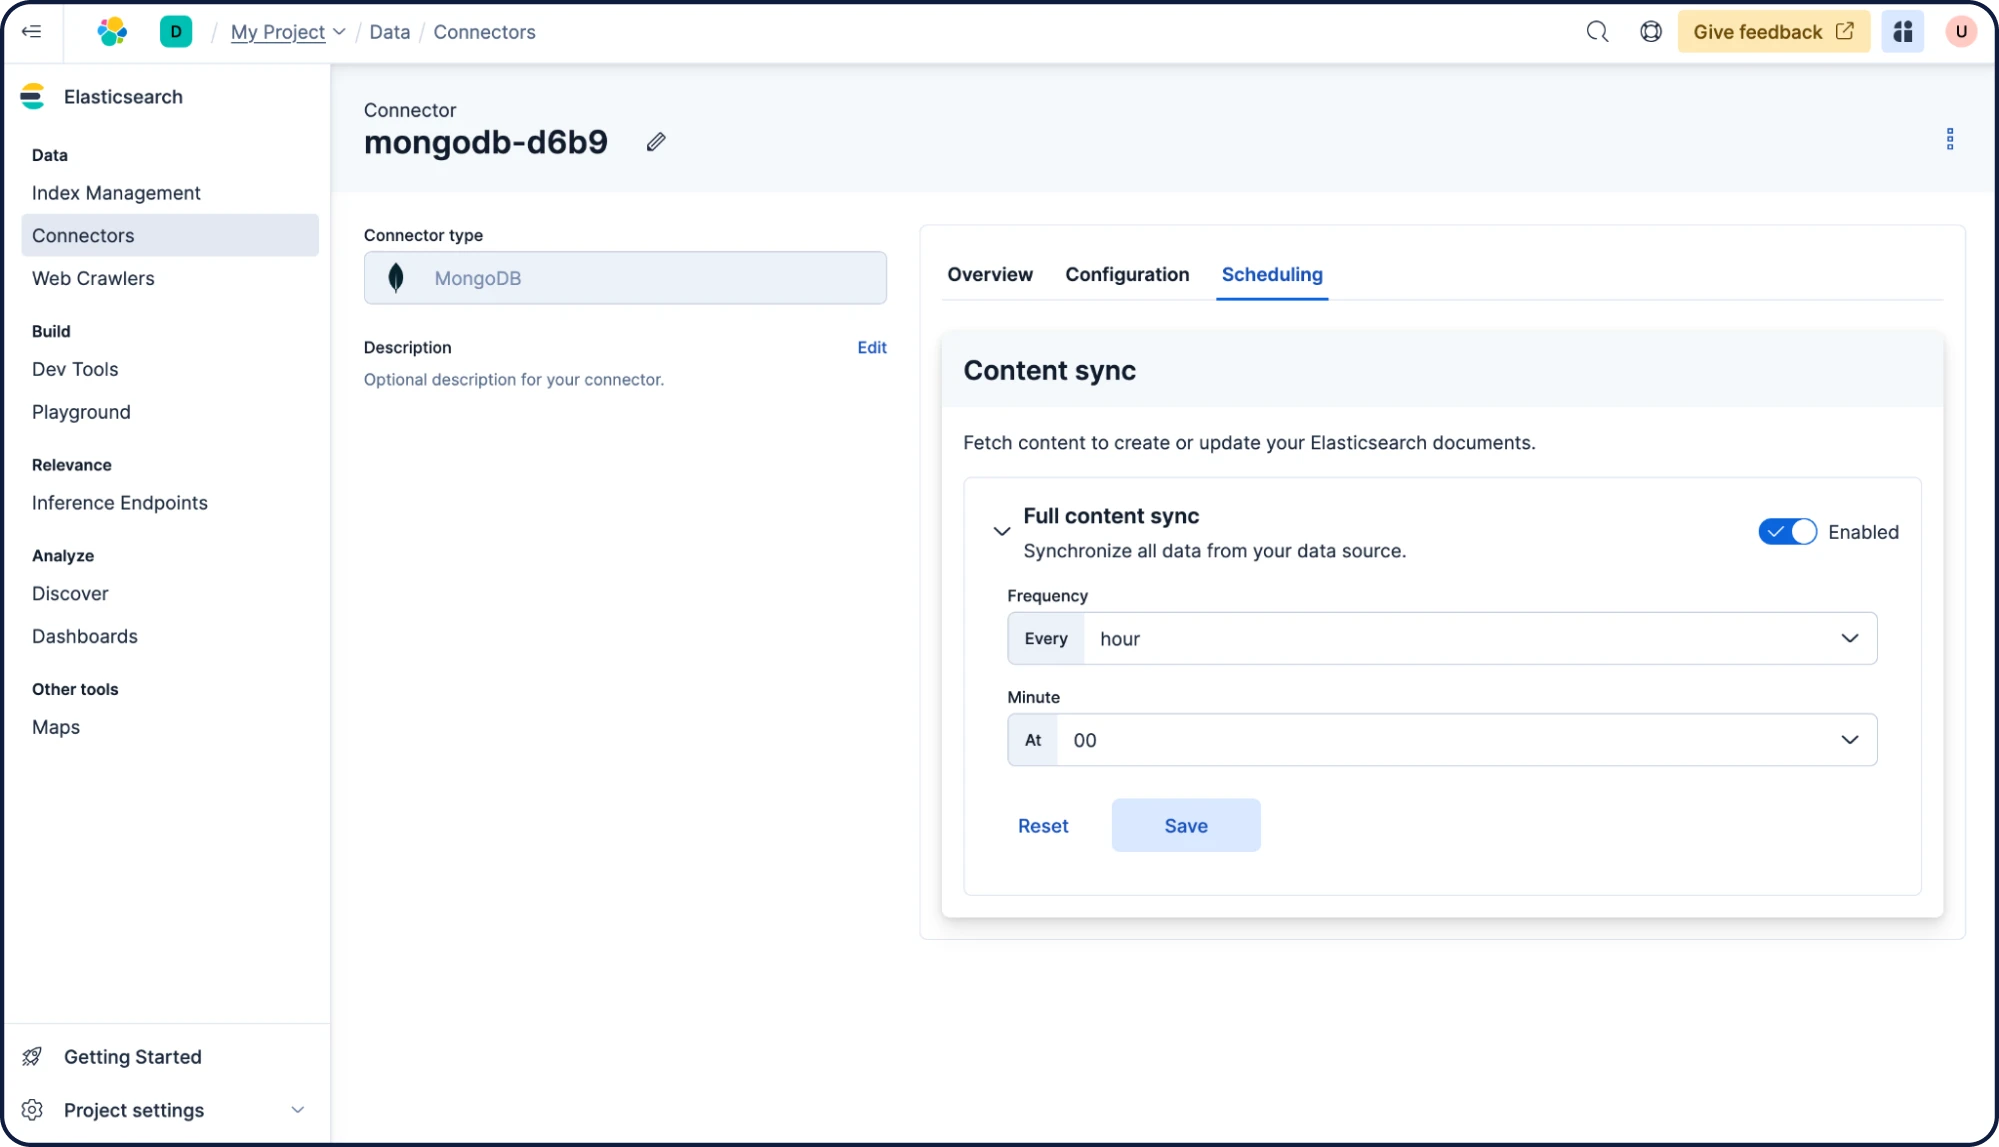
Connectors can also be configured to periodically sync the database to Elasticsearch. To do so, click on the connector, and then click Scheduling, select every hour, and click Save. Now the content will be synchronized at the top of every hour, as long as the self-hosted connector is up and running.
Working with Elasticsearch
Querying data
Now the fun part begins. Head over to Build > Dev Tools (the same section we used to update the index mappings) and issue the following query, which will make a full-text search on the "name" and "description" fields:
GET my-index/_search
{
 "query": {
   "multi_match": {
     "query": "adventure game on a desert island",
     "fields": [
       "name",
       "description"
     ]
   }
 }
}
Since the index has now a semantic_text field, you can query it like so:
GET my-index/_search
{
 "query": {
   "semantic": {
     "field": "description_semantic",
     "query": "game about ghosts in medieval times"
   }
 }
}
You just learned how to synchronize data from an external database to Elasticsearch and add semantic search on top of it!
Next steps
Thanks for taking the time to learn how to build your first search query with Python in with Elastic Cloud. As you begin your journey with Elastic, understand some operational, security, and data components you should manage as a user when you deploy across your environment.
Ready to get started? Spin up a free 14-day trial on Elastic Cloud or try out these 15-minute hands-on learnings on Search AI 101.