Saved Objects
editSaved Objects
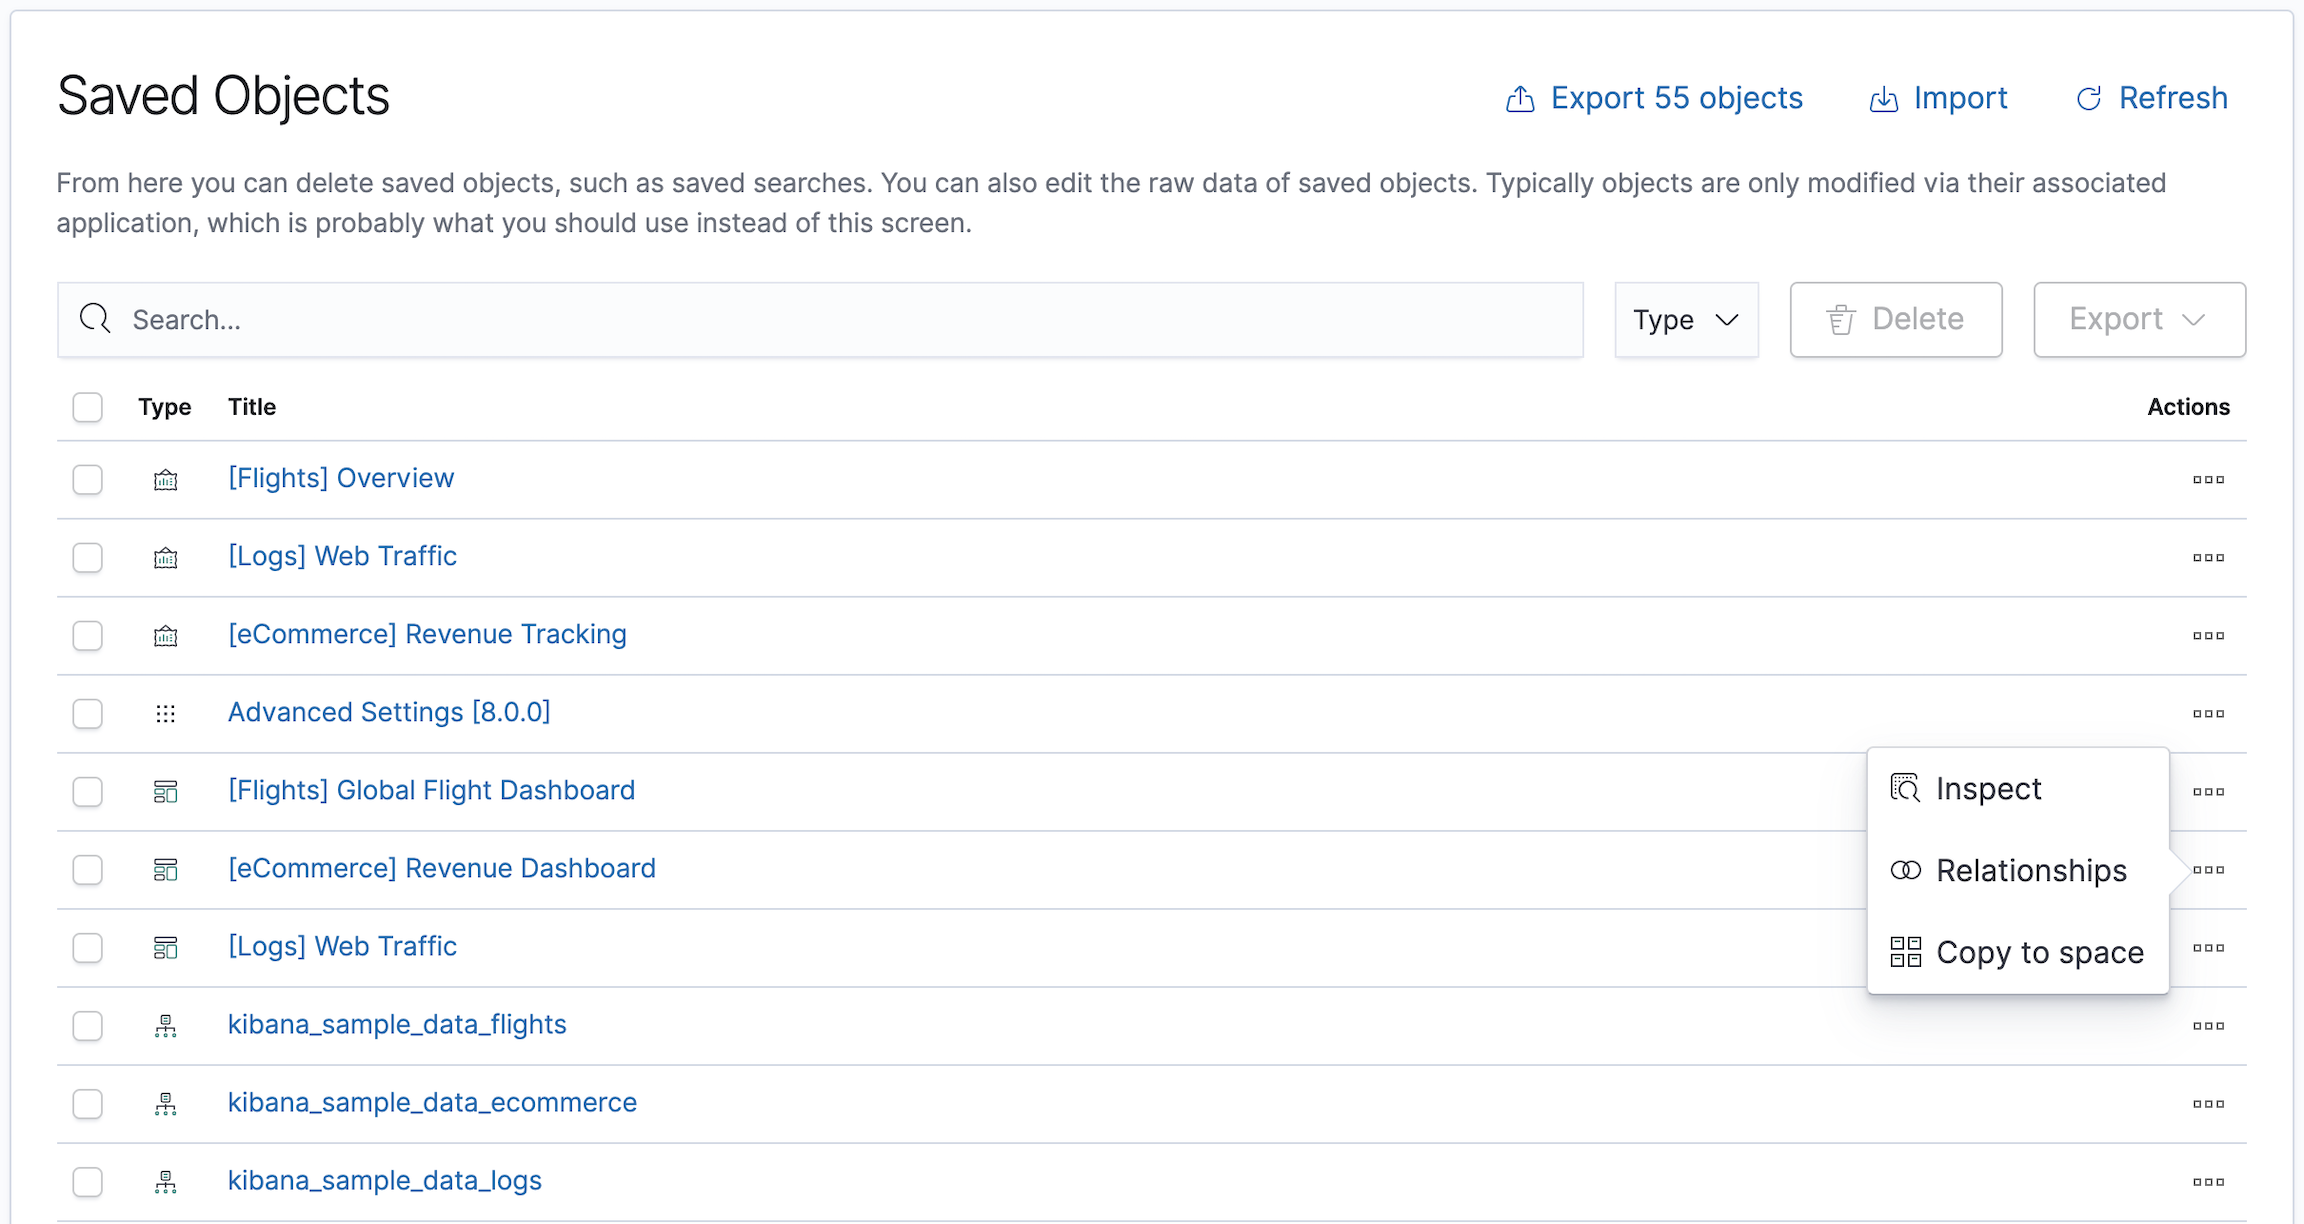
editThe Saved Objects UI helps you keep track of and manage your saved objects. These objects store data for later use, including dashboards, visualizations, maps, index patterns, Canvas workpads, and more.
To get started, open the main menu, then click Stack Management > Saved Objects.
Required permissions
editThe Saved Objects Management Kibana privilege is required to access the Saved Objects UI.
To add the privilege, open the menu, then click Stack Management > Roles.
NOTE: Granting access to Saved Objects Management will authorize users to manage all saved objects in Kibana, including objects that are managed by applications they may not otherwise be authorized to access.
View, edit, and delete
edit- To view and edit an object in its associated application, click the object title.
-
To show objects that use this object, so you know the
impact of deleting it, click the actions icon
 and select Relationships.
- To delete one or more objects, select their checkboxes, and then click Delete.
Import and export
editUsing the import and export commands, you can move objects between different Kibana instances. This action is useful when you have multiple environments for development and production. Import and export also work well when you have a large number of objects to update and want to batch the process.
Compatibility across versions
editWith each release, Kibana introduces changes to the way saved objects are stored. When importing a saved object, Kibana will run the necessary migrations to ensure that the imported saved objects are compatible with the current version.
However, saved objects can only be imported into the same version, a newer minor on the same major, or the next major. Exported saved objects are not backwards compatible and cannot be imported into an older version of Kibana. See the table below for compatibility examples:
Exporting version |
Importing version |
Compatible? |
6.7.0 |
6.8.1 |
Yes |
6.8.1 |
7.3.0 |
Yes |
7.3.0 |
7.11.1 |
Yes |
7.11.1 |
7.6.0 |
No |
6.8.1 |
8.0.0 |
No |
Import
editYou can import multiple objects in a single operation. Click Import and navigate to the NDJSON file that represents the objects to import. By default, saved objects already in Kibana are overwritten.
Export
editYou have two options for exporting saved objects.
- Select the checkboxes of objects that you want to export, and then click Export.
- Click Export x objects, and export objects by type.
This action creates an NDJSON with all your saved objects. By default, the NDJSON includes child objects that are related to the saved objects. Exported dashboards include their associated index patterns.
Copy to other Kibana spaces
editTo copy a saved object to another space, click the actions icon ![]() and select Copy to space. From here, you can select the spaces in which to copy the object.
You can also select whether to automatically overwrite any conflicts in the target spaces, or
resolve them manually.
and select Copy to space. From here, you can select the spaces in which to copy the object.
You can also select whether to automatically overwrite any conflicts in the target spaces, or
resolve them manually.
The copy operation automatically includes child objects that are related to the saved objects. If you don’t want this behavior, use the copy saved objects to space API instead.
Advanced editing
editSome objects offer an advanced Edit page for modifying the object definition.
To open the page, click the actions icon ![]() and select Inspect.
You can change the object title, add a description, and modify
the JSON that defines the object properties.
and select Inspect.
You can change the object title, add a description, and modify
the JSON that defines the object properties.
If you access an object whose index has been deleted, you can:
- Recreate the index so you can continue using the object.
- Delete the object and recreate it using a different index.
-
Change the index name in the object’s
referencearray to point to an existing index pattern. This is useful if the index you were working with has been renamed.
Validation is not performed for object properties. Submitting an invalid change will render the object unusable. A more failsafe approach is to use Discover or Dashboard to create new objects instead of directly editing an existing one.